The purpose of this two part tutorial is to provide enough instruction, and explanation on Filestack’s Javascript API that someone inexperienced with either Filestack or Javascript can leave with a grasp on what we do, and how we do it. The first part will focus on basic HTML and Javascript, and implementing file uploads, and the second will focus on transforming, storing, and downloading files. We are going to tie all these aspects together to build a watermarking application in HTML. To implement the app, we will upload a watermark and upload an image to be watermarked, save their file handles to perform the watermark transformation with the Filestack API, and download the resulting watermarked image. I would like this guide to be evolving, so if you have any comments or questions on my writing, coding, or technical explanations I would like to hear them and will do my best to respond.
You Will Need
Filestack API Key
To participate in the tutorial you will need a Filestack API key. Download a free one, here.
Intro to HTML, and Javascript
The ability to write and execute an HTML and Javascript file. To write the file, I used sublime text (you can download it, here) but feel free to use any text editor you prefer. To execute the file, open it with a web browser that has developer tools. I used Google Chrome, but Mozilla Firefox should work also.
HTML, or Hyper Text Markup Language, defines the structure of the pages that compose much of the internet. Elements of HTML are tags and they create content such as paragraphs, headings or tables. Javascript is the programming language HTML uses to implement functionality in the web pages, by running a ‘script’. Here is the bare bones structure of an html page.
<!-- This is a comment in a HTML file -->
<!Doctype html> <!-- Defines document type as HTML -->
<html> <!-- Start of html tag -->
    <head> <!-- Head section contains metadata about the file -->
    </head> <!-- End of Head section tag -->
    <body> <!-- Start of Body section Head -->
        <script> <!-- Start of Javascript script tag -->
             //Comments in script area start with two slashes
        </script> <!-- End of Javascript script tag -->
    </body> <!-- End of Body tag -->
</html> <!-- End of HTML tag -->
(Basic structure of HTML file with script area for Javascript. Comments in the HTML area start with ‘<!– -’ and end with ‘- –>’ and comments in the script area start with ‘//’.)
The HTML file has two main areas, the head and the body. The head contains meta elements such as a title or description which is information about the file. The body contains the actual content of the pages such as text, or buttons, as well as the script area where most of the Javascript goes. When we work with HTML elements such as buttons, they will go in the top of the body area, and when we work with Javascript variables and functions they will go in the script area.
To Create and Run an HTML File
To get started we are going to create an HTML file, with all of the tags in the basic structure from the example above. Open Sublime Text from your applications folder, and open a new file. Type in the content such as the HTML tags, and head, body, and script tags (the comments are not necessary but can be informative). Next, save the file with a name and extension of ‘.html’; mine was called ‘practiceMark.html’. Now, you can open the file with an internet browser by double clicking on it in whichever file viewing system your computer has. A blank window should appear in the browser tab, and the address bar where the URL is displayed will display the path of the file you just opened. Now you have created and executed an HTML file!
Upload a File
Filestack is well known as the #1 file uploading service for developers, so we will begin by implementing file uploading capabilities.
Include the Filestack API
The first step is including the Filestack API. To do this, put script tags in the head area. The first script tag will include the type and source of the Filestack API. What this does, is attach the Filestack functionality to your application so that you can use our services.
<head>
    <!-- This script tag includes the Filestack API into your HTML file -->
    <script type="text/javascript" src="https://static.filestackapi.com/v3/filestack.js"></script>
</head>
(Including the Filestack Javascript API source code into an HTML file.)
Open the File Picker
Now that you have included the source code, we can instantiate the Filestack dialog, and open the file picker. To instantiate the dialog include the line “var client = filestack.init(‘YOUR_API_KEY’);” into the beginning of the script area. This is essentially opening a connection between your application and Filestack to by identifying yourself with an API key, so that you can use our API methods (the API methods are how we will perform uploads, transformations, and more).
After initializing this connection, we can open the picker with: “client.pick({});”. Now, the Filestack file picker should automatically open when you load the page.
<body>
    <script>
        //Instantiating dialog with Filestack
        var client = filestack.init("YOUR_API_KEY_HERE");
        //Filestack API method 'pick()' that opens the file picker
        client.pick({});
    </script>
</body>
(Initializing the Filestack dialog, and opening the file picker.)
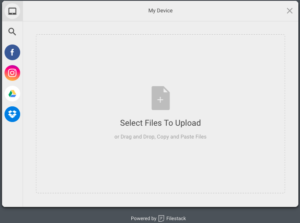
(The Filestack V3 File picker.)
Upload Your First File
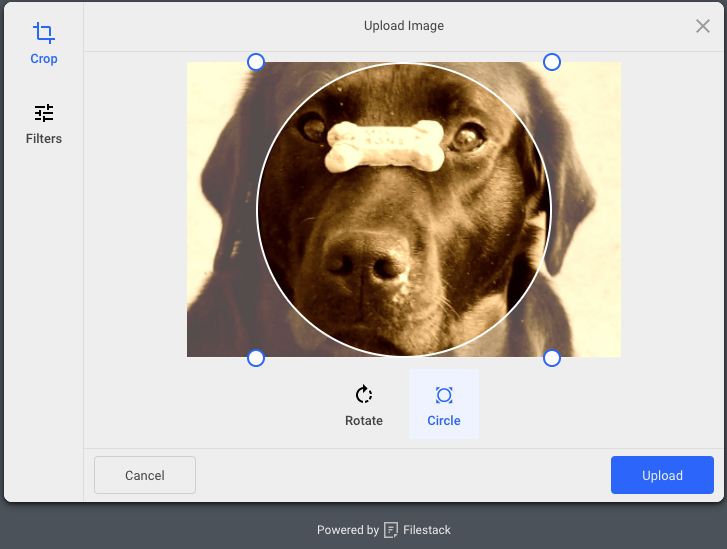
It’s now time to upload your first file! You can either drag and drop a file to upload it, or click in the center of the frame to upload from your local device. You can also easily upload from cloud sources such as Facebook or google drive by clicking the icons on the left. Since we did not specify any of the file picker options when we called the file picker, we will be able to upload multiple files and also perform cropping and basic editing on image files before they are sent to, and stored with Filestack. I am going to upload a picture of a dog, crop it into a circle, and use a filter on it. Once you have selected your file, make any changes you would like if it is an image file, and click the blue button to perform your first upload!
(Photo of dog image with sepia filter and circle crop in Filestack file picker.)
Congratulations! You have just uploaded your first file using the Filestack Javascript API. Now, since it is not very useful to have the picker open automatically every time, we are going to trigger its initialization with a button.
Open the Picker With a Button
First, prevent the picker from automatically opening by commenting out the line that opens it. To comment a line out in the Javascript area put two slashes (“//”) before the line, which essentially forces that line to be skipped.
//Commenting out the picker

//client.pick({}); Picker is now commented out
(Comment out the line automatically calling the picker with two slashes: “//”.)
Next, we are going to include a button in the top of the HTML body. Often, people will include a button simply by using the tags: “<button></button>”. We are not going to do this, because it automatically elicits a button of type ‘submit’. Instead we are going to use the tag: <input type=”BUTTON”>. This button is not of type submit (it is simply just of type ‘button’), and will only perform events once they have been assigned to the button. The full line to include the button into the HTML file is: <input type=”BUTTON” value=”Pick Watermark” id=”pickWatermark” onclick=””>. The ‘type’ field defines what type the button is (the types I discussed above and more), the ‘value’ field defines what text is written on the button, the ‘id’ field is a unique identifier for the button, and the ‘onclick’ field defines what events happen when the button is clicked. Once you include the line, there will be a white button with the text ‘Pick Watermark’ in the upper left corner of the page.
<body>
    <!-- This line includes a button -->
    <input type="BUTTON" value="Pick Watermark" id="pickWatermark" onclick="">
    <script>
        var client = filestack.init("YOUR_API_KEY_HERE");
    </script>
</body>
To make the button interactive, I am going to make a Javascript function called ‘pickMark()’ and use the button to call the function when it is clicked. The function goes in the script area in the body of the HTML file, and looks like this: ‘function pickMark() {}’. To make the button call the function, we set the ‘onclick’ field equal to the name of the function.
<body>
    <!-- Button calls function 'pickMark()' onclick now -->
    <input type="BUTTON" value="Pick Watermark" id="pickWatermark" onclick="pickMark()">
    <script>
        var client = filestack.init("YOUR_API_KEY_HERE");
        //The function pickMark()
        function pickMark() {}
    </script>
</body>
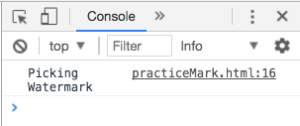
The function has no content, and so when it is executed it will not do anything. To test if the function is being called we can use the console, one of the Google Chrome developer tools. Insert the line: ‘console.log(“Picking Watermark”);’, into the function. To see the console in Google Chrome, click ‘view -> Developer -> Developer Tools’ and then switch from elements to console. Now, when you run this code, open the console, and press the button, you will see “Picking Watermark” appear in the console when you click the button and know the function has been called.
//pickMark() will now print "Picking Watermark" when it is called
function pickMark() {
    console.log(Picking Watermark);
}
(Making ‘pickMark()’ print “Picking Watermark” to the console.)
(“Picking Watermark” printed in the console.)
Now you can re-include the “client.pick({});” line, except this time it will be inside of the ‘pickMark’ function. This way, instead of the picker automatically opening when we load the page, now the picker will open when we click the button which calls the ‘pickMark()’ function.
//The function pickMark now will open the file picker
function pickMark() {
    console.log("Picking Watermark");
    //Opening the file picker here
    client.pick({});
}
(Calling the file picker in the ‘pickMark()’ function.)
Adjust Options in the Picker
The next step is adjusting the picker options, such as limiting the number of files or types that can be uploaded. Read about all the picker options that can be set, here. Since this is intended to be a watermarking app, I am going to accept the mimetype: ‘image/*’, which means the picker will only accept files with an extension that is of the image type. Also, since this will be the picker for the watermark image specifically, I am going to limit this picker to uploading only 1 file. To limit the accepted filetypes, insert into the bracket where the picker is opened the line “accept: ‘image/*,’, and immediately following it, the line ‘maxFiles: 1,’ to limit the number of files that can be uploaded.
function pickMark() {
    console.log("Picking Watermark");
    //Limiting file types and number for uploading in the picker
    client.pick({
        //Only accepting files with a mimetype 'image/*'
        accept: 'image/*',
        //Only accepting at most 1 file
        maxFiles:1,
    });
}
(Pick method with adjusted accepted file types, and maximum files accepted.)
Security Note: Settings options in the picker is not sufficient for security if you want to ensure people will not be able to upload a specific size or type of file. Filestack offers other methods to ensure your security and proctection, you can read about here.
Part 1 Conclusion
This is the end of part 1, and I hope you have found the tutorial interesting and educational. In the second half of the tutorial, I am going to cover file transformations, and storing and downloading files. Again, if you have any questions or comments I would love to hear them, and if you would like to see my final code for this basic watermarking application, then check it out on codepen, here (remember to insert your API key). Thanks for checking out the first half of my tutorial, and here is the second. If you’re also curious about how to do a basic html file uploading; you can check out this html file upload tutorial.
Filestack is a dynamic team dedicated to revolutionizing file uploads and management for web and mobile applications. Our user-friendly API seamlessly integrates with major cloud services, offering developers a reliable and efficient file handling experience.
Read More →


