Are you tired of manually typing text from images? Optical Character Recognition (OCR) is here to help! It converts images with text into editable text files. This blog will walk you through the Filestack OCR feature. This fantastic feature makes text-to-image conversion fast and simple.
We’ll start by explaining OCR and why it’s essential. Then, we’ll look at which industries use this technology the most. Next, we’ll show you how to add OCR to your apps. It’s easy, and Filestack OCR makes it even easier.
We’ll also guide you through building a sample app with Filestack OCR. By the end, you’ll have a fully functional app that converts images to text quickly. Let’s get started!
What is OCR?
Optical Character Recognition helps us read text from images or scanned documents. This means you can turn a picture of a page into actual text that you can edit or search for. It helps us quickly convert old paper documents into digital files. It’s also helpful in making documents accessible to people with vision impairments, as computers can read the text aloud.
We use Optical Character Recognition in many industries. For example, banking and healthcare. It helps us save time and make work easier.
Which industries have a higher demand for OCR technology?
Optical Character Recognition is in high demand in banking, insurance, healthcare, publishing, and legal industries.
👉Banks use optical character recognition to process checks faster.
👉Insurance companies use it for claims and policies.
👉In healthcare, optical character recognition digitizes patient records and prescriptions.
👉Publishing and legal industries use optical character recognition to convert printed materials into digital files.
✔️Any industry with many paper documents can benefit from OCR to work more accurately.
How do you integrate OCR technology into your applications?
We have made it easier for you to integrate the OCR into your applications. Let’s begin our journey.
Filestack OCR
Optical Character Recognition by Filestack can extract printed and handwritten text from images. The result is presented in a JSON format. It includes details such as the location of detected text areas, lines, and words.
To use OCR with Filestack, you can employ the `ocr` task in the Processing API. This task requires you to use a security policy and signature for authentication. The response from the OCR task includes information about text areas, lines, and words, along with their bounding boxes.
Here is an example of the response structure:
The response includes the extracted text, the percentage of the image covered by text, and detailed information about the text areas, lines, and words.
{

    "document": {

        "text_areas": [

            {

                "bounding_box": [ /* Coordinates of the text area */ ],

                "lines": [

                    {

                        "bounding_box": [ /* Coordinates of the text line */ ],

                        "text": "Text of the line",

                        "words": [

                            {

                                "bounding_box": [ /* Coordinates of the word */ ],

                                "text": "Word"

                            }

                        ]

                    }

                ],

                "text": "Text of the area"

            }

        ]

    },

    "text": "Extracted text",

    "text_area_percentage": 23.40692449819434

}
To use OCR in the Processing API, you can construct a URL like this:
👉Get the OCR response on your image
https://cdn.filestackcontent.com/security=p:<POLICY>,s:<SIGNATURE>/ocr/<HANDLE>
👉Use OCR in a chain with other tasks, such as doc_detection
https://cdn.filestackcontent.com/security=p:<POLICY>,s:<SIGNATURE>/doc_detection=coords:false,preprocess:true/ocr/<HANDLE>
👉Use OCR with an external URL
https://cdn.filestackcontent.com/<FILESTACK_API_KEY>/security=p:<POLICY>,s:<SIGNATURE>/ocr/<EXTERNAL_URL>
👉Use OCR with Storage Aliases
https://cdn.filestackcontent.com/<FILESTACK_API_KEY>/security=p:<POLICY>,s:<SIGNATURE>/ocr/src://<STORAGE_ALIAS>/<PATH_TO_FILE>
You can also use OCR with other tasks or external URLs, with appropriate modifications to the URL structure.
- Let’s check how to use Filestack OCR.
- First, you should create an account at Filestack.
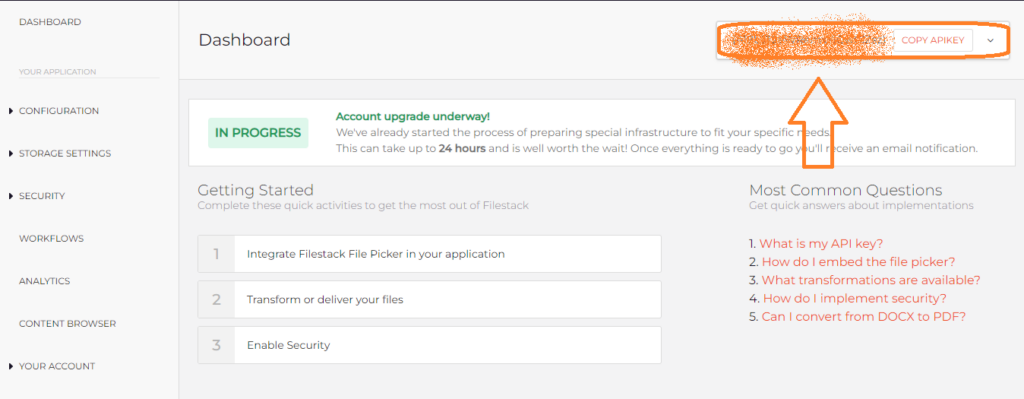
- Next, open your Filestack account and navigate to the dashboard.
Here, you will get the API key as under:
Once you get the API key, the only thing you need to do is to write code. Let’s begin.
Testing our Filestack API requests using the Postman
Open the Postman app and select the “GET” method to fetch the JSON response.
Next, copy the below URL and add it to the blank space under:
https://cdn.filestackcontent.com/<FILESTACK_API_KEY>/security=p:<POLICY>,s:<SIGNATURE>/ocr/<EXTERNAL_URL>

You should add the policy and signature in place of the given placeholders. When you click on the Send button, it will fetch the response as under:
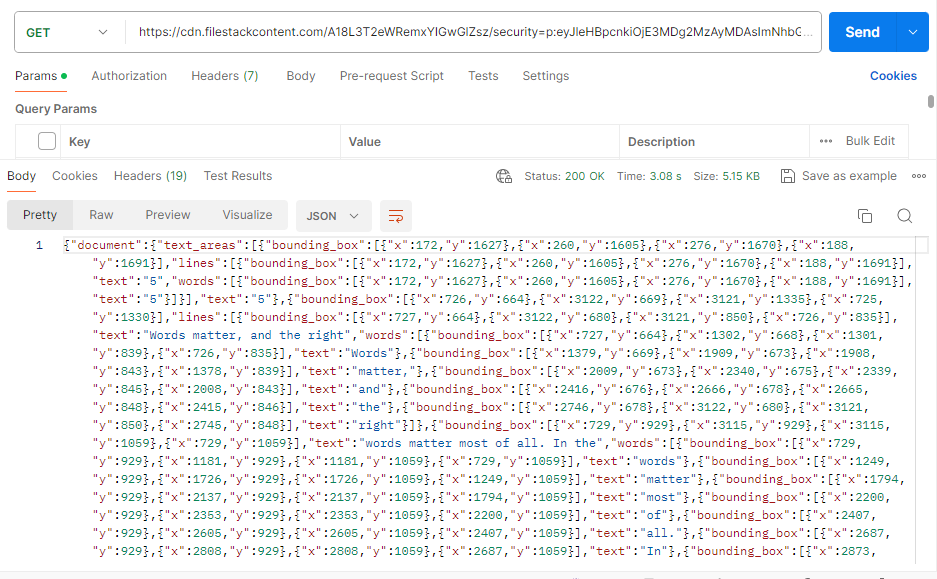
This shows that our API key is working fine. We can move to creating our optical character recognition application now.
Building a sample application with Filestack optical character recognition
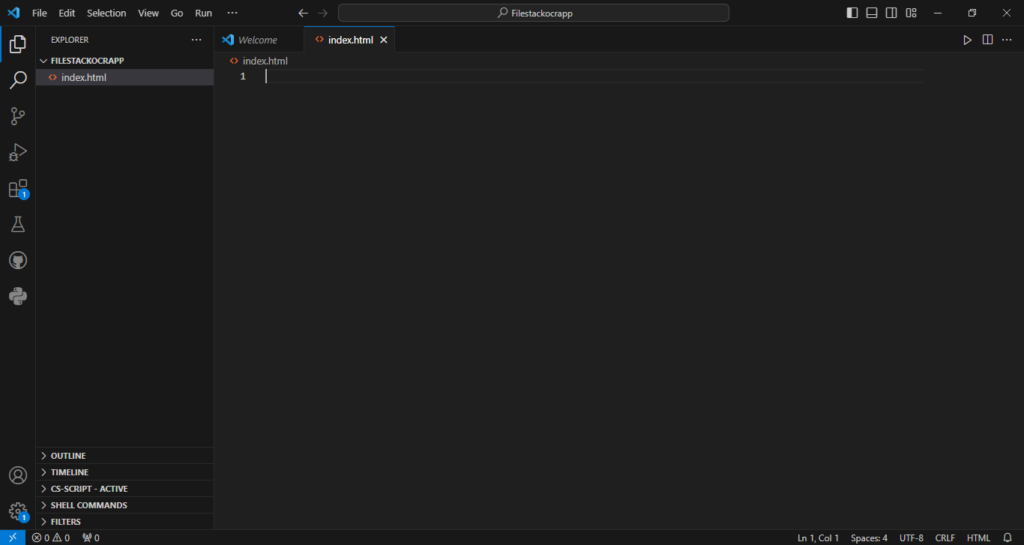
Create a file “index.html” in the Visual Studio Code. Your Visual Studio Code should look like below:
Let’s start writing our code.
HTML Structure
<!DOCTYPE html>

<html lang="en">

<head>

    <meta charset="UTF-8">

    <meta name="viewport" content="width=device-width, initial-scale=1.0">

    <title>Your Web Page</title>

    <!-- Include the Filestack library -->

    <script src="https://static.filestackapi.com/filestack-js/3.x.x/filestack.min.js"></script>

    <!-- CSS styles -->

    <style>

        body {

            display: flex;

            align-items: center;

            justify-content: center;

            height: 100vh;

            margin: 0;

            background-color: #f1f1f1;

            font-family: 'Times New Roman', Times, serif;

            background-image: url('https://img.freepik.com/free-photo/abstract-blue-geometric-shapes-background_24972-1841.jpg');

            background-size: cover;

        }


        button {

            padding: 50px;

            font-size: 50px;

            font-family: 'Times New Roman', Times, serif;

            cursor: pointer;

            margin: 10px;

            border: none;

            border-radius: 5px;

            background-color: #EF4A25;

            color: white;

        }


        #filestackEnhanceButtonContainer {

            display: flex;

            flex-direction: column;

            align-items: center;

        }

        /* Other CSS styles */

    </style>

</head>

<body>

    <!-- HTML body content -->

    <!-- div container for filestack -->

    <div id="filestackContainer" style="display: none;"></div>

    <!-- button to trigger filestack OCR -->

    <div id="filestackEnhanceButtonContainer">

        <button id="filestackEnhanceButton" onclick="openFilestackEnhancePicker()">Filestack OCR</button>

    </div>

    <!-- div to display OCR result -->

    <div id="ocrResult" style="display: none;">

        <p id="ocrText"></p>

        <button id="copyButton" onclick="copyText()">Copy Text</button>

        <button id="returnToOCRButton" onclick="returnToOCR()">Return to OCR</button>

        <span id="copiedMessage">Text copied!</span>

    </div>

    <!-- JavaScript -->

    <script>

        // JavaScript code

    </script>

</body>

</html>
The HTML section includes a head section where metadata and external resources are loaded, such as the Filestack library for handling file uploads and OCR.
In the body section, there are three main div elements:
- filestackContainer – initially hidden, this will be used to hold the uploaded file.
- filestackEnhanceButtonContainer – contains a button (filestackEnhanceButton) that triggers the file upload and OCR process.
- ocrResult – initially hidden, this will display the OCR result along with buttons for copying text and returning to the OCR process.
CSS
<style>

    /* CSS styles */

    .closeButton {

        padding: 5px 10px;

        font-size: 16px;

        cursor: pointer;

        margin-top: 10px;

        border: none;

        border-radius: 3px;

        background-color: #ccc;

        color: #333;

    }


    #copyButton {

        display: none;

        padding: 10px 20px;

        font-size: 18px;

        cursor: pointer;

        margin: 10px;

        border: none;

        border-radius: 5px;

        background-color: #EF4A25;

        color: white;

    }

    /* Other CSS styles */

</style>- The CSS styles includes styles for the body, buttons, and other elements to achieve a specific layout and design.
- For example, the button selector styles all buttons on the page, setting padding, font size, color, etc.
- The #copyButton selector targets the button used to copy text and sets it to initially be hidden (display: none;).
JavaScript
<script>

    const apikey = 'ADD YOUR API KEY HERE';

    const client = filestack.init(apikey);

    let uploadedFileHandle;


    function openFilestackEnhancePicker() {

        const options = {

            onUploadDone: (res) => {

                uploadedFileHandle = res.filesUploaded[0].handle;

                performOCR(uploadedFileHandle);

            },

        };


        const picker = client.picker(options);

        picker.open();

    }


    function performOCR(fileHandle) {

        const policy = 'ADD YOUR POLICY HERE';

        const signature = 'ADD FILESTACK SIGNATURE HERE';

        const ocrUrl = `https://cdn.filestackcontent.com/${apikey}/security=p:${policy},s:${signature}/ocr/${fileHandle}`;


        fetch(ocrUrl)

            .then(response => response.json())

            .then(data => {

                const ocrResult = document.getElementById('ocrResult');

                const ocrText = document.getElementById('ocrText');

                ocrText.innerText = 'OCR Result: ' + data.text;

                ocrResult.style.display = 'block';

                document.getElementById('copyButton').style.display = 'block';

                document.getElementById('returnToOCRButton').style.display = 'block';

                document.getElementById('filestackEnhanceButtonContainer').style.display = 'none';

            })

            .catch(error => console.error('Error:', error));

    }


    function copyText() {

        const textElement = document.getElementById('ocrText');

        const text = textElement.innerText;

        navigator.clipboard.writeText(text)

            .then(() => {

                document.getElementById('copiedMessage').style.display = 'block';

                setTimeout(() => {

                    document.getElementById('copiedMessage').style.display = 'none';

                }, 2000);

            })

            .catch(err => {

                console.error('Failed to copy: ', err);

            });

    }


    function returnToOCR() {

        document.getElementById('ocrResult').style.display = 'none';

        document.getElementById('copyButton').style.display = 'none';

        document.getElementById('returnToOCRButton').style.display = 'none';

        document.getElementById('filestackEnhanceButtonContainer').style.display = 'block';

    }

</script>- The JavaScript code defines several functions that handle the OCR process, copying text, and managing the display of elements.
- openFilestackEnhancePicker opens the Filestack file picker and triggers OCR processing when a file is uploaded.
- performOCR performs OCR on the uploaded file using the Filestack API and displays the result on the page.
- copyText copies the extracted text to the clipboard and displays a message indicating that the text has been copied.
- returnToOCR hides the OCR result and buttons for copying text, returning to the initial state where the user can upload a new file for OCR.
Final code
<!DOCTYPE html>

<html lang="en">

<head>

    <meta charset="UTF-8">

    <meta name="viewport" content="width=device-width, initial-scale=1.0">

    <title>Your Web Page</title>

    <!-- Include the Filestack library -->

    <script src="https://static.filestackapi.com/filestack-js/3.x.x/filestack.min.js"></script>

    <style>

        body {

            display: flex;

            align-items: center;

            justify-content: center;

            height: 100vh;

            margin: 0;

            background-color: #f1f1f1;

            font-family: 'Times New Roman', Times, serif;

            background-image: url('https://img.freepik.com/free-photo/abstract-blue-geometric-shapes-background_24972-1841.jpg');

            background-size: cover;

        }

        button {

            padding: 50px;

            font-size: 50px;

            font-family: 'Times New Roman', Times, serif;

            cursor: pointer;

            margin: 10px;

            border: none;

            border-radius: 5px;

            background-color: #EF4A25;

            color: white;

        }

        #filestackEnhanceButtonContainer {

            display: flex;

            flex-direction: column;

            align-items: center;

        }

        .closeButton {

            padding: 5px 10px;

            font-size: 16px;

            cursor: pointer;

            margin-top: 10px;

            border: none;

            border-radius: 3px;

            background-color: #ccc;

            color: #333;

        }

        #copyButton {

            display: none;

            padding: 10px 20px;

            font-size: 18px;

            cursor: pointer;

            margin: 10px;

            border: none;

            border-radius: 5px;

            background-color: #EF4A25;

            color: white;

        }

        #returnToOCRButton {

            display: none;

            padding: 10px 20px;

            font-size: 18px;

            cursor: pointer;

            margin: 10px;

            border: none;

            border-radius: 5px;

            background-color: #fbbc05;

            color: white;

        }

        #copiedMessage {

            display: none;

            margin-top: 10px;

            color: #333;

        }

        #ocrText {

            border: 2px solid #EF4A25;

            padding: 10px;

            border-radius: 5px;

        }

    </style>

</head>

<body>

<div id="filestackContainer" style="display: none;"></div>

<div id="filestackEnhanceButtonContainer">

    <button id="filestackEnhanceButton" onclick="openFilestackEnhancePicker()">Filestack OCR</button>

</div>

<div id="ocrResult" style="display: none;">

    <p id="ocrText"></p>

    <button id="copyButton" onclick="copyText()">Copy Text</button>

    <button id="returnToOCRButton" onclick="returnToOCR()">Return to OCR</button>

    <span id="copiedMessage">Text copied!</span>

</div>

<script>

    const apikey = 'ADD YOUR API KEY HERE';

    const client = filestack.init(apikey);

    let uploadedFileHandle;

    function openFilestackEnhancePicker() {

        const options = {

            onUploadDone: (res) => {

                uploadedFileHandle = res.filesUploaded[0].handle;

                performOCR(uploadedFileHandle);

            },

        };

        const picker = client.picker(options);

        picker.open();

    }

    function performOCR(fileHandle) {

        const policy = 'ADD YOUR POLICY HERE';

        const signature = 'ADD YOUR SIGNATURE HERE';

        const ocrUrl = `https://cdn.filestackcontent.com/${apikey}/security=p:${policy},s:${signature}/ocr/${fileHandle}`;

        fetch(ocrUrl)

            .then(response => response.json())

            .then(data => {

                const ocrResult = document.getElementById('ocrResult');

                const ocrText = document.getElementById('ocrText');

                ocrText.innerText = 'OCR Result: ' + data.text;

                ocrResult.style.display = 'block';

                document.getElementById('copyButton').style.display = 'block';

                document.getElementById('returnToOCRButton').style.display = 'block';

                document.getElementById('filestackEnhanceButtonContainer').style.display = 'none';

            })

            .catch(error => console.error('Error:', error));

    }

    function copyText() {

        const textElement = document.getElementById('ocrText');

        const text = textElement.innerText;

        navigator.clipboard.writeText(text)

            .then(() => {

                document.getElementById('copiedMessage').style.display = 'block';

                setTimeout(() => {

                    document.getElementById('copiedMessage').style.display = 'none';

                }, 2000);

            })

            .catch(err => {

                console.error('Failed to copy: ', err);

            });

    }

    function returnToOCR() {

        document.getElementById('ocrResult').style.display = 'none';

        document.getElementById('copyButton').style.display = 'none';

        document.getElementById('returnToOCRButton').style.display = 'none';

        document.getElementById('filestackEnhanceButtonContainer').style.display = 'block';

    }

</script>

</body>

</html>
Here is the GitHub code for our OCR application:
https://github.com/devayesha23/Filestack_OCR_App
Output
When you run the command, it will show you the below web page:

Click on the “Filestack OCR” button to open the file picker as below.
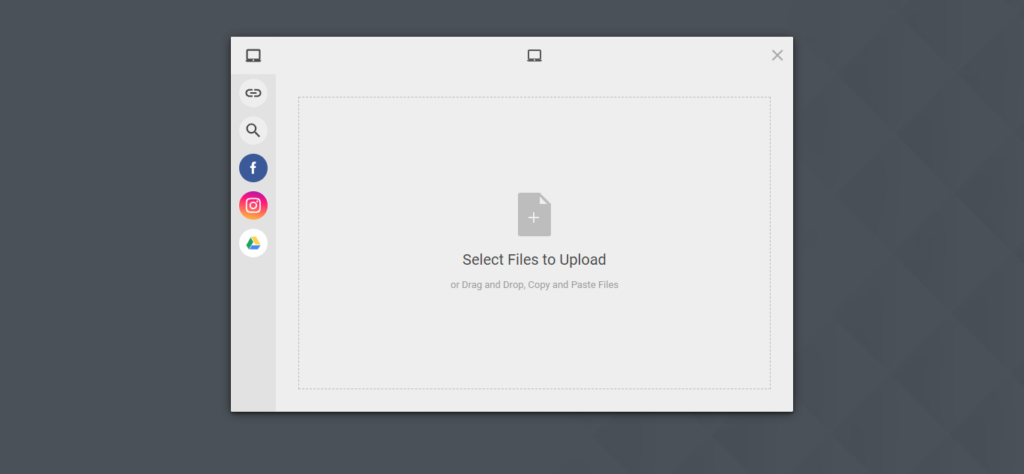
Upload the file from your local directory or insert a URL. You can check it as under:

Once you click on the upload button, it will return the optical character recognition text as under:

You can copy the text or return to the OCR page.
Conclusion
Filestack OCR quickly changes images to editable text files, saving time. This blog explains why OCR matters and how industries like banking, healthcare, and publishing use it. We showed how to add OCR to your apps with Filestack. Filestack optical character recognition is simple to use and makes text-to-image conversion fast.
Filestack optical character recognition is secure and reliable. Hence, it is a great choice for developers. Try it out and see how it can benefit your projects!
FAQs
What is Filestack OCR?
Filestack OCR is an API that converts images to editable text files quickly and efficiently.
Can I try Filestack OCR for free?
Yes. Filestack optical character recognition is available on the free plans.
Why should I choose Filestack OCR over other solutions?
Filestack optical character recognition is easier to integrate when compared with other solutions.
Is it secure to use the Filestack optical character recognition?
Yes. As you can see in the above blog, we implemented the security and policy into our application. This step aims to ensure our data is safe and secure.
Try Filestack OCR today and effortlessly convert images to editable text!

Ayesha Zahra is a Geo Informatics Engineer with hands-on experience in web development (both frontend & backend). Also, she is a technical writer, a passionate programmer, and a video editor. She is always looking for opportunities to excel in her skills & build a strong career.
Read More →