
QR codes are everywhere, those little square barcodes you scan with your phone. They’re useful for quickly accessing information like websites or contact details. This blog will show you how to make QR codes using Filestack’s API. We’ll start by explaining how to generate QR codes and why they’re useful. Then, we’ll talk about how to generate them efficiently, especially with Filestack’s API. This makes the process easier.
You’ll learn how to create QR codes step-by-step, and we’ll provide a simple code example to help you get started. We’ll also cover some best practices for making QR codes and answer common questions like how to customize their design. So, if you’ve ever wondered how to make your own QR codes, this blog is for you. Let’s dive in and explore the world of QR codes with Filestack!
What is a QR Code?
“QR” stands for “Quick Response.” A QR code is a special kind of barcode that holds information. It looks like a square filled with black squares and lines. You can scan it with your phone to open a website, show a message, or save contact details. QR codes are useful because they can store a lot of information and are easy to scan with a smartphone.
Common Applications Where We Use QR Codes
QR codes are used in many ways in our daily lives. You might see them in ads or posters. These codes allow you to visit a website or get a discount quickly.
✔️In stores, they’re used for mobile payments, letting you pay with your phone.
✔️QR codes are used as tickets for events like concerts or flights, making entering without a paper ticket easy.
✔️Teachers use QR codes in textbooks to link to online school resources.
✔️In healthcare, QR codes identify patients and track medications.
✔️They’re also used in museums to give more information about exhibits.
What Are the Benefits of Generating QR Codes?
Generating QR codes has many benefits.
👉One big advantage is that they can store information like website links, contact details, or text. This makes them great for quickly sharing information.
👉QR codes are also easy to create. You can make them using different tools and software; you don’t need anything special.
👉Another good thing about QR coding is that most smartphones can read them. You don’t need to install extra apps to scan them. This makes them really convenient.
👉QR codes are also cheap to use. You can print them on many things, and you don’t need fancy equipment.
What is the Most Efficient Way to Generate QR Codes?
Many tools are available on the market to generate QR codes. Let’s explore how we achieve this via Filestack.
Generating QR Codes with Filestack
Filestack helps you generate a code that contains a web link. You can use a Filestack handle or a public web link. This process checks if the link works and then creates the QR code.
Parameters:
| Parameter | Description |
| Version | Choose a size for the QR code. |
| Error Correction | Choose how much damage the QR code can tolerate. |
| Format | Choose between SVG or PNG for the QR code. |
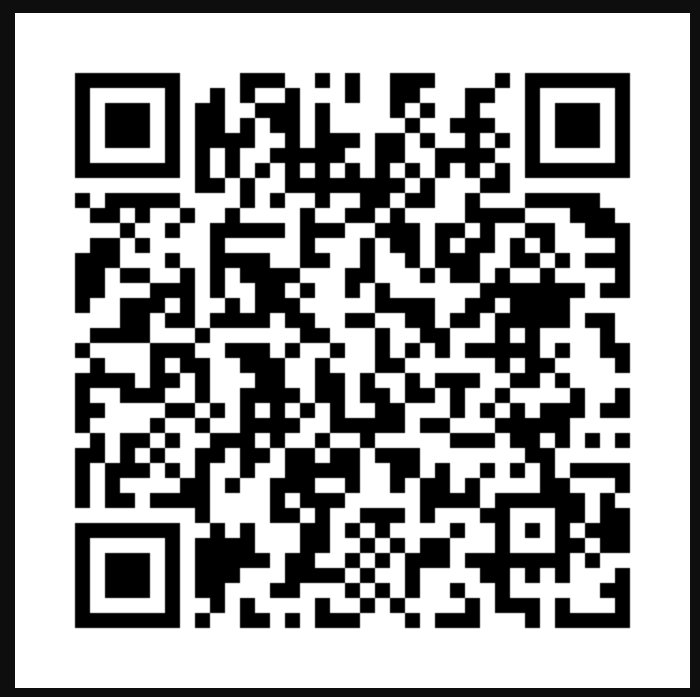
You can check the example result:
https://cdn.filestackcontent.com/qr/xBfYjbEJT0Wpkh2s0MK0
Here is how to use the Filestack QR code feature:
Use a handle
https://cdn.filestackcontent.com/qr/HANDLE
Use a web link
https://cdn.filestackcontent.com/qr/EXTERNAL_URL
Use parameters https://cdn.filestackcontent.com/qr=version:4,error_correction:L,format:svg/HANDLE
Building a Sample Application
First, create a Filestack account at https://www.filestack.com/
Next, navigate to the dashboard and get the API key.
Finally, create your application by implementing the Filestack QR code. Let’s explore it.
We will use HTML, CSS, and JavaScript to create our application.
Create index.html in Visual Studio Code. Next, add the below code to it.
HTML
<!DOCTYPE html>

<html>

<head>

    <title>Filestack QR Code Generator</title>

    <script src="https://static.filestackapi.com/filestack-js/3.x.x/filestack.min.js"></script>

    <!-- CSS styles -->

    <style>

        /* CSS styles */

    </style>

</head>

<body>

    <div class="container">

        <!-- Image banner -->

        <img src="..." alt="Cartoon Banner">

        <!-- Heading -->

        <h1>Filestack QR Code Generator</h1>

        <!-- Upload button -->

        <button id="uploadBtn">Upload File</button>

        <!-- Container for the QR code -->

        <div id="qrCode"></div>

    </div>

    <!-- JavaScript -->

    <script>

        // JavaScript code

    </script>

</body>

</html>
<!DOCTYPE html> specifies that the document is an HTML5 document.
<html>…</html> is the root element of the HTML document.
<head>…</head> contains meta-information about the document, such as its title and links to scripts and stylesheets.
<title>Filestack QR Code Generator</title> sets the title of the document.
<script src=”…”></script> links to the Filestack JavaScript library for handling file uploads.
<style>…</style> contains CSS styles for styling the elements in the document.
<body>…</body> contains the document’s content that will be displayed in the browser.
<div class=”container”>…</div> is a container for the main content of the page.
<img src=”…” alt=”Cartoon Banner”> displays an image banner with a placeholder source and alt text.
<h1>Filestack QR Code Generator</h1> displays a heading for the page.
<button id=”uploadBtn”>Upload File</button> creates a button with the ID “uploadBtn” for uploading files.
<div id=”qrCode”></div> creates a container with the ID “qrCode” for displaying the generated QR code.
CSS
body {

    /* CSS styles */

}

.container {

    /* CSS styles */

}

h1 {

    /* CSS styles */

}

#uploadBtn {

    /* CSS styles */

}

#uploadBtn:hover {

    /* CSS styles */

}

#qrCode {

    /* CSS styles */

}
body {…} styles the document’s body, setting the font family, background color, margin, padding, and text alignment.
.container {…} styles the container div, setting the maximum width, margin, padding, background color, border radius, and box shadow.
h1 {…} styles the heading, setting the color, font size, and margin bottom.
#uploadBtn {…} styles the upload button, setting the background color, text color, border, padding, font size, border radius, and cursor.
#uploadBtn:hover {…} styles the upload button on hover, changing the background color.
#qrCode {…} styles the QR code container, setting the margin top.
JavaScript
const client = filestack.init('ADD API KEY HERE');


document.getElementById('uploadBtn').addEventListener('click', () => {

    client.picker({

        accept: 'image/*',

        onUploadDone: (res) => {

            const handle = res.filesUploaded[0].handle;

            generateQRCode(handle);

        }

    }).open();

});


function generateQRCode(handle) {

    const qrContainer = document.getElementById('qrCode');

    qrContainer.innerHTML = `<img src="https://cdn.filestackcontent.com/apikey/qr/${handle}" alt="QR Code"/>`;

}
const client = filestack.init(‘ADD API KEY HERE’); initializes the Filestack client with the provided API key.
document.getElementById(‘uploadBtn’).addEventListener(‘click’, () => {…}); adds a click event listener to the upload button.
client.picker({…}).open(); opens the Filestack file picker when the upload button is clicked.
function generateQRCode(handle) {…} defines a function to generate the QR code using the Filestack handle.
qrContainer.innerHTML = <img src=”https://cdn.filestackcontent.com/apikey/qr/${handle}” alt=”QR Code”/>; updates the inner HTML of the QR code container with an image tag containing the QR code URL.
Here is the GitHub code to our application: https://github.com/devayesha23/QRCodeGenerator
Final Code
<!DOCTYPE html>

<html>

<head>

    <title>Filestack QR Code Generator</title>

    <script src="https://static.filestackapi.com/filestack-js/3.x.x/filestack.min.js"></script>

    <style>

        body {

            font-family: Arial, sans-serif;

            background-color: #EF4A25;

            margin: 0;

            padding: 0;

            text-align: center;

        }

        .container {

            max-width: 600px;

            margin: 50px auto;

            padding: 20px;

            background-color: #fff;

            border-radius: 10px;

            box-shadow: 0 2px 4px rgba(0, 0, 0, 0.1);

        }

        h1 {

            color: #333;

            font-size: 24px;

            margin-bottom: 20px;

        }

        #uploadBtn {

            background-color: #EF4A25;

            color: #fff;

            border: none;

            padding: 10px 20px;

            font-size: 16px;

            border-radius: 5px;

            cursor: pointer;

        }

        #uploadBtn:hover {

            background-color: #0056b3;

        }

        #qrCode {

            margin-top: 20px;

        }

    </style>

</head>

<body>

    <div class="container">

        <img src="https://static.vecteezy.com/system/resources/previews/005/399/981/original/cute-qr-code-cartoon-is-planting-a-tree-seed-vector.jpg" alt="Cartoon Banner" style="max-width: 100%; height: auto;">

        <h1>Filestack QR Code Generator</h1>

        <button id="uploadBtn">Upload File</button>

        <div id="qrCode"></div>

    </div>

    <script>

        const client = filestack.init('ADD YOUR API KEY HERE');

        document.getElementById('uploadBtn').addEventListener('click', () => {

            client.picker({

                accept: 'image/*',

                onUploadDone: (res) => {

                    const handle = res.filesUploaded[0].handle;

                    generateQRCode(handle);

                }

            }).open();

        });

        function generateQRCode(handle) {

            const qrContainer = document.getElementById('qrCode');

            qrContainer.innerHTML = `<img src="https://cdn.filestackcontent.com/apikey/qr/${handle}" alt="QR Code"/>`;

        }

    </script>

</body>

</html>
Output
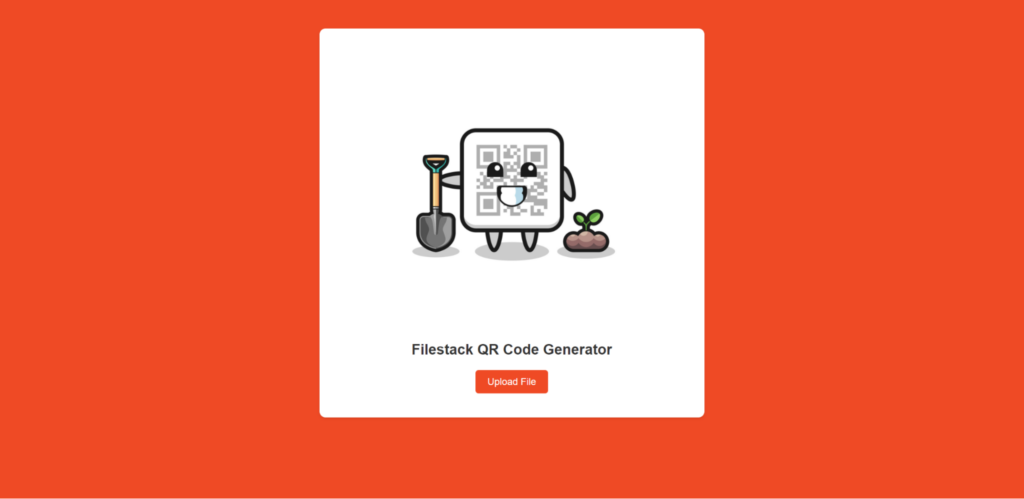
When you run the app, it will give you the following screen:
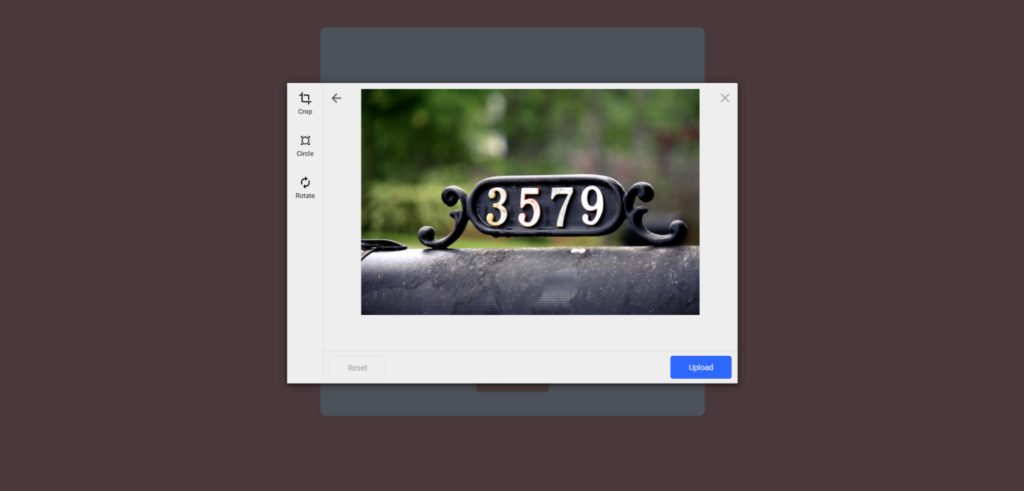
Click on Upload File button and add the file for which you want to generate the code. Suppose we want to generate a code for an image containing code:
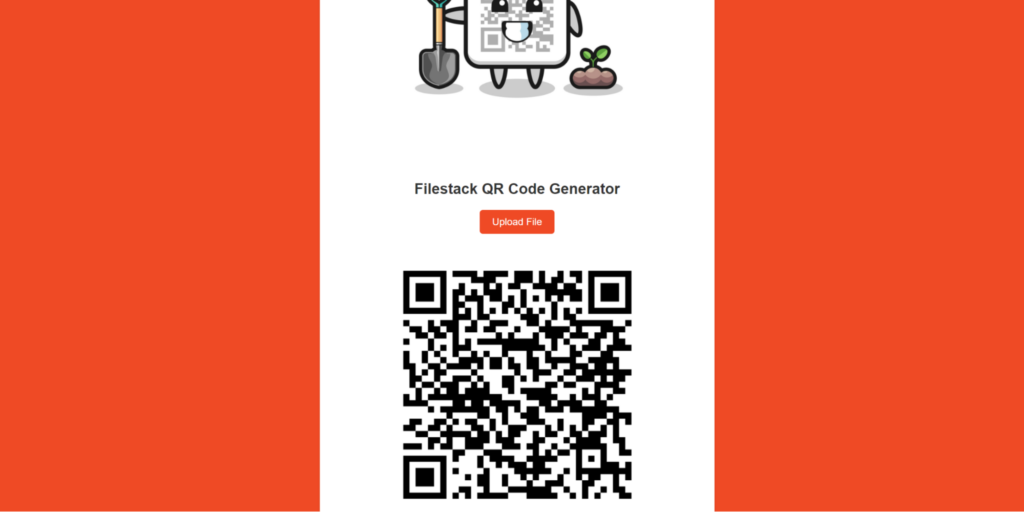
Click on upload and then wait for a few seconds. Here is how you get the QR Code in the app:
Here is how it opens when you scan it on a mobile phone.
What Are the Best Practices to Consider When Generating the QR Code?
Follow these tips for better results:
✔️Make sure people know what the QR code is for.
✔️Use a big enough QR code in a clear spot for easy scanning.
✔️Test the QR code on different devices and apps to ensure it works for everyone.
✔️Make sure the QR code has high contrast for easy reading.
✔️Use a good QR code generator that lets you customize and track scans.
✔️Add your brand’s look to the QR code while keeping it scannable.
✔️Keep QR codes up to date with correct and useful information.
Conclusion
Generating QR codes with Filestack’s API offers a convenient way to create codes that store different types of information. It can be website links or contact details. QR codes are square barcodes that can be scanned with a smartphone. Hence, it provides quick access to the encoded information.
Filestack’s API simplifies generating QR codes. This allows users to create codes step-by-step and customize their design. This feature is useful for businesses and individuals looking to share information in a quick and accessible format.
QR codes have various applications, including advertising, mobile payments, event ticketing, education, healthcare, and museums. They are versatile tools that can store significant information and are easy to scan.
When creating QR codes, it is important to follow best practices to ensure their effectiveness. This includes ensuring clarity of purpose, optimizing size and placement for easy scanning, and using a reliable QR code generator. Customizing the design of the QR code can also help make it more engaging and recognizable to users.
FAQs
How Can I Generate a QR Code Using Filestack?
To generate a QR code using Filestack, you can use their API and the `cdn.filestackcontent.com/qr/` endpoint. This endpoint allows you to create a QR code by providing a Filestack handle or a public URL.
You can customize the QR code’s size, error correction level, and format (SVG or PNG). After generating the QR code, you can quickly share website links, contact details, or other information.
What Types of Files Can I Use to Create a QR Code?
You can use different types of files like images, documents, and URLs to make a QR code. For instance, you can make a QR code that links to a website, downloads a file, or shows a message. QR codes can store different kinds of info, making them useful for many things.
Can I Customize the Design of the QR Codes?
You can change how the QR codes look. You can add your logo or use your brand’s colors. This makes the QR code more attractive without making it hard to scan.
Is There a Limit to the Number of QR Codes I Can Generate?
With Filestack’s API, you can create as many QR codes as you need for your projects without restriction. Filestack’s API can handle many QR code requests, whether you need just a few or a whole bunch.
How Long Does It Take to Generate a QR Code with Filestack?
Generating a QR code with Filestack is fast, usually taking just a few seconds. After you upload the file or provide the URL, Filestack quickly creates the QR code.
The speed can vary based on file size and internet speed, but it’s generally very quick. You can use the QR code right away after it’s generated.
Explore QR codes with Filestack! Simplify QR code generation and management in your applications.

Ayesha Zahra is a Geo Informatics Engineer with hands-on experience in web development (both frontend & backend). Also, she is a technical writer, a passionate programmer, and a video editor. She is always looking for opportunities to excel in her skills & build a strong career.
Read More →