From fashion to print shops, Shopify is a great resource for building Ecommerce platforms. Shopify makes it easy to sell goods online – where you can showcase your store and have an online checkout option.
However, we often hear clients ask, “How do I enable users to upload pictures to my Shopify store, for custom prints or clothing to resell?”
Filestack’s super API for end user content is perfect for uploading images to Shopify, and this tutorial should help you get going in minutes. If you have any questions, definitely reach out to:
Contact Support
The App
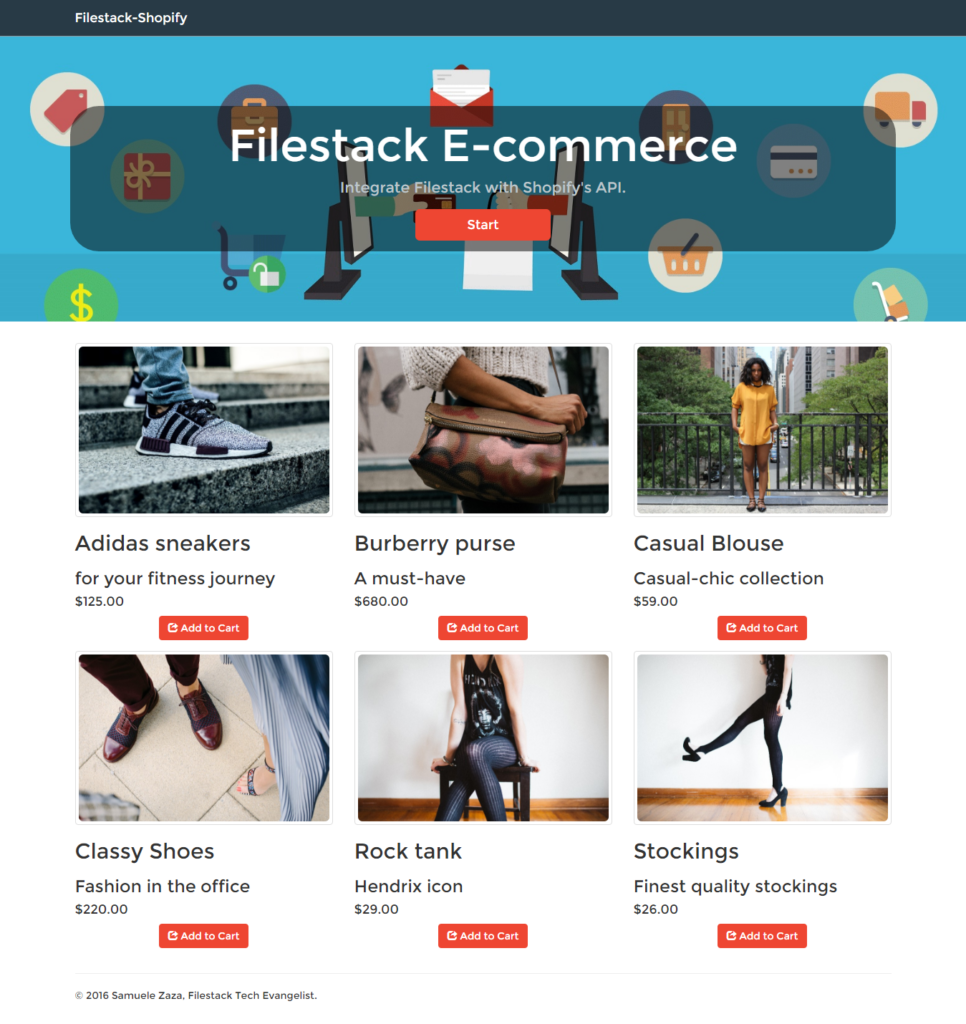
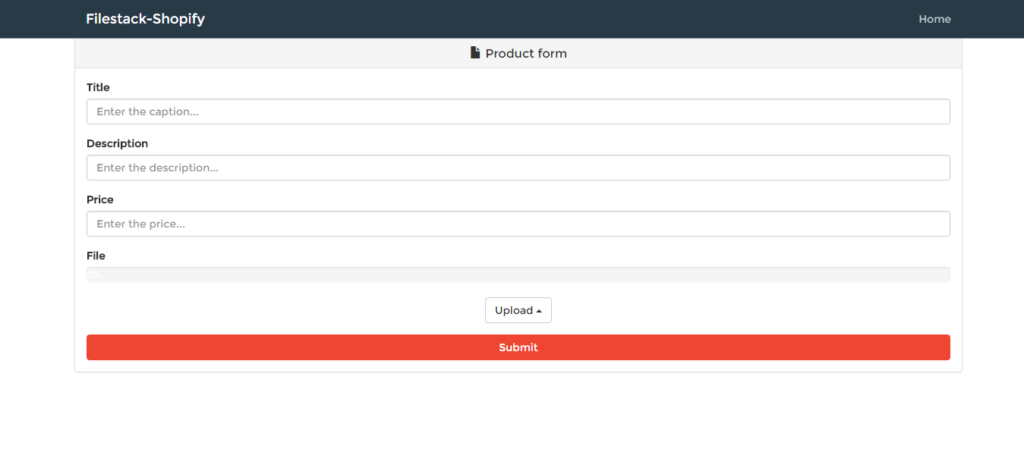
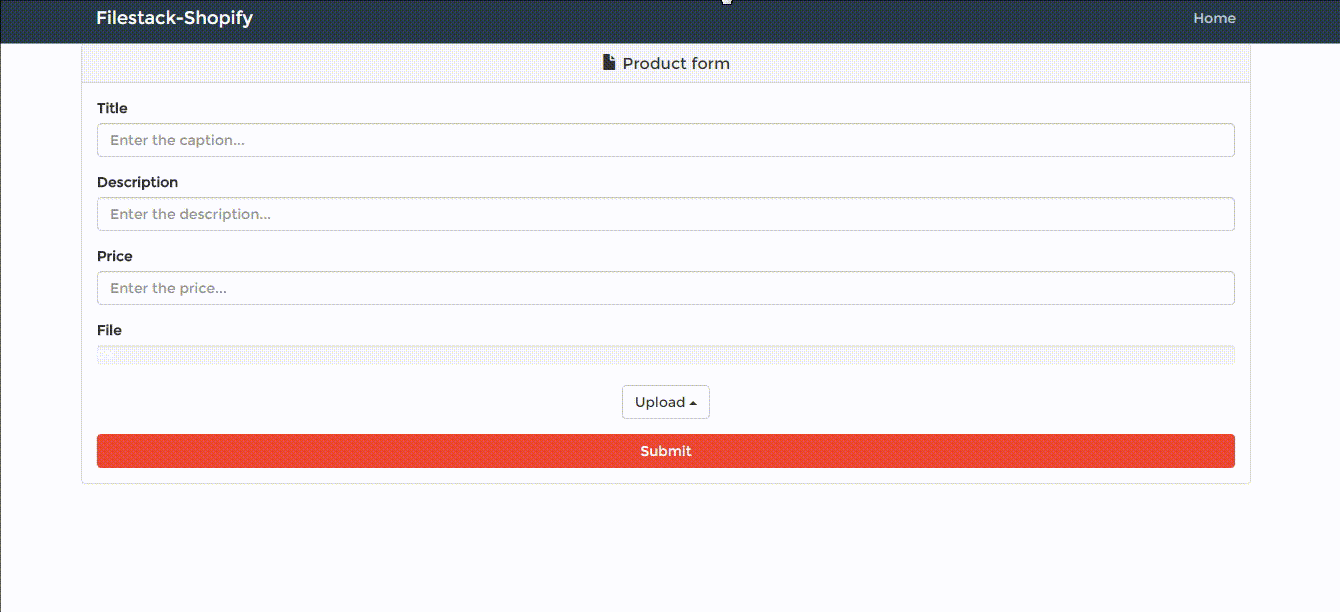
To demonstrate, I’ve build a Fashion Application with two parts. The first part showcases all of the products that buyers can choose from, and the second part allows users to upload pictures of clothing to sell on the platform.
Let’s take a look at the UI:
I created a sample app with Node.js and I use node-shopify package to interface with Shopify’s API. As usual you can clone/fork the app on my github.
Get Shopify Authorization
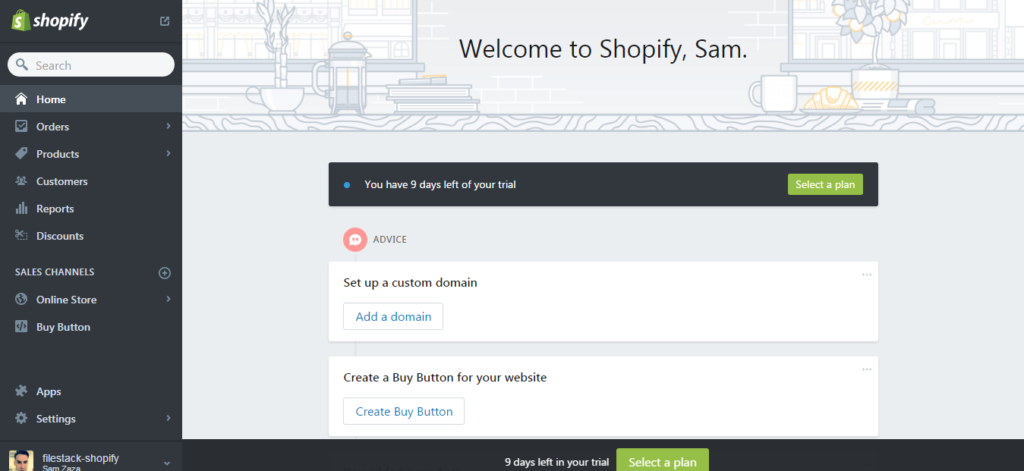
Before talking about the app itself, we need the permission to connect to Shopify and manage the e-commerce website. So, let’s go on Shopify’s website and login. You will be redirected to the dashboard:
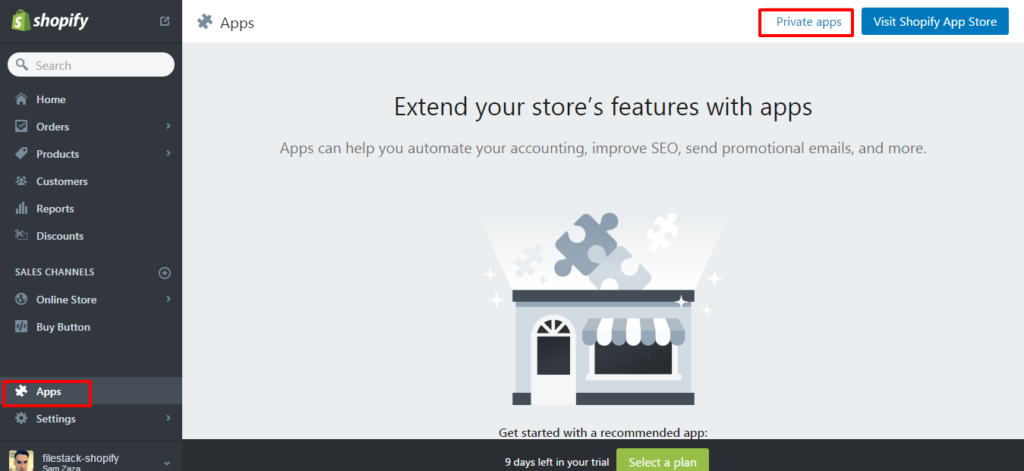
We are going to create a private app so on the left panel click on Apps and on private apps:
Successively click on the create private app button and enter the requested information:
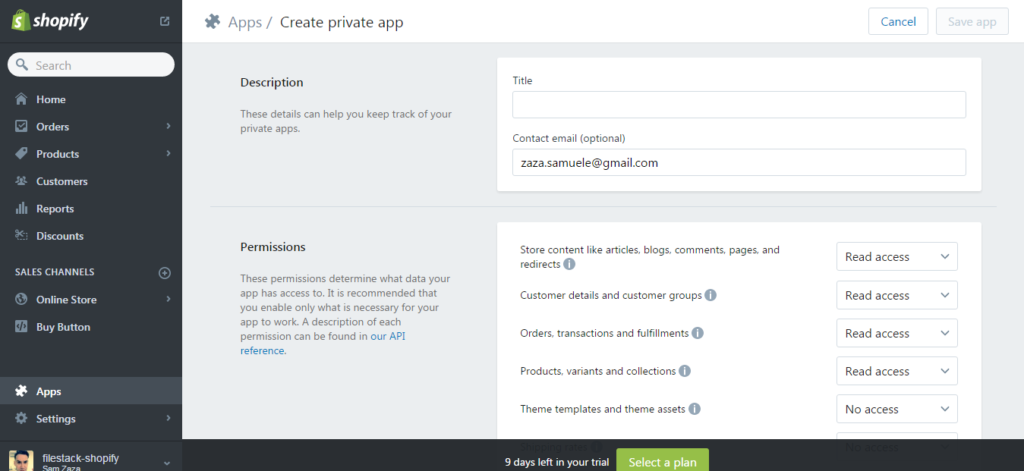
Finally you will receive all the authentication codes that we are using to connect our app to Shopify:

That’s all, remember the API key and password!
Setup Node.js
So how do we access Shopify’s API?
After we require node-shopify we are going to create an object from the shopifyAPI class:
var Shopify = new shopifyAPI({
  shop: 'YOUR_SHOP_NAME', // MYSHOP.myshopify.com
  shopify_api_key: 'API_KEY', // Your API key
  access_token: 'PASSWORD/TOKEN' // Your API password
});
The option object we are sending in requires the API key and the password that we received from Shopify before.
As this point we are almost done because the object has several methods that we can use to access the API.
I setup two routes on the /product endpoint, a GET for receiving the list of products and a POST for adding a new product.
Let’s check the code:
app.route('/product')
  .get(function(req, res) {
    Shopify.get('/admin/products.json', function(err, data, headers){
      res.json(data);
    });
  })
  .post(function(req, res) {
    var product = req.body;
      Shopify.post('/admin/products.json', product, function(err, data, headers){
        res.json(data);
     });
   })
- When the client surfs the homepage, a GET http request is thrown which returns all the products. You can see the Shopify object requesting the products at admin/products.json.
- This is very similar to the procedure to POST a new product to Shopify. In fact, you just have to make a POST request to the same endpoint with the product as second parameter for the
postfunction.
That’s all, thanks to node-shopify it’s so easy to work with this API.
Now, let’s go to create a product.
Add a new Product
Before showing the Filestack integration, I do think it’s important to understand how Shopify builds products in terms of objects:
While a product has a single title and description, it comes with an array of images. Also, it has variants. You can think about the same t-shirt but in different colors:
For each color you have a variant that can vary (guess what!) in price, color etc.
So, in this example I only treat my products as single variants so I want you to take a look at the object structure I defined:
var product = {
  "product": {
    "title": 'PRODUCT_TITLE',
    "body_html": 'PRODUCT_DESCRIPTION',
    "images" : [{ "src" : 'PICTURE_SRC' }],
    "variants": [
      {
        "price": 'PRICE',
        "sku": Date.now()
      }
    ]
  }
}
You should see that I defined a single variant with price and sku, which is a unique identifier for the product in the shop.
Title, description, picture and price they all come from the client’s input. Obviously the ‘PICTURE_SRC’ will be substituted by Filestack’s CDN link to the picture.
Now let’s check the pick function code:
filepicker.pick(
  {
    mimetype: 'image/*',
    hide: true,
    maxSize: 2*1024*1024,
    services: ['COMPUTER', 'FACEBOOK'],
    openTo: 'COMPUTER'
  },
  function(Blob) {
    setTimeout(previewImage(Blob.url), 2000);
    console.log(JSON.stringify(Blob));
    _this.data("doc-url", Blob.url);
  },
  function(FPError) {
    console.log(FPError.toString());
  },
  function(FPProgress) {
    console.log(parseInt(FPProgress.progress));
    progressPercentage = parseInt(FPProgress.progress) + '%';
    $('.progress-bar').css('width', progressPercentage).text(progressPercentage);
  }
);
We have seen these options before, notice that I take advantage of the onProgress function to create a nice animation on the loading bar.
mimetype
-
-
- defines the files allowed to be upload, only pictures in our case.
-
hide
-
-
- set to true will close the modal as soon as a client chooses the picture, this is because we want to show the loading bar in the page.
-
- We defined 2MBs as the
-
maxSize
-
-
- for a picture.
-
- We allow users to upload pictures from either their physical device or Facebook with
-
services
-
-
- .
-
- Finally, we set the physical device as the first choice with
-
openTo
-
- .
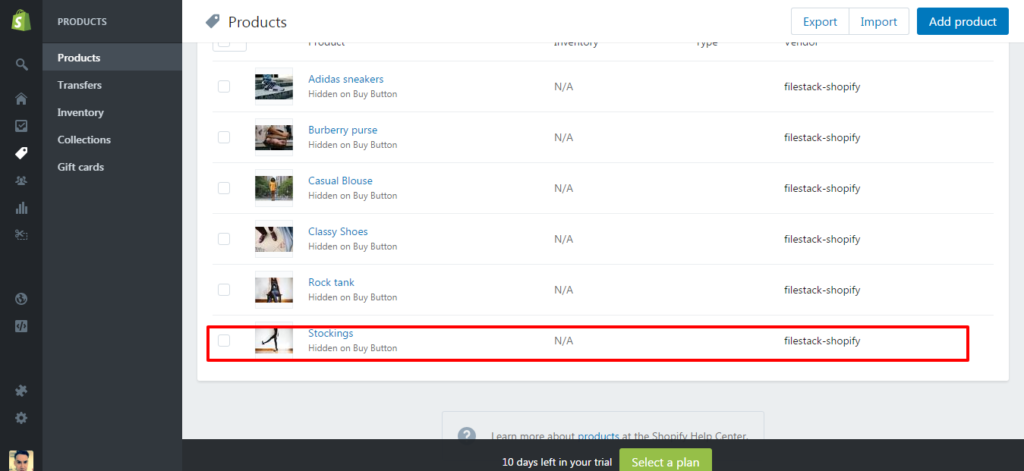
Now if we go back to Shopify’s dashboard, on the left side you can click on products and you will find the newly added one!
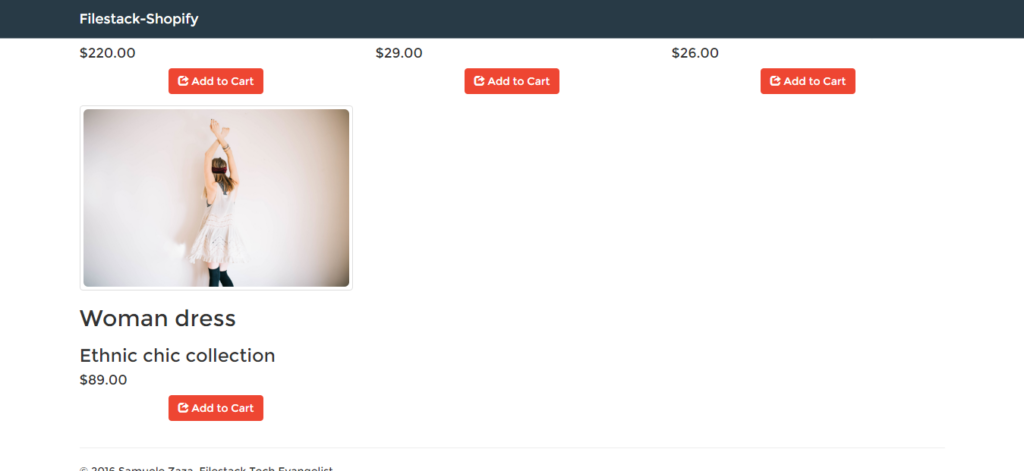
…And of course it will also show up in the homepage of our app:
Congratulations, Shopify and Filestack now successfully work together!
Conclusions
In the article we went through all the steps to setup the connection between Shopify and Filestack for file uploads:
We created a private app credentials and use them to connect Node.js to Shopify’s API.
Successively we analyzed the steps of creating a new product by highlighting the object structure and used Filestack to upload new product pictures.
Filestack is a dynamic team dedicated to revolutionizing file uploads and management for web and mobile applications. Our user-friendly API seamlessly integrates with major cloud services, offering developers a reliable and efficient file handling experience.
Read More →