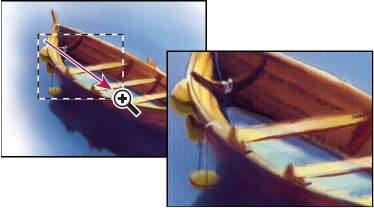
I have always been amazed by the upscale processes shown in action movies. Typically, a satellite photo captures the assumed location of the villain and the picture is infinitely zoomed while preserving a great amount of details.
This works pretty well in fictional stories, but when you try to enlarge an image in real life, the result is not what we expect. In fact, the upscale process often loses image quality and creates a blurry look for the enhanced picture.
While this unexpected outcome seems inevitable, there has been a lot of research on this field. Nowadays, there exists machine learning based software that is able to enlarge images while limiting the loss of quality. Without being too technical, these softwares do a series of guesswork and pixel interpolation trying to preserve the overall quality of the upscale image. Photoshop and even Matlab offer a few ways to achieve this but both programs require a basic training not suitable for general users.
Thus, Filestack came up with the perfect upscale solution that requires minimal technical background to upscale up to 2x the dimension of the original image with amazing quality.
Are you curious about the upscale implementation? Don’t miss the following tutorial where we will integrate Filestack with React to upscale images.
React App
in this tutorial we are using React and you can clone/fork my repository directly from my github.
The sample app is composed by two views: A main page where the enhanced photos are listed and a /add view to edit (enhance, upscale or remove red eyes) and send the photo to the server.
localhost:8080
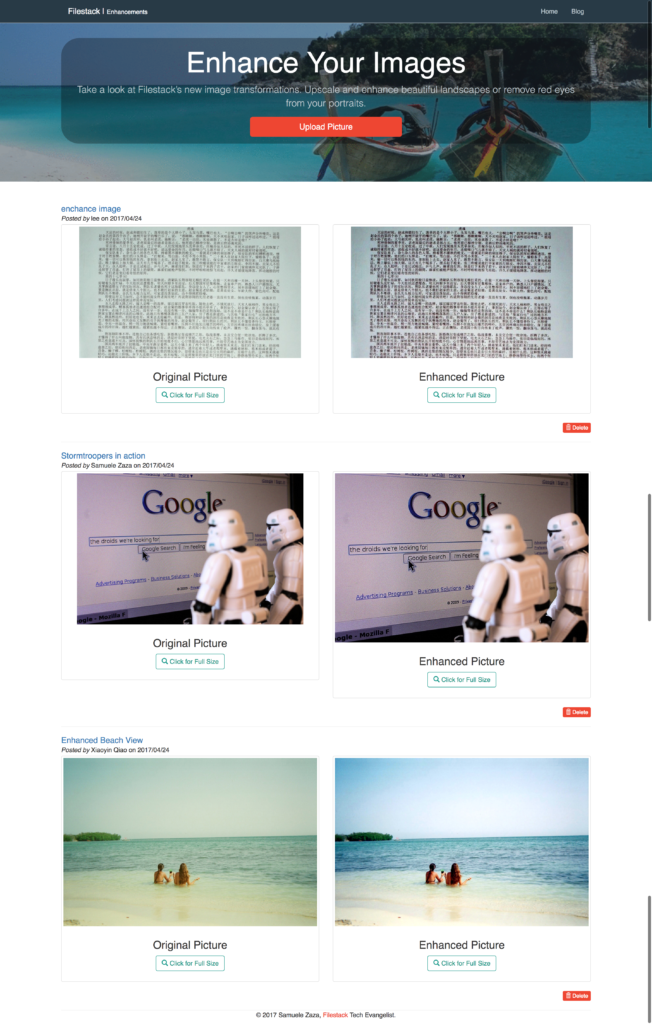
Both the original and enhanced pictures are stored in the json database and shown beside each other to highlight the difference.
localhost:8080/add
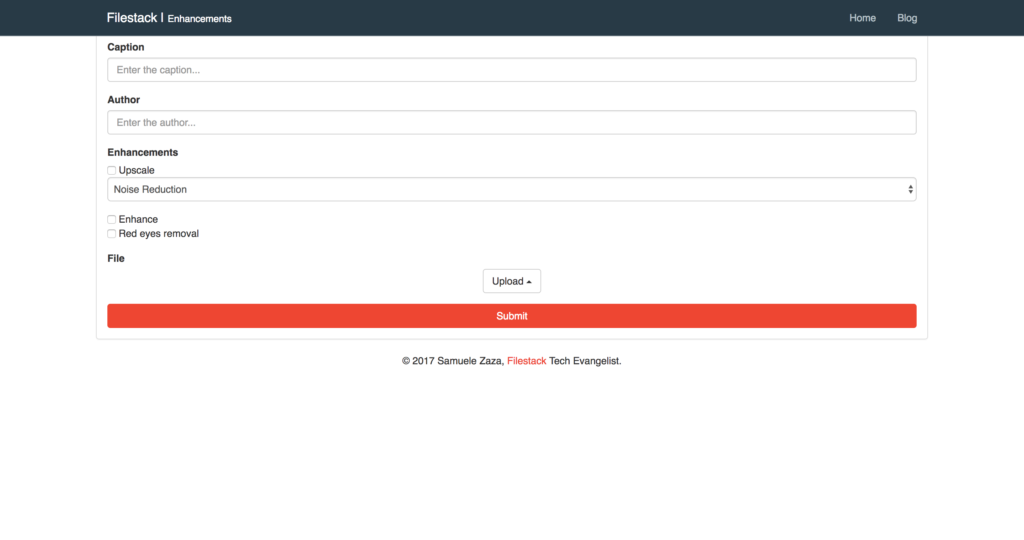
As mentioned, The /add view offers users the 3 image enhancements from the documentation, red-eye removal, enhancement and upscale.
Upload A Picture
The first step is definitely the file uploader. We are going to use filestack-js, the new npm package you can simply install from the terminal.
npm install filestack-js
filestack-js is the official client to upload images and provide the function pick. Whenever the user clicks on the upload button, a function uploadImage triggers pick to open a dialog:
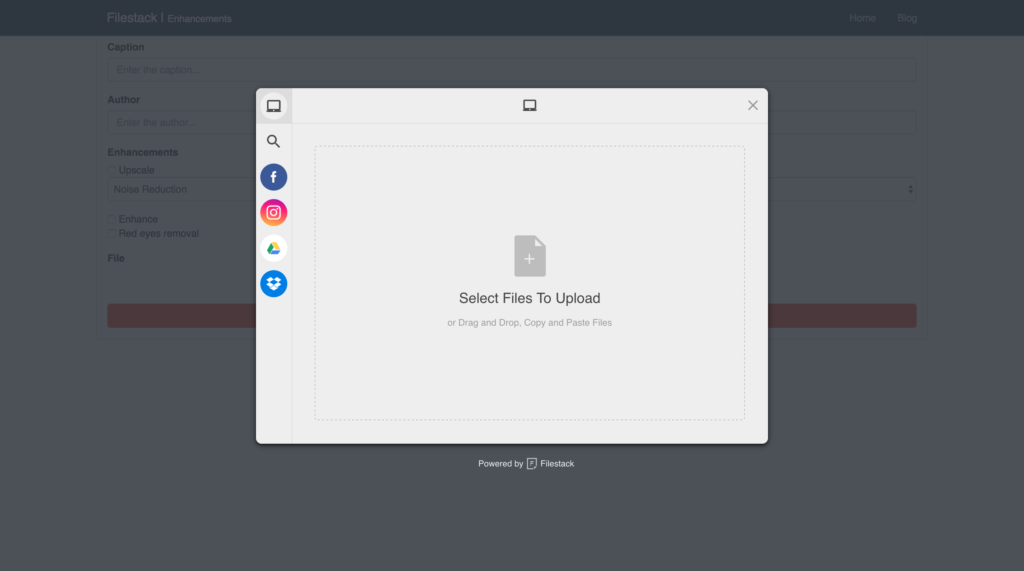
The minimalistic UI allows for drag-and-drop or file uploading from different sources listed on the left, some are actually listed by default like Facebook and Instagram but they can also be programmatically customized.
Here is the code:
filestack = () => {
  return client.pick(
    {
      accept: 'image/*',
      maxSize: 1024 * 1024 * 10,
    }
  );
};

async uploadImage () {
  try {
    const { filesUploaded } = await this.filestack();
    const handle = filesUploaded[0].handle;
    this.setState({ handle, transformation: this.setTransformation() });
  } catch (e) {
    console.log(e);
  }
}
Since pick returns a promise uploadImage can be easily written as async function. Let’s list the 3 steps for uploading and showing the picture in the view:
- We first call
filestackin charge to runpick. We set 2 constraints in the options parameter; the uploader only accept images whose size is within 10Mbs. - Once the promise resolves we receive a response carrying information about the newly uploaded photo. We take
handle. you can seehandleas a unique string representing the specific photo. - Finally, the handle is set in the app state along with the transformation.
Upscale the Picture
Perhaps you are wondering what setTransformation actually does! We have Filestack handle and thanks to the CDN url we can render the picture:
https://cdn.filestackcontent.com/ + handle
However, this renders only the raw image but we want to upscale it. Thus, we need to complete the photo URL with the specific process API syntax.
The official documentation shows the final url:
https://process.filestackapi.com/upscale=[options]/ + filestack_handle
or
https://process.filestackapi.com/API_KEY/upscale=[options]/photo_url
upscale optionally accepts a few option parameters to fully customize the behavior:
upscale=upscale:false: the default value is true and it will generate an image that is 2x the dimentions of the original image.upscale=noise:none, low, medium or high: This parameter is not required and default setting is none. Its function is to reduce the level of noise in an image.upscale=style:artwork or photo: The style parameter is not required. The default setting is photo. If the image being upscaled is a drawing or piece of artwork with smooth lines, you will receive better results from the upscaling process if you also include the artwork style parameter.
To summarize, we need to dynamically generate the process API url. This is where setTransformation comes handy as it dynamically create the final url given the chosen enhancements:
setTransformation = () => {
  // users can also select red-eye and enhance
  const { getUpscale, getEnhance, getRedEyes } = this;
  return processApi + getUpscale() + getEnhance() + getRedEyes();
}
Finally, getUpscale returns the /upscale string whenever the user clicks on the specific checkbox in the form:
getUpscale = () => {
 const { upscale, noise } = this;
 return upscale.checked ? `/upscale=noise:${noise.value}` : '';
}
NB: Users can define their preferred noise level!
The original selfie I took a few months ago has size 802×802:

Once upscaled it will become 1604×1604, click on the link!
Upscaled Selfie
AND THAT’S ALL!
More Image Transformations
Here is a complete list of image transformations supported by Filestack.
- Compress
- Facial Detection
- Crop
- Rotate
- Border and Effects
- Filters
- Collage
- Image Enhancements
- URL Screenshot
- Image to ASCII
- File type conversions
- Security
Filestack is a dynamic team dedicated to revolutionizing file uploads and management for web and mobile applications. Our user-friendly API seamlessly integrates with major cloud services, offering developers a reliable and efficient file handling experience.
Read More →