Do you need to add file upload functionality to your WordPress site but none of the available plugins are streamlined enough or powerful enough to your liking? The Filestack WordPress Upload plugin can help!
The Filestack WordPress Upload plugin allows you or your users to upload images, documents, and videos directly from Facebook, Instagram, Google Drive, local drives and more to your site, and then allows you to programmatically edit and deliver the assets on your website. Filestack provides the fastest, most reliable way to upload files with one simple integration.
Installing the plugin
To install the plugin through the WordPress admin console, simply search for “Filestack WordPress Upload” in the Add Plugins section and click Install Now then Activate.
You can also install the plugin by downloading it from the wordpress.org plugins page, then uploading the plugin folder to the /wp-content/plugins/ directory.
Once you have activated the plugin, go to the plugin’s settings page and enter your Filestack API Key. If you don’t have an api key you can simply signup for a free trial.
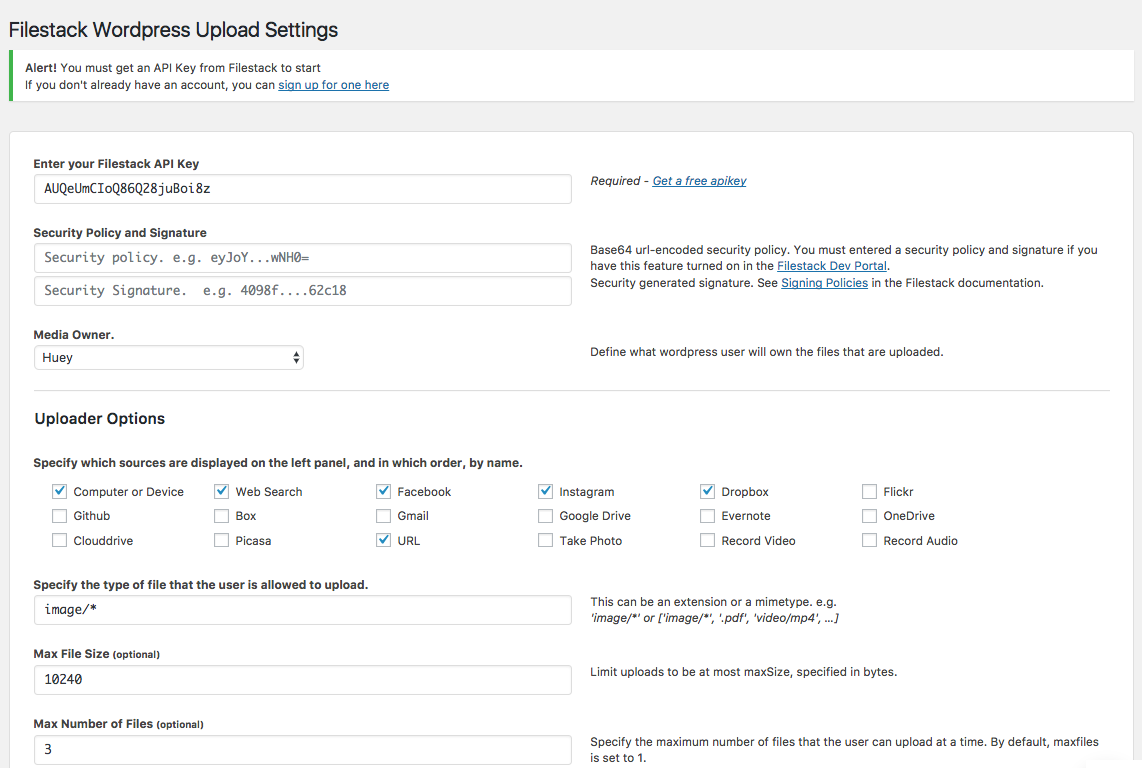
You can also configure other options on the settings page such as the upload sources, accepted files, max file size. You can ignore the security fields for now if that feature is not turned on (it isn’t by default).
You can easily add an upload button to any post, page, or widget by using the shortcode filestack. The shortcode has other optional attributes such as button_title, postId, and media_category. You can view examples of the shortcode usage on the Settings page of the plugin.
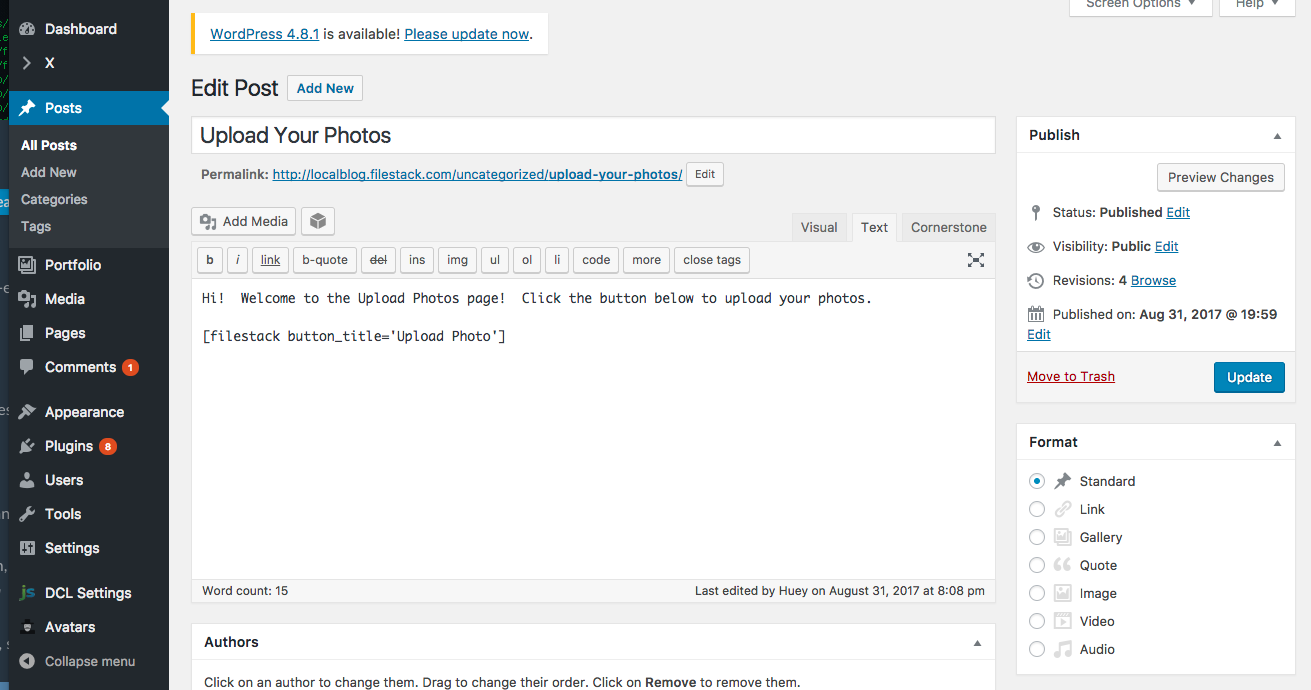
When you save and preview the page. You’ll see that an upload button has been added to the post in place of the shortcode. But it isn’t styled in any way and just inherits the button default styles of your theme. But have no fear! You can easily customize the appearance of the Upload button by overriding their css attributes in the following file:
/wp-content/plugins/filestack-upload/css/filestack_style.css. (Hint: You can access it through the link on the plugin’s settings page or going to Plugins->Editor and selecting the Filestack WordPress Upload plugin from the dropdown.
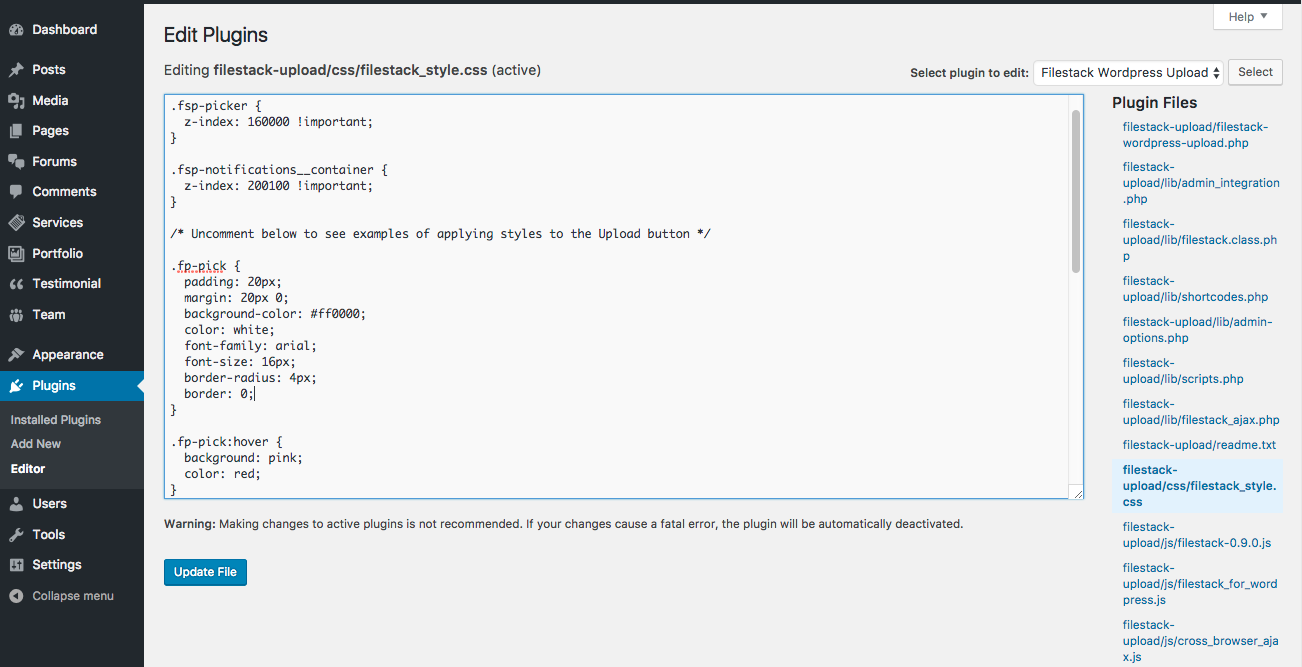
Uncomment by removing the /* */ statements around the .fp-pick and .fp-pick:hover classes and replace them with the following values:
.fp-pick {
  padding: 10px;
  margin: 20px 0;
  background-color: #ff0000;
  color: white;
  font-family: arial;
  font-size: 16px;
  border-radius: 4px;
  border: 0;
}

.fp-pick:hover {
  background: pink;
  color: red;
}
If you refresh your page (after clearing any caches you may have on your server and your browser client), you should see the Upload button updated with the new styles.
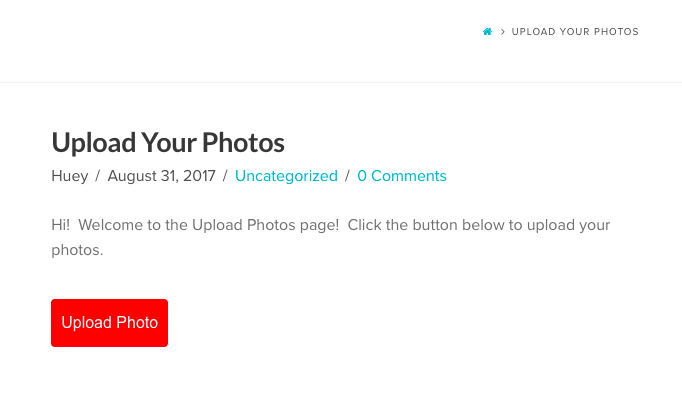
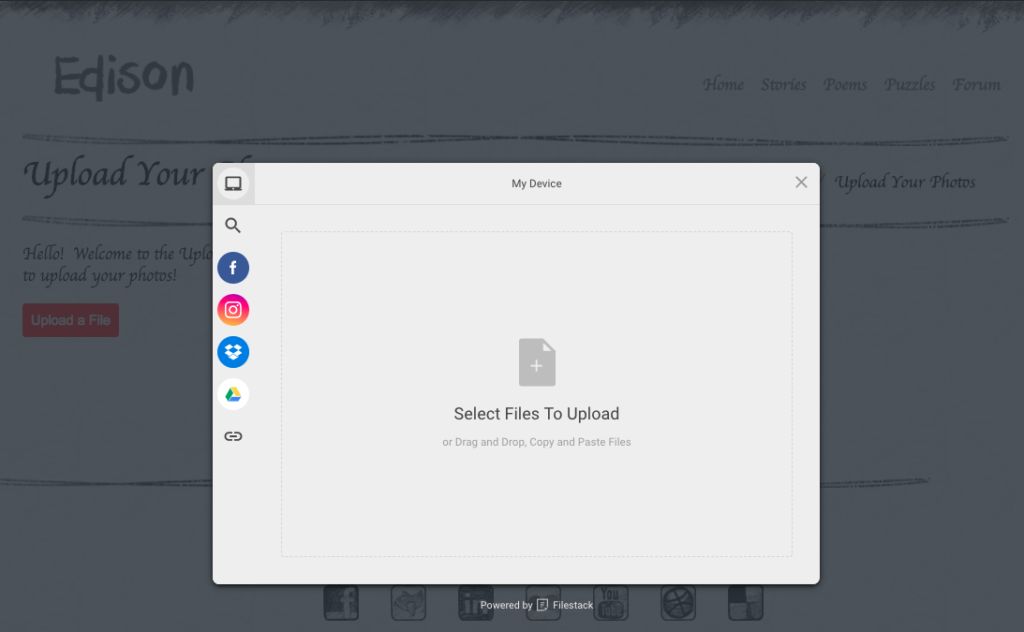
Now if you click the Upload Photo button, you should see the popup modal with all the sources you selected on the Settings page on the sidebar.
If you upload files now, they will appear in your media library, but the users will not notice anything significant. The good news is, the Filestack plugin is powerful enough for you to control the behaviors of every steps of the upload process. You can add javascript code that will execute when the Upload modal is opened, when a file is selected, when a file is uploading, when it finishes uploading or failed, and when the modal is closed.
Adding an image gallery to show uploaded files
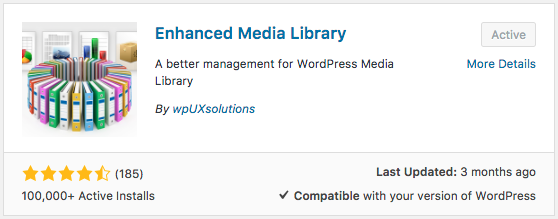
Firstly, there is a cool plugin called Enhanced Media Library that lets you create new custom media categories and organize your media assets into different categories. This is useful to keep your files organized, but also to handle just a set of media such as displaying a specific set of images to the page.
Once you’ve installed the Enhanced Media Library plugin, click on Media -> Media Categories and create a new category for testing purposes.
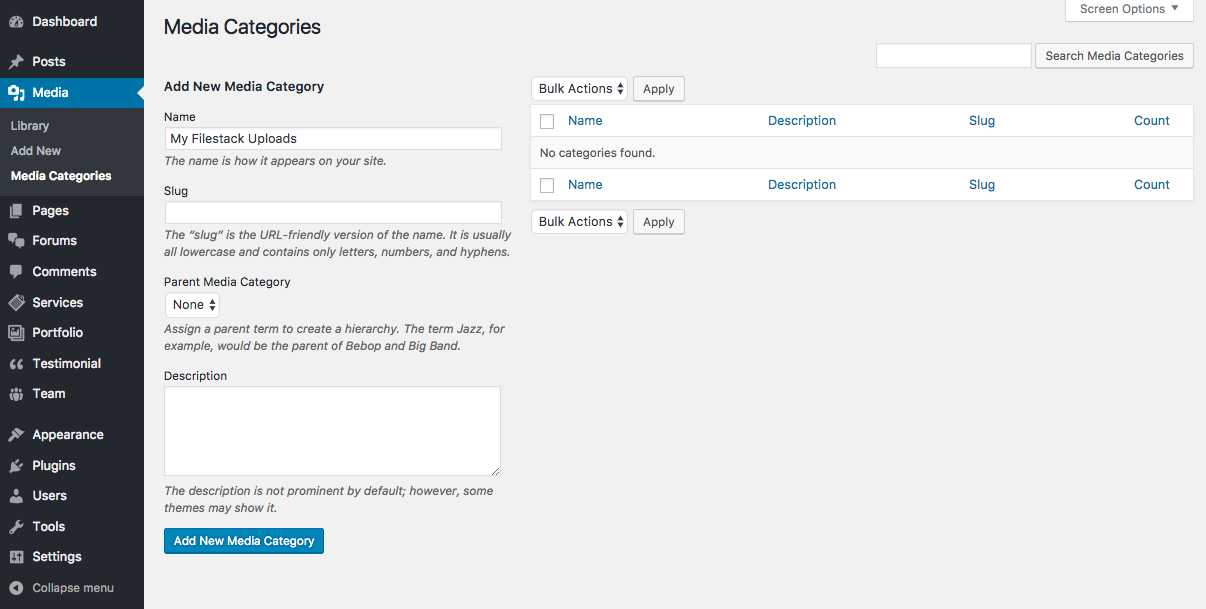
Next, click on the category that was created to edit it and make a note of the tag_ID parameter value in the URL:

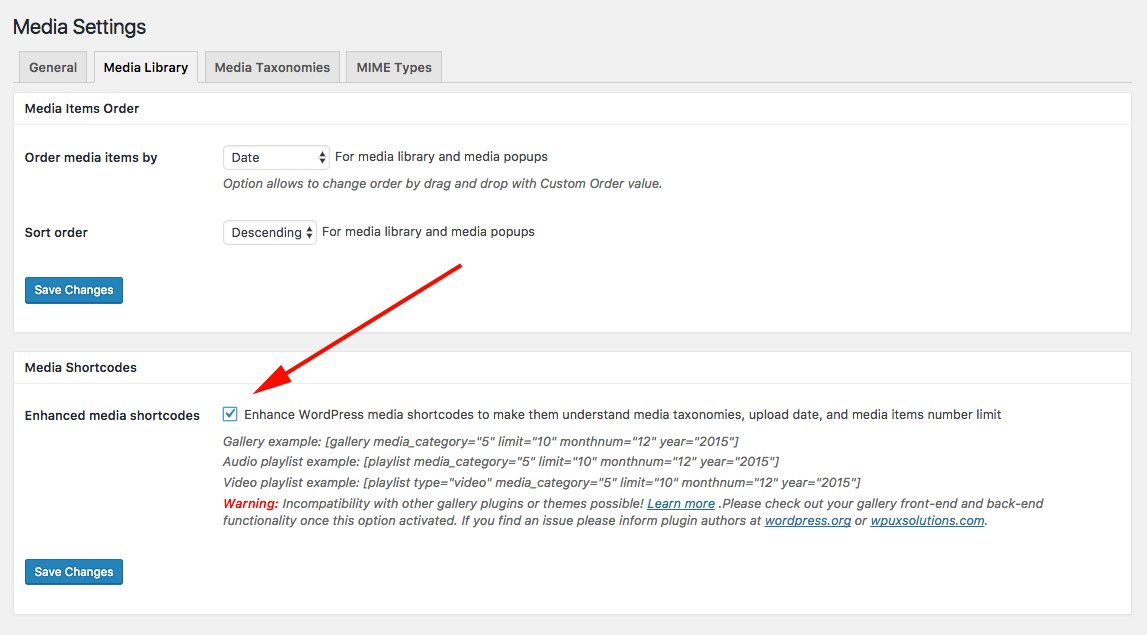
Also make sure you turn on the Enhanced media shortcodes option under the Media Library tab so that you can use custom attributes in the gallery shortcode in the steps below.
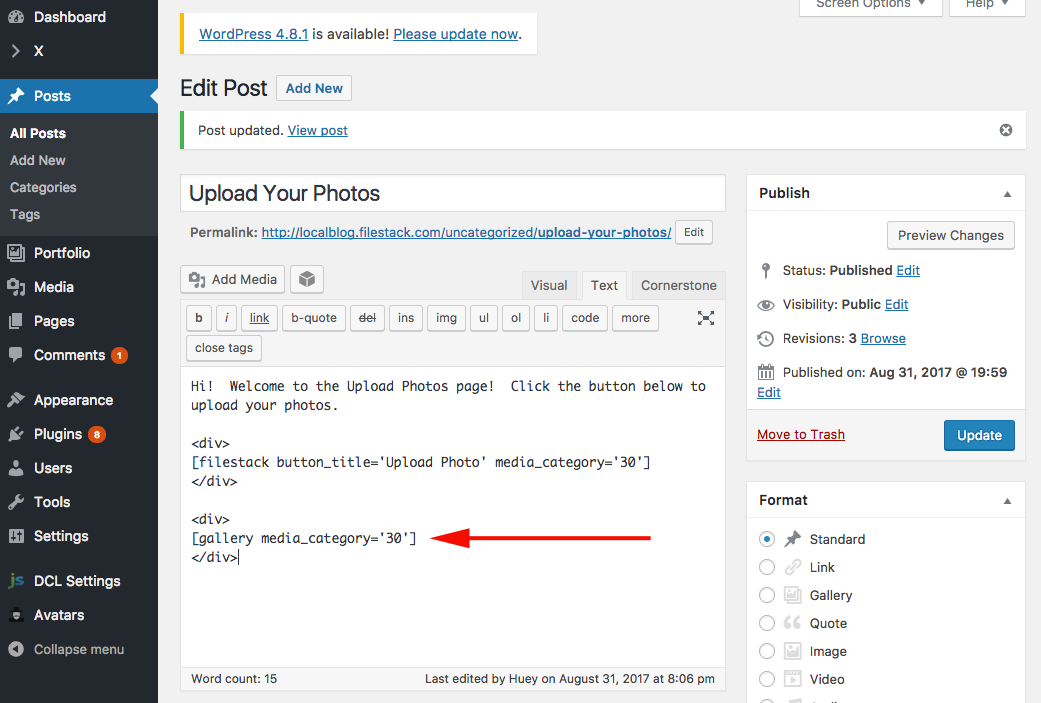
Now, edit your post and add the gallery shortcode beneath the button. Make sure to also add the attribute media_category=’30’ (or whatever the tag_ID was from the steps above) to your Filestack shortcode.
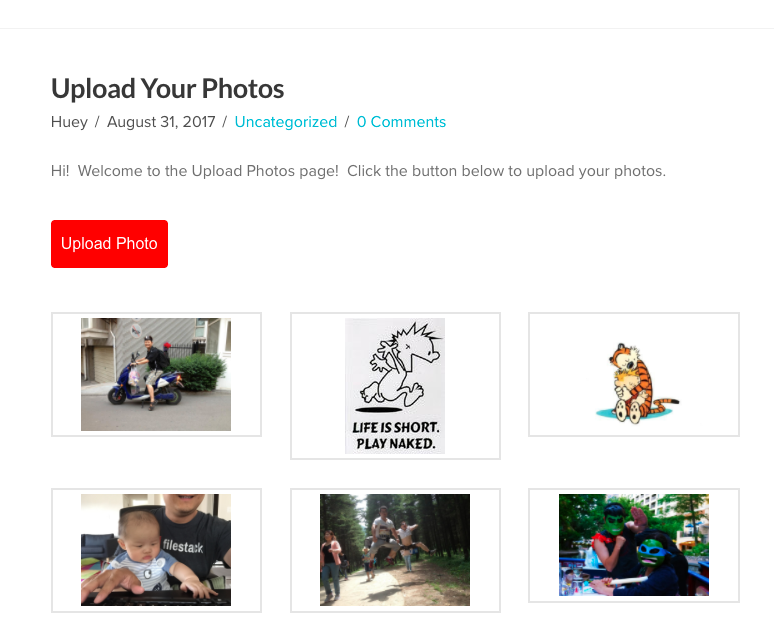
Now after you upload images, you will see it show up in the body of the post if you refresh the page.
Using a callback function to automatically refresh the page
Instead of manually refreshing the page to update the gallery, we can modify the filestackOnUploadFinished() function to automatically refresh the page after an upload is completed. The callback functions are declared in:
/wp-content/plugins/filestack-upload/js/filestack-callbacks.js
Hint: You can get to that file by going to Plugins -> Editor and selecting the Filestack WordPress Upload plugin from the dropdown menu, or accessing it through the link posted on the plugin’s settings page.
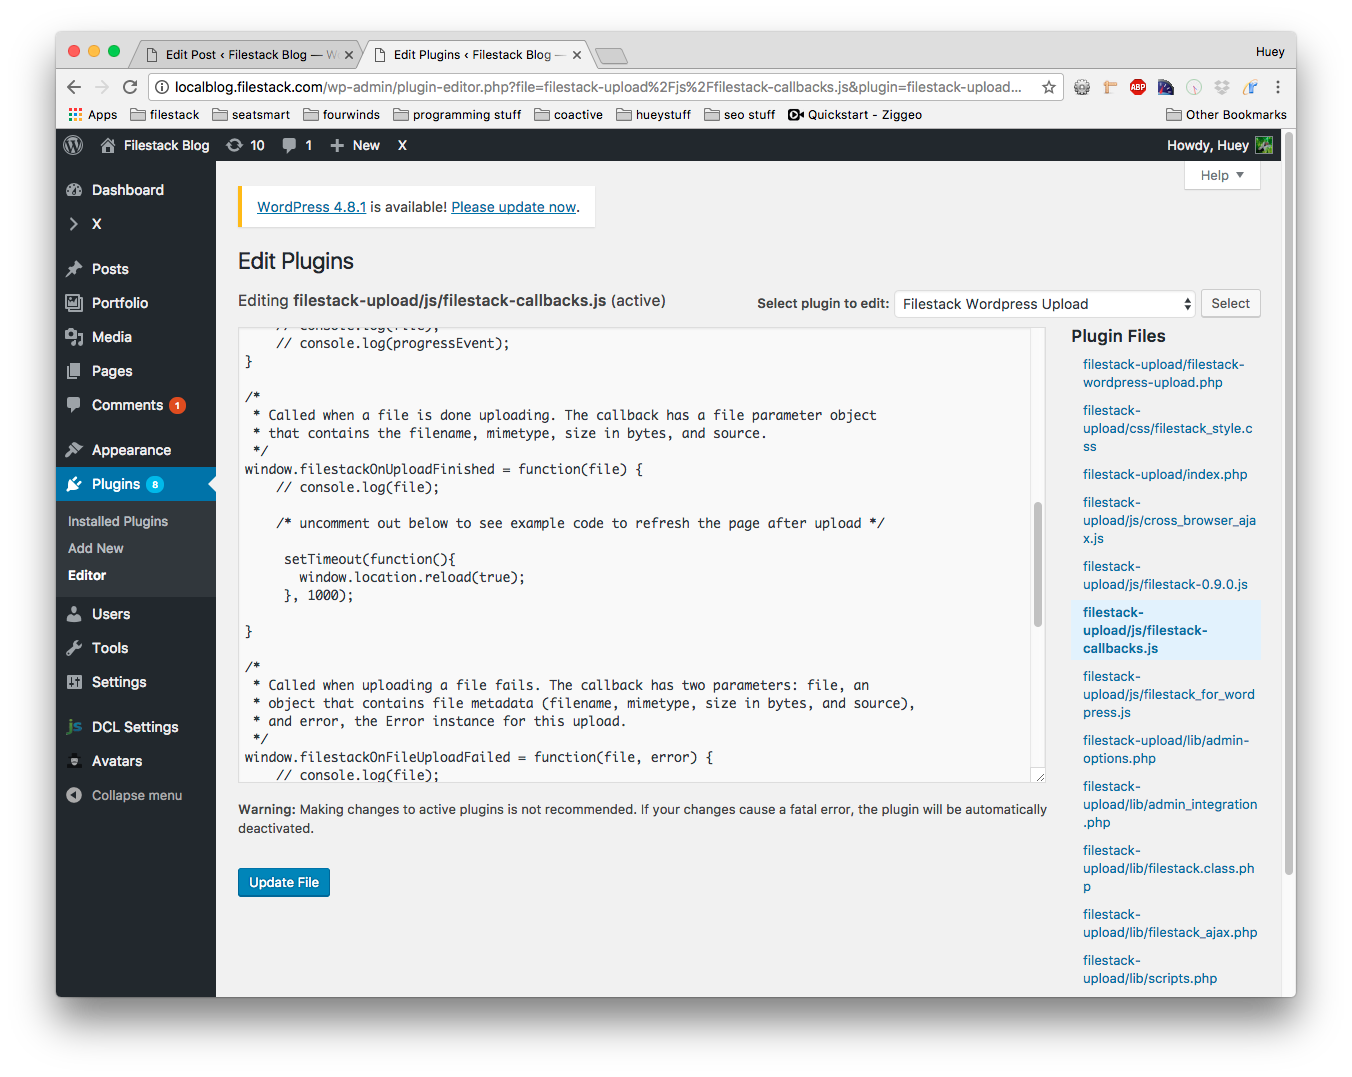
Uncomment the following code in the filestackOnUploadFinished() function in the file filestack-callbacks.js and click Update File.
setTimeout(function(){
  window.location.reload(true);
}, 1000);
Now if you refresh the page and upload a test image, the page will automatically refresh itself after the file finishes uploading, and display the new image in the gallery.
Great job making it through this long tutorial! We hope you find it useful, please leave a comment if you have any questions or feedback for us. Happy hacking!

Filestack is a dynamic team dedicated to revolutionizing file uploads and management for web and mobile applications. Our user-friendly API seamlessly integrates with major cloud services, offering developers a reliable and efficient file handling experience.
Read More →