
Printing workflows often break before a file ever reaches a printer. The problem usually starts at the image upload stage, where users submit files in formats like PNG, HEIC, TIFF, or WebP.
These formats work well on screens. But printing systems expect consistency and predictable image formats to produce accurate results. Print pipelines struggle to keep up when formats, dimensions, and resolutions vary from one upload to the next.
The outcome is familiar: failed prints, incorrect sizing, costly reprints, and a growing number of support tickets.
Converting uploaded images to a printer-friendly format, such as JPEG, and resizing them to print-ready dimensions creates a stable foundation. This will reduce errors, simplify processing, and ensure every file is ready for production.
Key takeaways
- Mixed image formats break printing workflows by introducing inconsistencies in color space, resolution, and transparency.
- JPEG remains the most reliable format for printing due to universal printer compatibility and predictable output behavior.
- Normalizing images at upload time, including format conversion and resizing, reduces errors, reprints, and manual pre-press work.
- Automated workflows with Filestack make it easier to scale web-to-print pipelines while keeping print output consistent and production-ready.
Why printing workflows fail with mixed image file types
Consistency is critical for any reliable printing workflow. Mixed image file types have different formats and create unnecessary complexity.
Different image formats handle key properties like color space, resolution and transparency in different ways and conflict with printer and software requirements. It leads to processing errors, production delays, customer complaints, and increased operational costs.
Let’s see some key points which create inconsistencies:
Incompatible color modes: Screens use RGB (Red, Green, Blue) and commercial printing uses CMYK (Cyan, Magenta, Yellow and Black) ink. Mixing image formats will result in incompatible color modes going to printing and print dull and unexpected colors.
Resolution discrepancies: Print output required higher resolution, like a minimum of 300 DPI than screen display which is usually 72 DPI. A mix of formats will send a mix of high and low resolutions to the printer providing an inconsistent output.
Handling of transparency: Formats like PNG and WebP often include transparent backgrounds for digital use. This transparency can render unpredictably during printing, leading to missing backgrounds, unexpected overlays, or incorrect color output.
Why is JPEG still one of the most reliable formats for printing?
JPEG is still one of the most reliable and widely supported image formats for printing workflows for several reasons:
- Universal compatibility: JPEG is supported by virtually all printers, RIP software, and print vendors.
- Predictable behavior: It handles color space and compression in a consistent, well-understood way.
- Fewer edge cases: No transparency layers, no exotic metadata, fewer surprises in output.
- Operational efficiency: Smaller file sizes mean faster processing and fewer pipeline failures.
Because of this reliability, many print vendors explicitly request JPEG even today.
Example: from user upload to print-ready JPEG (step-by-step)
Your printing workflow starts at the time the user uploads the images. It’s a good practice to normalize the images as soon as the user uploads and before storing them.
Let’s build our print-ready app step by step using Filestack File Upload and Workflows. With Filestack Workflows, you can bring multiple tasks into a single API call.
1. Upload the images using Filestack File Picker
You can add the Filestack File Picker to your printing image workflow app and provide users with a user-friendly interface for uploading files.
<script src="https://static.filestackapi.com/filestack-js/4.x.x/filestack.min.js"></script>
<script>
  const client = filestack.init('YOUR_API_KEY');
  client.picker({
    maxFiles: 1, // Adjust this value as needed
    onUploadDone: (res) => {
      console.log('Uploaded:', res);
    }
  }).open();
</script>
As soon as the image upload completes, it starts normalizing your images for printing. This web-to-print image processing includes print-ready image conversion (to JPEG in this example), resizing images for print, setting the color space profile to CMYK, and more.
For that, we need to create a print prep workflow with Filestack Workflows.
2. Creating a print prep workflow with Filestack Workflows
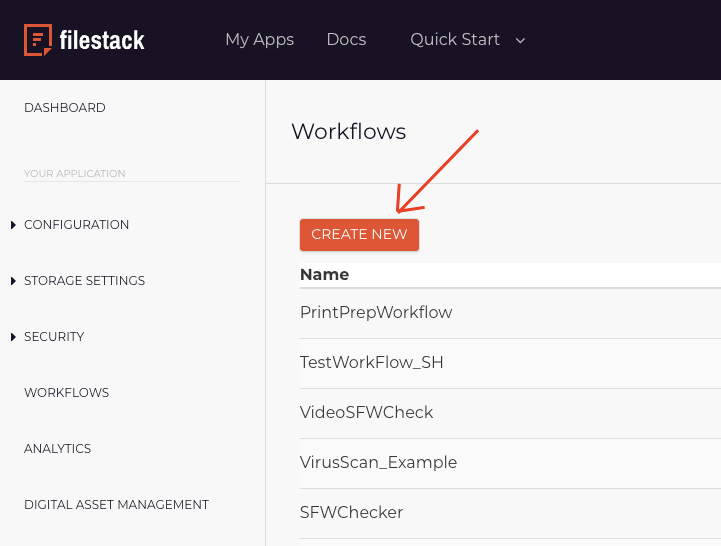
Sign in to your Filestack dashboard and go to Workflows to create a new workflow.
Don’t have a Filestack account yet? Sign up for free to get started.
2.1 Change the image format, color space, and quality
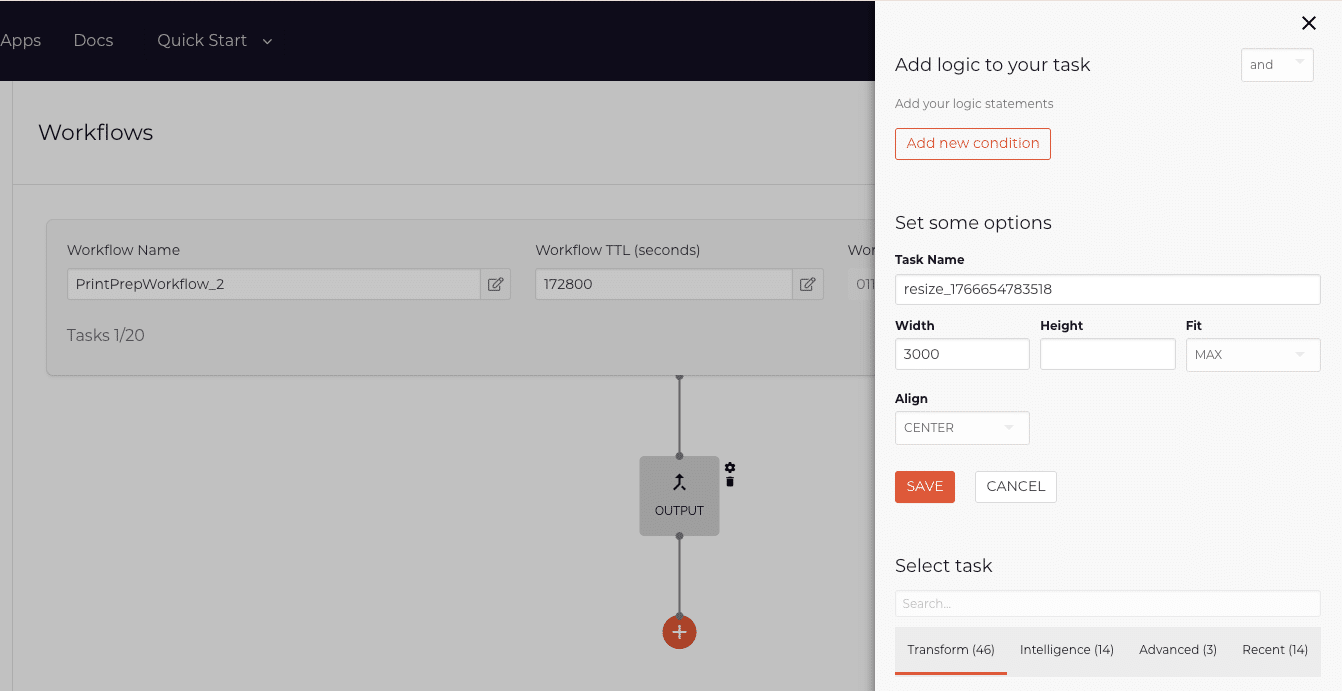
In your Filestack Workflow, add the output task.

This task will perform:
✔ Format conversion (Image → JPG)
✔ RGB → CMYK conversion
✔ Quality normalization
Let’s configure your task for this.
Set the format to JPG, Quality to 90, Colorspace to CMYK, and Background to #ffffff (White) to normalize the image for printing.
This ensures consistent output for your print pipeline.

Then save your task.
2.2 Resize the image
Add the resize task to your Filestack Workflow to transform your image into a printable version. Set the dimensions as you want for your printing.
2.3 Store the processed image
Finally, add the store task to your Filestack workflow to save the processed image. You don’t have to change any parameter in the store task for this example. You can see the completed Workflow below:
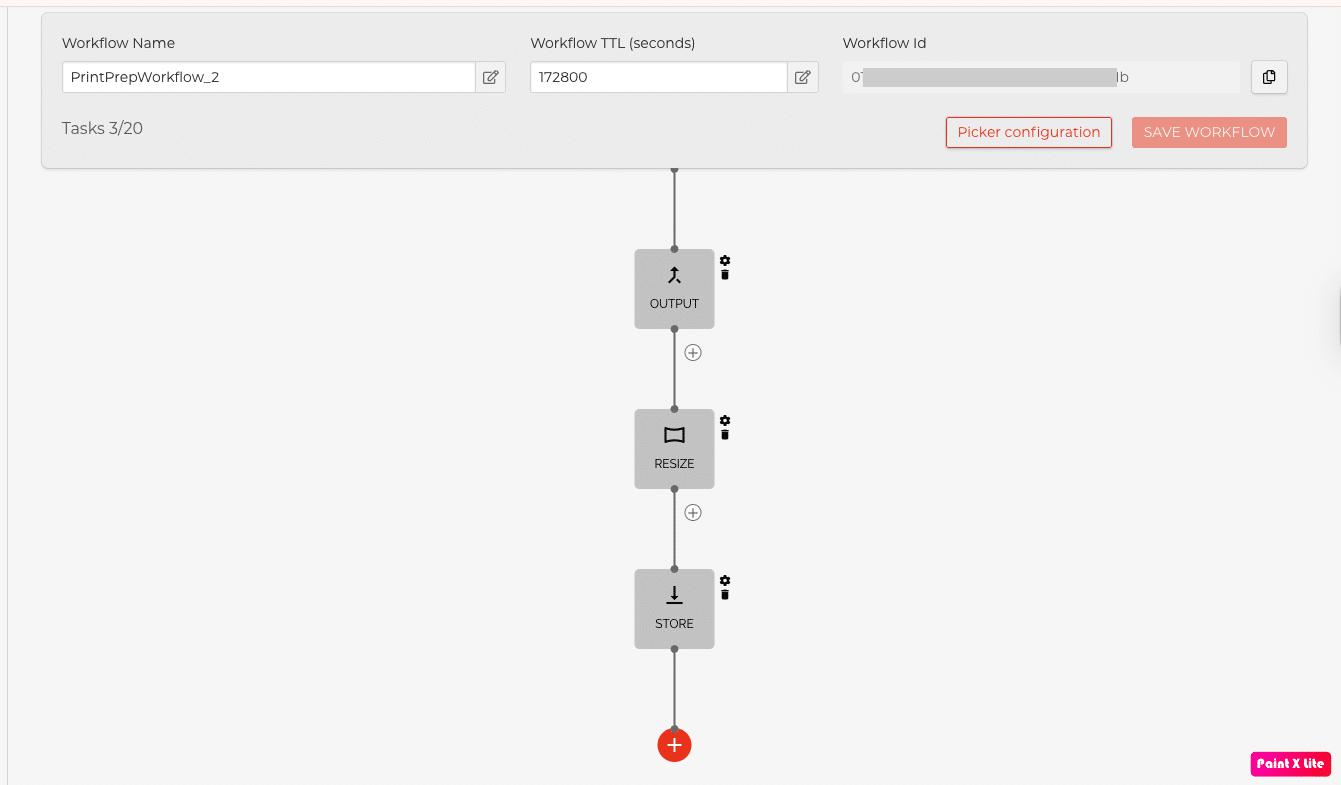
This workflow converts your images to JPEG, color space from RGB to CMYK and make other required transformations to make your images print ready.
Note: Remember to save each task and your workflow. Usually it saves your workflow when you save your tasks in when you add them.
Learn more in the Filestack Workflows documentation.
3. Run the workflow
After creating your workflow in the Filestack dashboard, you can run it with the Filestack Workflows API on the user-uploaded image files and receive the response to the browser.
The base URL for your workflow API is:
https://cdn.filestackcontent.comHere is a sample URL to run the workflow:
https://cdn.filestackcontent.com/security=p:${policy},s:${signature}/run_workflow=id:${WORKFLOW_ID}/${fileHandle}- Security policy and signature: Create them in the Filestack dashboard or programmatically.
Best practice: Create and store them on the server side. I will show it to you in my example.
- Workflow ID: You can get the Workflow ID from the workflow you created in the Filestack dashboard – workflow section.
- File handle: When a file is uploaded through the Filestack File Picker, the response includes the uploaded file’s handle in the filesUploaded array.
When you run the workflow using the Filestack Workflow API, it returns a job ID, which you can use in the next step to check the workflow status and retrieve the file handle of the processed image.
4. Get the workflow status
Filestack Workflows run asynchronously. Thus, your app should send a request to get the workflow status after running your workflow.
/workflow_status/In this example, you can use the URL below to get the result back:
https://cdn.filestackcontent.com/${FILESTACK_API_KEY}/security=p:${policy},s:${signature}/workflow_status=job_id:${jobId}- Filestack API key: Copy and paste your Filestack API key from your Filestack dashboard.
- Security policy and signature: Use the same values as in the previous step.
- Job ID: The job ID is returned in the response from the Workflows API request.
The response includes the file handle for the processed image, which you can use to deliver the print-ready asset via Filestack’s CDN and send it directly to production.
Walk through the complete example in this GitHub repository.
Run it locally to see how it works.
Scaling printing workflows with automated image processing
When your printing volumes grow, manual image handling quickly becomes a bottleneck. Automated image processing makes it possible to handle hundreds or thousands of uploads without slowing production. Format conversion and resizing happen consistently in the background, eliminating time-consuming pre-press steps.
A single automated workflow can support multiple print products, from posters to labels, without creating separate pipelines. By reducing manual work and reprocessing, teams lower operational costs and keep print workflows fast, predictable, and scalable.
When to use this workflow (common printing use cases)
This workflow is ideal anywhere users upload images that need to be print-ready. It fits naturally into web-to-print platforms, ecommerce product printing, and marketing collateral generation. Photo printing services also benefit from consistent JPEG conversion and resizing.
The same approach works well for labels and packaging workflows, where accuracy and repeatability are critical. In each case, normalizing images at upload time helps ensure reliable output and smoother production.
Conclusion
Your printing workflows depend on consistency. Image uploads are often where things start to go wrong. When your users submit files in different formats, sizes, and color modes, print pipelines are forced to compensate, leading to errors, delays, and unnecessary rework.
By converting uploaded images to JPEG, and color space to CMYK and resizing them to print-ready dimensions at upload time, teams can create a stable foundation for reliable production. Automating this process removes manual pre-press steps, reduces operational overhead, and ensures every file entering the pipeline meets printer expectations.
With Filestack Workflows, print-ready image processing becomes part of the upload experience itself. Instead of fixing files later, you normalize them once, making your printing workflows faster, more predictable, and easier to scale.
Sign up for free and build your automated image printing workflow with Filestack Workflows today.

Shamal is a seasoned Software Consultant, Digital Marketing & SEO Strategist, and educator with extensive hands-on experience in the latest web technologies and development. He is also an accomplished blog orchestrator, author, and editor. Shamal holds an MBA from London Metropolitan University, a Graduate Diploma in IT from the British Computer Society, and a professional certification from the Australian Computer Society.
Read More →