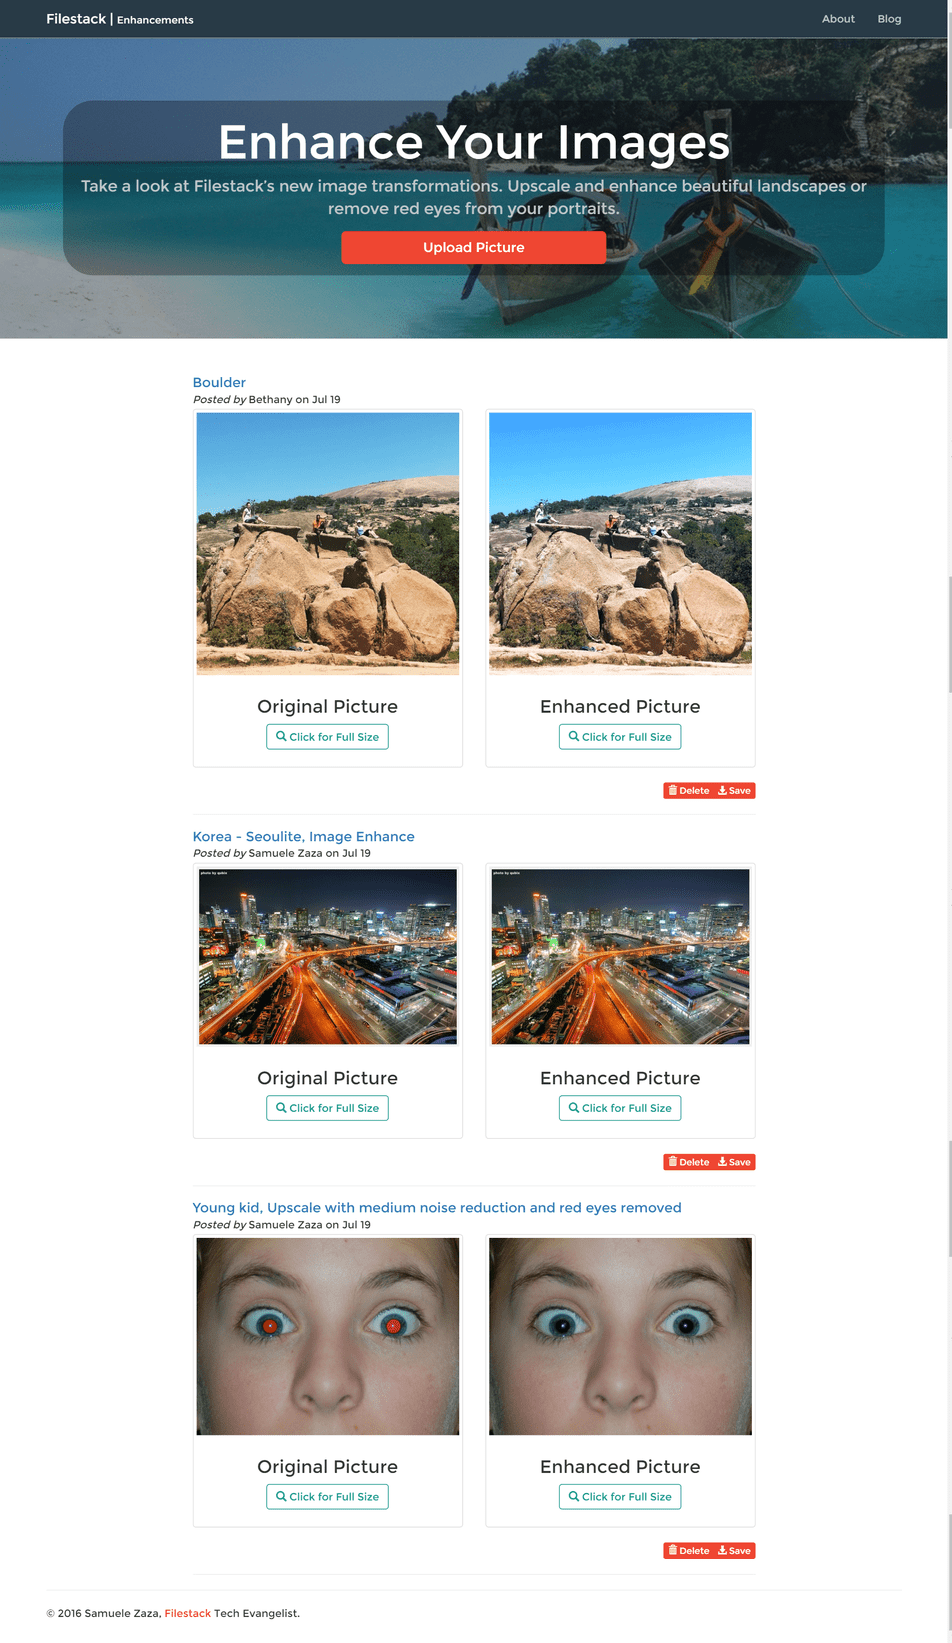
As I never tire of repeating – Filestack shines when it comes to manipulating images. My last post on image enhancements demonstrates the depths and magnitude of our transformations, and this post will continue down the images path to make a new app for creating photo collages.
And by the way, when you are ready to turn your app into a business, make sure to see our other post about how to integrate Snipcart for plug-and-play shopping cart functionality.
Posterstack
So that’s the name of the app (I am not original at all) but how does it actually work?
In few words, we let users to upload several pictures at once and define the size of the poster so that the Filestack API will process them and return a collage. You can see the demo app live here: https://posterstack.herokuapp.com/.
On the homepage, we are going to list all the posters we have in our in-memory database and also allow users to save or export their new creations.
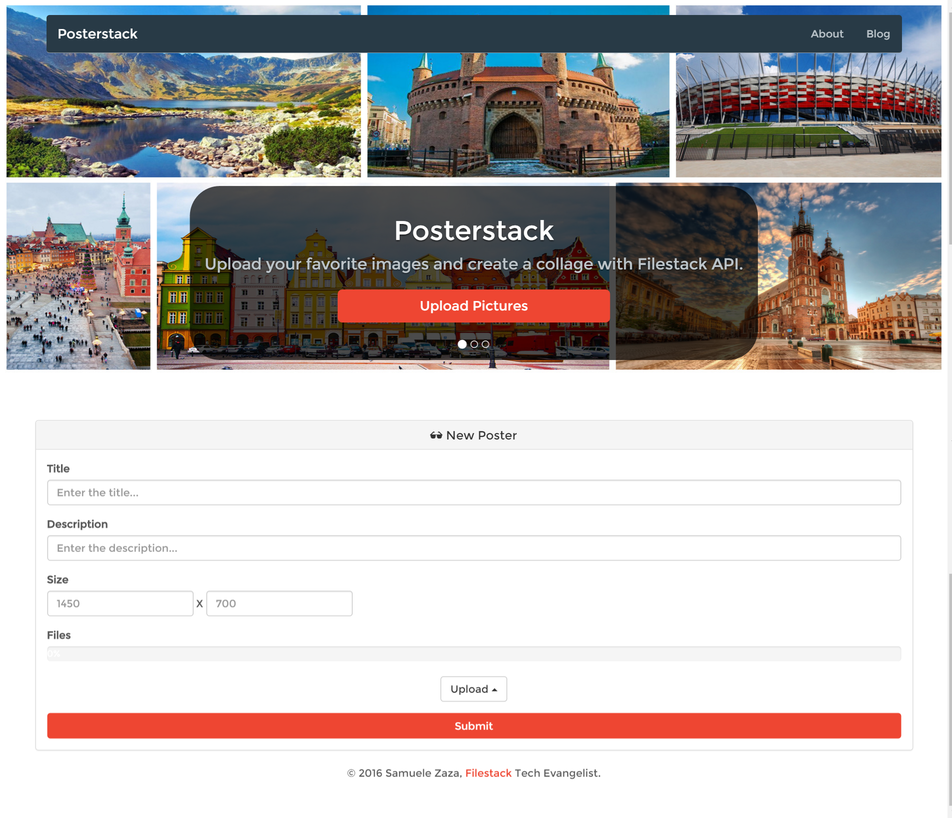
Let’s take a look at the homepage.
Since we want to give the feeling of a poster service app we have a nice carousel instead of the static jumbotron in the upper part of the homepage: This could be further exploited to show the carousel with the last 4-5 uploaded posters for example. After all, thanks to Filestack, we have complete control on the final poster size.
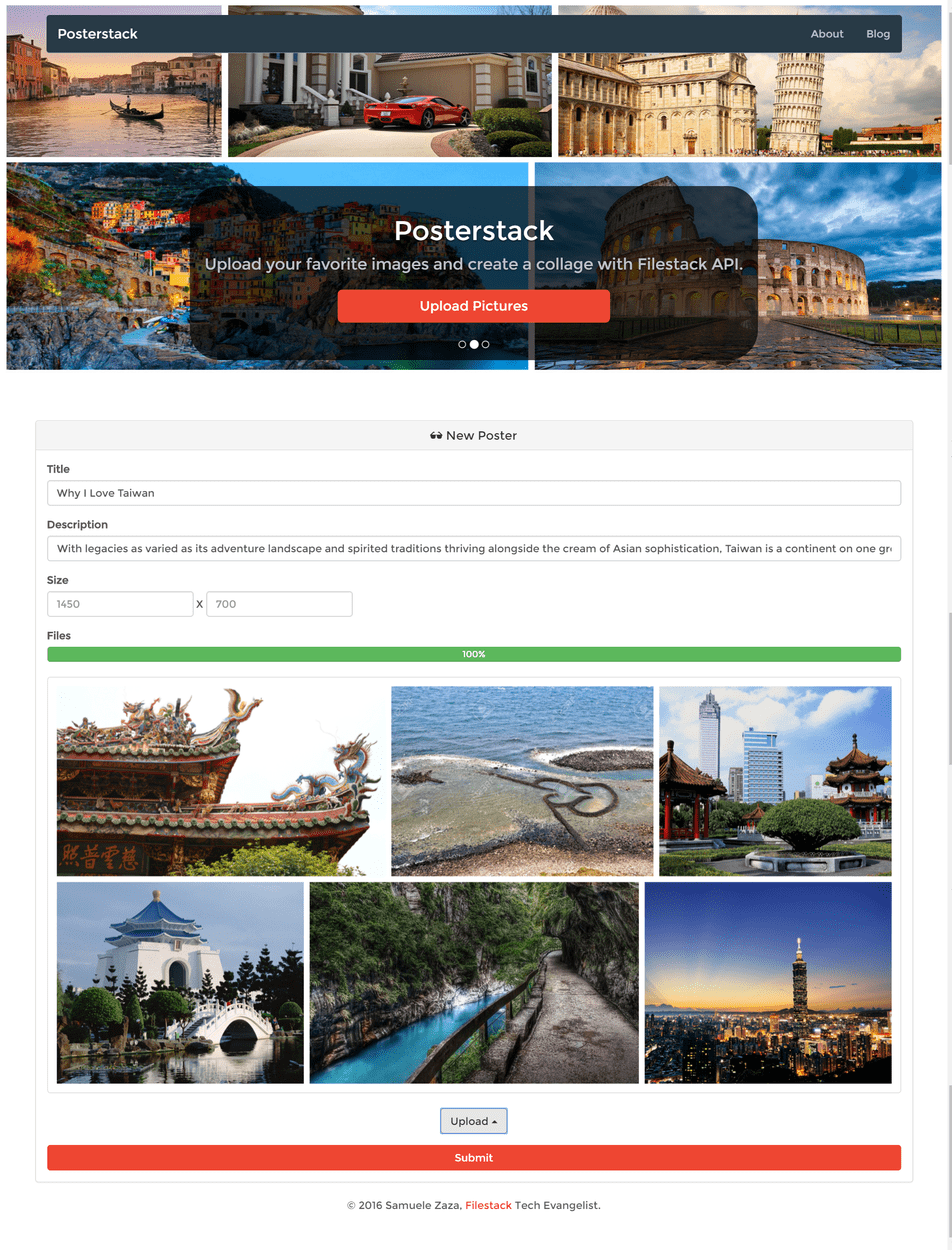
Finally let’s take a look at the uploading page.
In this page we are going to show the preview of the poster right beneath the upload button.
Last but not least, the app is built with node.js and JQuery as you can find the source code here.
Multiple Files Upload
The way we are letting users to upload their pictures is slightly different than the previous apps: This time they are supposed to upload more than a single file at a time and calling multiple times the pick function would end up in a poor user experience!
Here at Filestack the crew cares about every single detail so here it comes the pickMultiple function to help:
It is basically the same as pick but the options parameter allows for a property to define the max number of pictures to be uploaded in a single call.
So, let’s take a look at the code:
filepicker.pickMultiple(
  {
    mimetype: 'image/*',
    hide: true,
    services: ['COMPUTER', 'BOX', 'IMGUR','DROPBOX', 'GOOGLE_DRIVE', 'FACEBOOK', 'INSTAGRAM', 'URL'],
    maxFiles: 7
  },
  function(Blob){
    console.log(JSON.stringify(Blob));
    var url = createUrl(Blob); //Create the correct URL for the poster
    _this.data("doc-url", url);
    setTimeout(previewImage(url), 2000);
  },
  function(FPError){
    console.log(FPError.toString());
  },
  function(FPProgress){
    console.log(parseInt(FPProgress.progress));
    progressPercentage = parseInt(FPProgress.progress) + '%';
    $('.progress-bar').css('width', progressPercentage).text(progressPercentage);
  });
The option parameter is defined as follow:
1. The mimetype property restricts the files to be uploaded to mere images, we have seen this property many times already and I definitely prefer it than extension.
2. We hide the modal right after choosing the pictures to take advantage of the onProgress function and animate a progress bar made with Bootstrap. Again, throughout all the uploading process, the onProgress function will be fired to return the current completion percentage.
3. Services is an array which lists all the possible sources a client can use to upload pictures. For other allowed source please take a look at the complete list in the documentation.
4. Finally, the maxFiles which governs the number of simultaneous uploads set to 7, fair enough!
The other function parameters are exactly the same as the old pick function and my implementation is also the same: I run the progress bar for a better user experience and eventually show the preview of the collage to the user.
Making a Image Collage
I do think we should take a look at function createUrl because it manipulates the final result in the Blob object:
var createUrl = function(Blob) {
  var url = 'https://process.filestackapi.com/collage=files:[';
  var handlerList = [];
  var firstImage;
  Blob.forEach(function(image, index){
    if(index > 0) { //The first image is put at the end of the url
      handlerList.push(image.url.substring(image.url.lastIndexOf('/') + 1));
    } else {
      firstImage = image.url.substring(image.url.lastIndexOf('/') + 1);
    }
  });
  url += handlerList.join() + ']';
  //Set the final size
  url += ',width:' + ($('#width').val() || 1450);
  url += ',height:' + ($('#height').val() || 700);
  url += ',fit:crop/' + firstImage; // fit:crop for a result close to the set size
  return url;
}
I made the logic as simple as possible for an easy understanding of the steps to create the final URL:
First of all, the pick function returns a JSON file with some information about the finished upload as well as the URL of the picture.
Great, the pickMultiple does exactly the same but this time the pictures are more than one so we have to deal with an array instead!
Moreover, as we use the Filestack handle we need to extract it from the URL as you may notice from the loop.
Finally, the options for the size and fit are concatenated as well as the first image which becomes the filelink handle at the end of the URL.
NB: notice that if users does not specify the size the poster will be 1450 x 700 by default.
Let’s try to make a poster! I have just made one myself about the country I now live in, Taiwan:
And let’s take a look at the final URL:
https://process.filestackapi.com/collage=files:[6Oqg1Xg8TJin3NN66XuS,Ioj4IEePQpGDFvHBPKBT,T7Ko2GLTZSeEpRK33BpN,Zl0cOpySdWA4QVWNR1Kk,0fkJg2oZRqSNJKhcM6BQ],width:1450,height:700,fit:crop/IxWdhJlRLqWIMPLwSk2E
You can notice the list of Filestack handles, the options for the size and fit, the filelink handle.
Export the File
Now in the Homepage we have a new entry and we can actually export it:
Let’s take a look at the export function attached to the button:
var exportData = function(url) {
  var options = {
    suggestedFilename: 'myFilestackPoster',
    mimetype: 'image/jpeg',
    services: ['COMPUTER', 'FACEBOOK'],
    openTo: 'COMPUTER'
  };
  filepicker.exportFile(
    url,
    options,
    function(Blob){
      console.log(Blob);
  });
}
The first parameter is the URL of the file to be exported, then we pass an options object for the exportFile function:
1. SuggestedFilename is the proposed name for the picture.
2. We defined the mimetype in order to let the users save it as a .jpeg file.
3. We only allow users to export it on the their own local device or Facebook with the services property.
4. OpenTo defines the initial proposed service where the user can export to.
…And finally an onSuccess function to log the returning Blob.
That’s all! We made till the end and we have working app.
Conclusions
In the post I showed you how to take advantage of Filestack’s API to write an app to create collages given users’ initial pictures.
We went through all the steps of creating and saving the collage by showing how to use pickMultiple function and the similarities with pick.
Successively, we analyzed the Filestack’s API to process the initial images to create a collage and we also wrote a function to easily build the URL for that.
Finally, thanks to the exportFile function we let users to export their own creation.
Congrats!
Filestack is a dynamic team dedicated to revolutionizing file uploads and management for web and mobile applications. Our user-friendly API seamlessly integrates with major cloud services, offering developers a reliable and efficient file handling experience.
Read More →