
Every day, millions of photos and images are shared on the internet. From social media sites to websites and blogs, images are everywhere. Naturally, everyone wants to upload high-quality and visually appealing photos. However, sometimes we don’t get desired results even if we use a high-resolution camera to take pictures. This is where image editing comes in handy. When it comes to image editing for the web, JavaScript image editing is widely used.
Moreover, JavaScript is easy to learn, so you can quickly get started with JavaScript image editing. Also, it offers several benefits, such as faster performance, better user experience, and lower bandwidth usage.
In this article, we’ll show you how to edit images with JavaScript using both the native HTML5 canvas API and Filestack’s image editing features to enhance your photos and make them more attractive. Filestack is an easy-to-use JavaScript image editing library that offers a wide range of basic and advanced image editing features.
Why is image editing important in web design and development?
Images do more heavy lifting on a web page than almost any other element. They communicate information faster than a block of text, they hold a visitor’s attention, and they directly influence how professional a site feels. But they are also the single most common cause of slow-loading pages. An unoptimized hero image can easily outweigh every line of HTML, CSS, and JavaScript on the page combined.
On top of that, images have to work responsively. The same photo may need to render crisply on a 4K desktop monitor and load quickly over a mobile connection. Doing that by hand, image by image, simply doesn’t scale — which is exactly why developers reach for programmatic editing in the first place.
Image manipulation and editing also allow us to enhance images. For example, sometimes, we need to fix underexposed photos, adjust the brightness of photos taken in the dark, apply color correction, crop and rotate images, etc. Editing images using an image editor or Javascript image manipulation program allows us to enhance our photos quickly and easily. Moreover, you can add watermarks, compress images, and change aspect ratio using Javascript image manipulation libraries.
What are different image editing techniques?
Some of the most common image manipulation and editing techniques that you should look for in a Javascript image manipulation library or image editor include:
1. Cropping
Image cropping is one of the most common image editing techniques, which allows you to remove unwanted and distracting areas from an image. Thus, it helps enhance focus and improve composition. However, we should avoid excessive cropping as it can affect image quality and resolution.
2. Brightness
This is the simplest photo editing feature that every image manipulation library offers. Adjusting the brightness is particularly helpful for photos taken in dimly lit areas. It is also used to adjust the lighting of pictures that are too bright. Since changing brightness affects all parts of the image equally, achieving the right level to improve the visibility of darker areas of an image while ensuring other areas aren’t too bright can be challenging.
3. Contrast
When you adjust brightness, you usually need to adjust contrast as well. It essentially allows you to enhance highlighting in your images. Decreasing contrast provides a flat and even tone, whereas increasing it will sharpen your image.
4. Saturation
Saturation deals with image colors as it allows you to enhance or reduce the color intensity in your images. If you want to make your photos more vibrant, you can increase the saturation. However, If you want faded colors, decreasing the saturation will help. Moreover, you can desaturate an image completely if you want a black-and-white image.
5. Filters

Filters are the quickest and easiest way to enhance your photos and make them more attractive. Today, a wide range of filters are available, allowing you to add special effects to your photos. When you use a filter, you typically don’t need to adjust the contest, brightness, and saturation of the image separately.
In addition to the above-mentioned basic image editing techniques, you sometimes need advanced editing features. For example, you might need to add watermarks to your images, detect and highlight faces in an image, etc.
How do you get started with JavaScript image editing?
Before reaching for a library, it’s worth understanding what the browser gives you out of the box. The HTML5 <canvas> element is supported in every major browser, and the Canvas 2D drawing API — combined with plain CSS and JavaScript — is enough to build a custom image editor from scratch.
The trade-off is straightforward. Canvas gives you complete control over every pixel, but you also own the performance tuning, the browser quirks, and every edge case. A transformation API gets you the same result in a single line. Knowing both means you can pick the right tool for the job.
Pixel manipulation
The most fundamental canvas technique is reading the raw pixel data of an image and writing it back after modifying it. The getImageData() method returns a flat array of RGBA values — four entries per pixel — which you can loop over and change directly. This is how effects like color inversion, channel swapping, or selectively recoloring every tenth pixel are built.
const canvas = document.getElementById('editor');
const ctx = canvas.getContext('2d');
const img = new Image();

img.onload = () => {
  canvas.width = img.width;
  canvas.height = img.height;
  ctx.drawImage(img, 0, 0);

  const imageData = ctx.getImageData(0, 0, canvas.width, canvas.height);
  const pixels = imageData.data; // [r, g, b, a, r, g, b, a, ...]

  // Invert the colors
  for (let i = 0; i < pixels.length; i += 4) {
    pixels[i]     = 255 - pixels[i];     // red
    pixels[i + 1] = 255 - pixels[i + 1]; // green
    pixels[i + 2] = 255 - pixels[i + 2]; // blue
    // pixels[i + 3] is the alpha channel — leave it alone
  }

  ctx.putImageData(imageData, 0, 0);
};

img.src = 'your-image.jpg';
Pixel loops are also how scaling works under the hood. Scaling an image down on canvas is straightforward, but scaling up is where naive approaches fall apart — you end up with a blurry, soft result because there’s no additional detail to draw from. Filestack can upscale an image to twice its original dimensions while reconstructing detail, which is not something a simple canvas redraw can do.
Filters with the canvas filter property
The Canvas API natively supports a handful of filters — blur, brightness, contrast, and grayscale among them — through the filter property. You set the filter before drawing, and it applies to everything drawn afterward.
ctx.filter = 'grayscale(100%) contrast(120%) blur(2px)';
ctx.drawImage(img, 0, 0);
ctx.filter = 'none'; // reset before the next draw
These built-in filters cover the basics well. But building something like an oil paint effect, a partial blur, or face-aware pixelation by hand is a genuinely different order of work — that’s where a dedicated filter suite earns its place.
Cropping, resizing, and rotating with drawImage()
The nine-argument form of drawImage() handles cropping and resizing in a single call. You specify the source rectangle to cut out of the original image, then the destination rectangle to draw it into — so a crop and a scale happen together.
// drawImage(source, sx, sy, sWidth, sHeight, dx, dy, dWidth, dHeight)

// Crop a 400x400 region starting at (100, 50), then draw it scaled to 200x200
ctx.drawImage(img, 100, 50, 400, 400, 0, 0, 200, 200);

// Rotate 45 degrees around the canvas center
ctx.translate(canvas.width / 2, canvas.height / 2);
ctx.rotate(45 * Math.PI / 180);
ctx.drawImage(img, -img.width / 2, -img.height / 2);
Flipping works the same way using ctx.scale(-1, 1) for a horizontal flip or ctx.scale(1, -1) for a vertical one, applied before the draw call.
Animating and redrawing the canvas
Canvas isn’t limited to static edits. Because you control every frame, you can animate transitions, build live preview sliders, or drive full browser games and 3D effects. Two rules matter more than any other here.
First, the canvas must be cleared before each redraw with clearRect(), or every frame stacks on top of the last one. Second, use window.requestAnimationFrame() for the animation loop rather than setInterval() or setTimeout(). It syncs to the display’s refresh rate, avoids the timing drift those two suffer from, and pauses automatically in background tabs to save battery.
function animate() {
  ctx.clearRect(0, 0, canvas.width, canvas.height);

  // draw the current frame here

  requestAnimationFrame(animate);
}

requestAnimationFrame(animate);
In terms of efficiency, the ranking is clear: requestAnimationFrame first, then setTimeout and setInterval as fallbacks.
How can Filestack help you with JavaScript image editing?

Filestack offers a set of APIs and tools you need to manage your digital assets efficiently. It essentially helps with file uploads, transformation, and delivery for your web app. When it comes to JavaScript image editing, Filestack has a processing API that offers a wide range of image transformation, manipulation, and editing features. You can edit and manipulate images through the processing API using the CDN URL returned by Filestack when you upload a file using the Filestack File Uploader. Filestack also offers image intelligence features, such as image tagging and captioning.
Here are some of the most useful image editing features of Filestack:
Basic image editing
Resizing
You can resize images with Filestack processing API by altering the height and width of a photo and modifying its fit and alignment.
Here is an example code for image resizing:
https://cdn.filestackcontent.com/resize=w:500/HANDLEYou can also control how the image fills the dimensions you’ve asked for by adding a fit parameter:
https://cdn.filestackcontent.com/resize=width:800,height:800,fit:scale/HANDLEThe available fit options are:
- clip: Resizes the image to fit within the given dimensions while keeping the original aspect ratio. Nothing is cropped.
- crop: Fills the given dimensions exactly and trims off whatever doesn’t fit.
- scale: Stretches the image to the exact dimensions, ignoring the original aspect ratio.
- max: Behaves like clip, but never enlarges an image beyond its original size.
When you use crop, the align parameter decides which part of the image survives — useful when the subject sits off-center.
Crop and smart Crop
Cropping images with Filestack is easy; you need to provide coordinates and crop dimensions. Filestack also offers a smart crop feature, allowing you to programmatically manipulate photos so that you get the version of the photo that is exactly the shape you want without affecting the aspect ratio. This feature removes the least interesting fragments from the original image. You can also change the color of the bars that appear after the image is cropped.
Here is an example code for a basic smart crop:
https://cdn.filestackcontent.com/smart_crop=width:400,height:400/HANDLEOriginal photo:
Output image:


Rotate, flip, and flop
Filestack allows you to rotate images clockwise from 0 degrees to 359 degrees. For example, you can use “rotate=deg:180” with the base URL to rotate an image to 180 degrees. You can also flip or flop a photo in a vertical or horizontal direction.
Filters
Filestack also provides a variety of image filters:
- Monochrome
- Sepia
- Sharpen
- Pixelate
- Blur
- Partial blur
- Black-and-white
- Oil paint
- Negative
- Modulate
Advanced image editing
Enhance images
With Filestack’s enhance feature in the paid plans, you get a range of presets to enhance your photos:
- Vivid: Enables users to add brightness and depth to images.
- beautify: Automatically detects each face in the photo and applies enhancements.
- fix_noise: Automatically detects noise in the image and uses sophisticated noise-removal techniques to get rid of any grains without affecting details.
- fix_dark: Turns off the contrast and recovers maximum detail shadows in the image. This is mainly used for highly underexposed pictures.
- fix_tint: This preset removes abnormal tints like green, blue, or yellow from images.
- outdoor: Adds more vibrancy to landscape photographs.
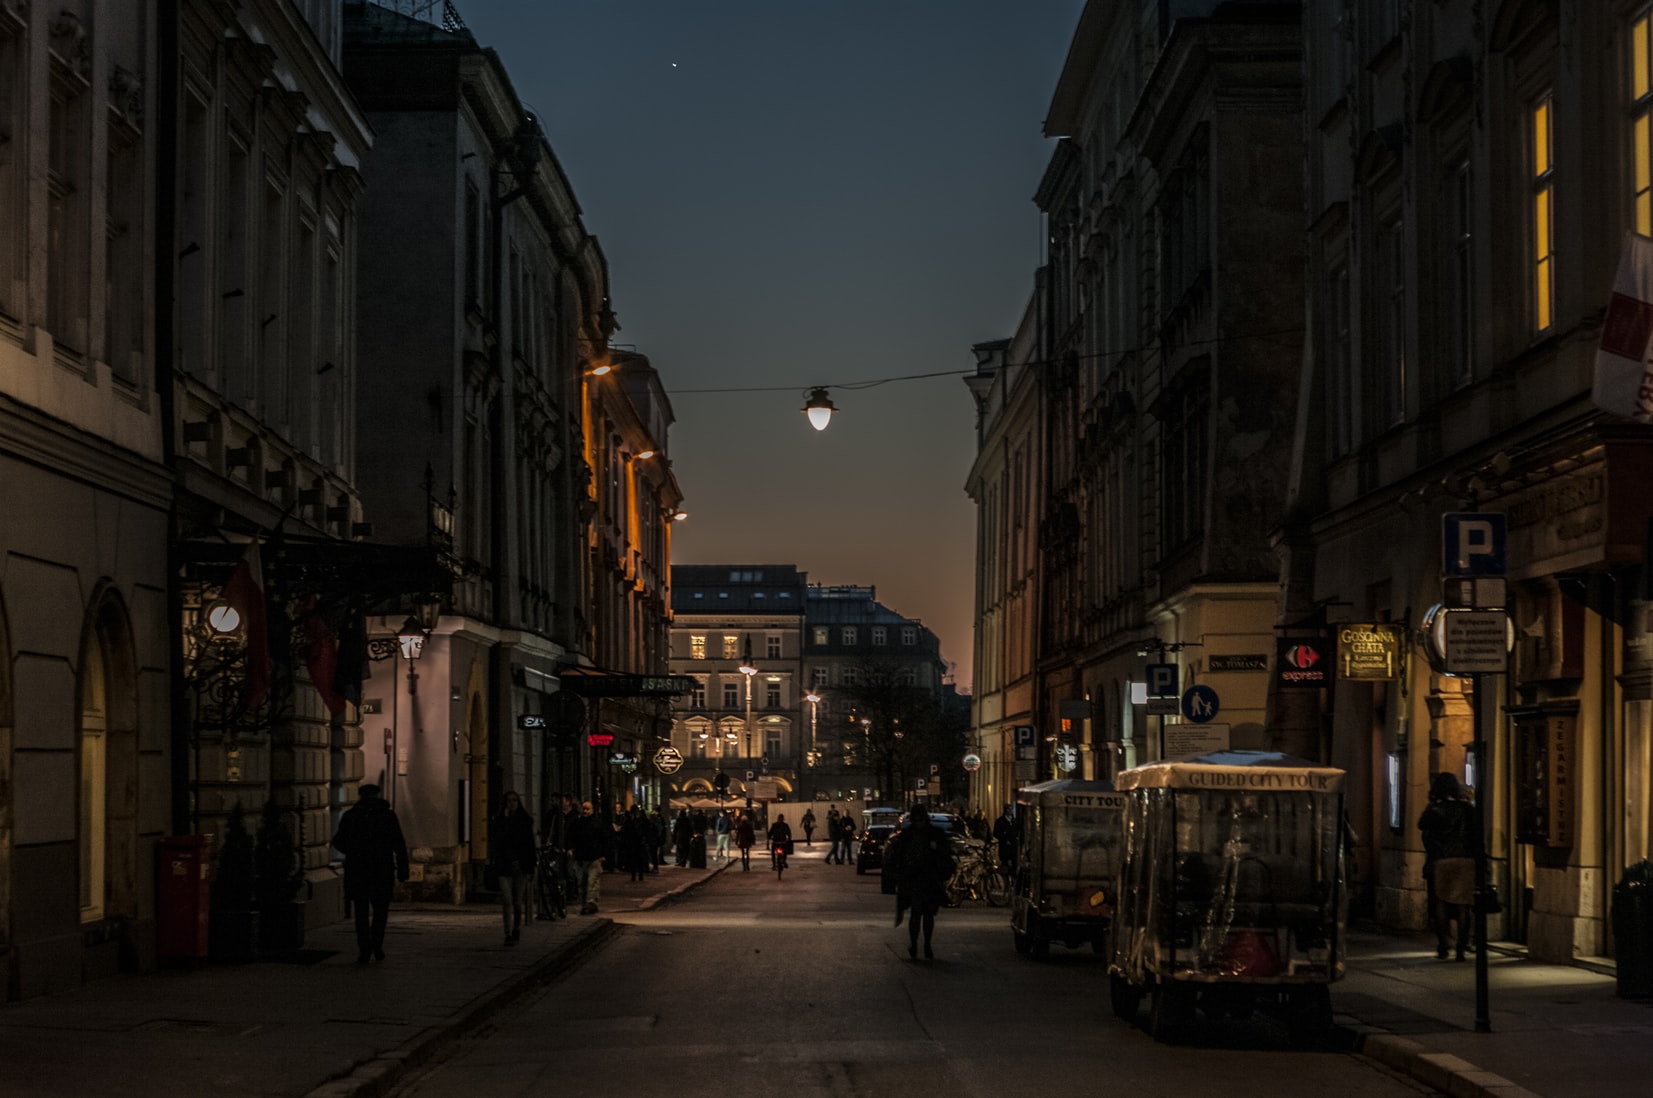
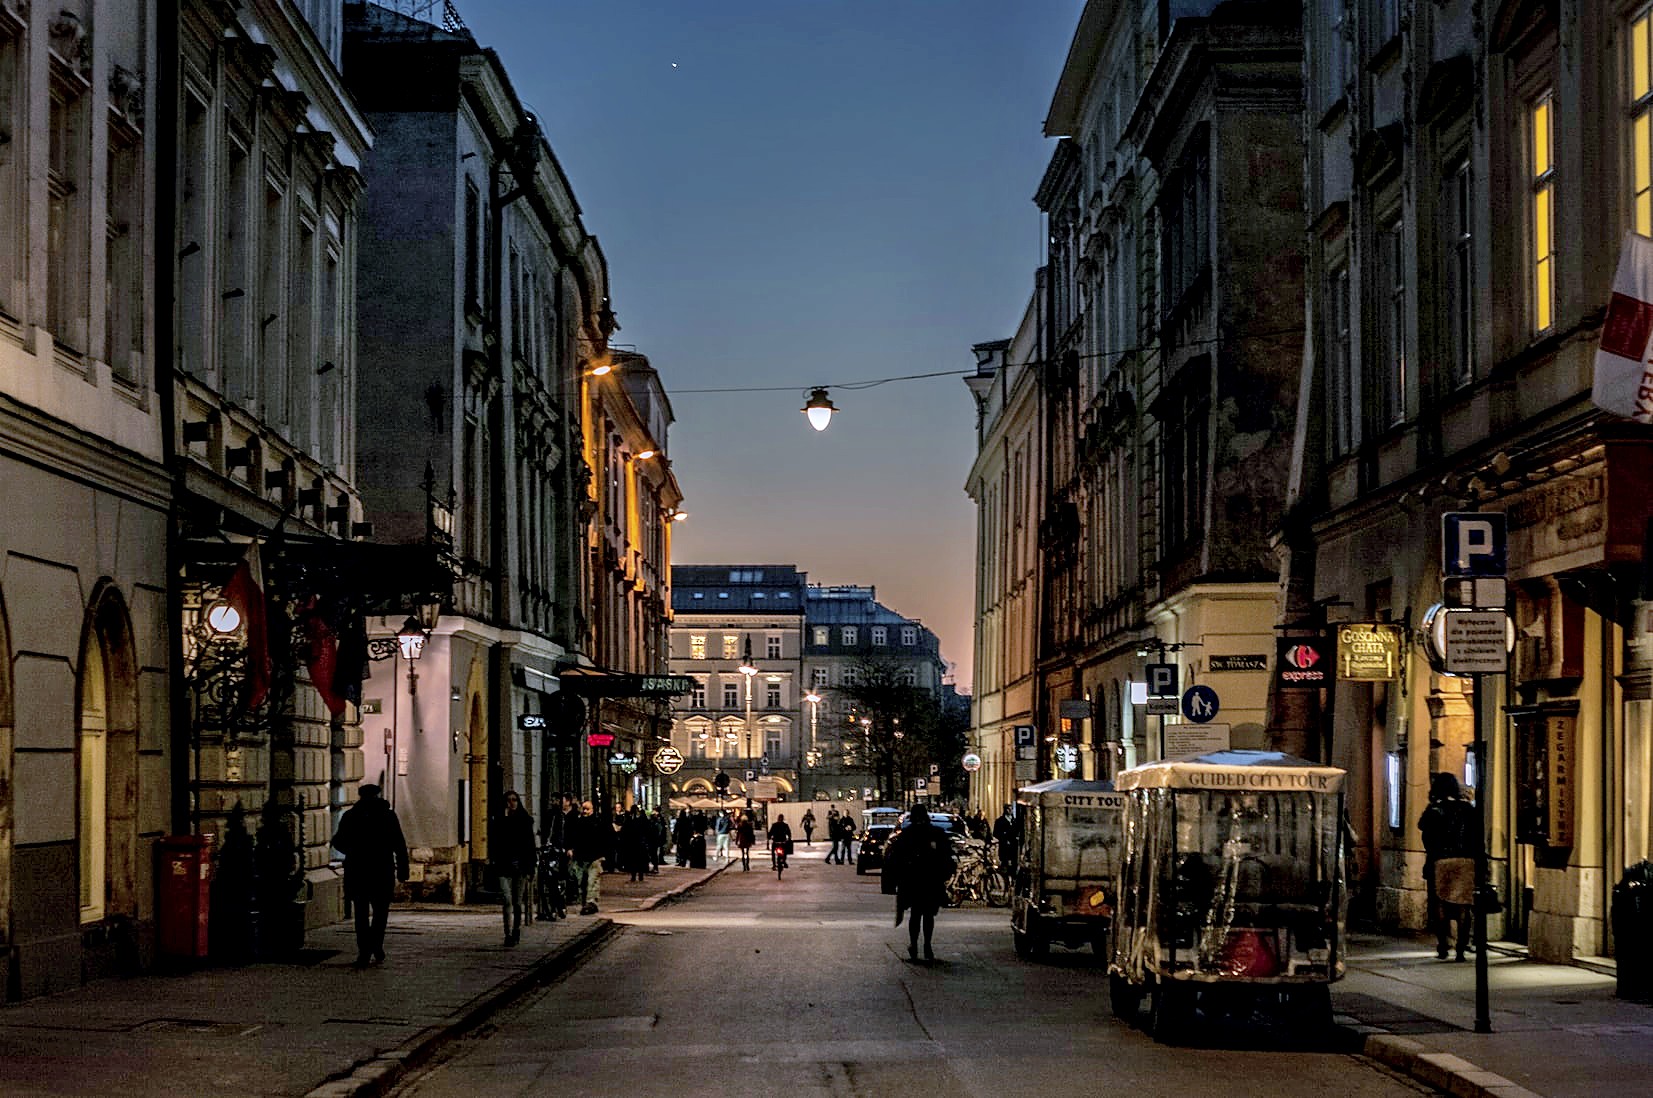
Here is how you can use the fix_noise preset:
https://cdn.filestackcontent.com/enhance=preset:fix_noise/HANDLEOriginal image:
Output image:
You can also use this feature to enhance an image automatically without using the above presets separately:


https://cdn.filestackcontent.com/enhance/HANDLEOriginal image:
Enhanced image:
Watermark
When you want to add watermarks to your image, you can use the following command with the base URL: ‘watermark=position:[middle, center]’.This is done by overlaying one photo on top of another.
Compress
Filestack also allows you to compress an image (PNG or JPG file) to reduce its size in bytes without affecting the image quality.
Red-eye removal
Filestack also enables users to remove the redeye effect from their pictures using the redeye parameter.
Image borders and effects
Filestack offers the following image borders and effects:
- Polaroid
- Rounded corners
- Torn edges
- Shadow
- Circle
- Vignette
- Border
Facial detection
With this feature, you can programmatically detect faces in a photo and highlight them, crop the photo to only show the around the face, etc. You can also use this feature to detect and blur or pixelate faces.
How do you optimize images for the web?
Editing an image and optimizing it for delivery are two different jobs, and the second one is where most sites lose ground. A beautifully edited photo that takes four seconds to load has already cost you the visitor. Here’s what actually moves the needle.
Use the right file format
Format choice is the highest-leverage decision you’ll make. JPG/JPEG remains the default for photographs, PNG is the right pick when you need transparency or sharp-edged graphics like logos and screenshots, and GIF still handles simple animation.
Modern formats are worth adopting, though. WebP is supported across all current browsers and typically cuts 25–35% off an equivalent-quality JPEG, and AVIF pushes compression further still. Filestack supports conversion between 200+ file types, so switching formats is a URL parameter rather than a build step:
https://cdn.filestackcontent.com/output=format:webp,quality:80/HANDLEReduce image pixel dimensions
Serving a 4000px-wide image into an 800px container is one of the most common performance mistakes on the web. The browser dutifully downscales it for display — but only after paying the full download cost. Match your delivered dimensions to the size the image will actually be displayed at, and serve smaller variants for mobile breakpoints.
The balance to strike is between preserving enough quality for high-density displays and keeping the transfer small enough to load fast.
Reduce image file size
Beyond dimensions, compression reduces the byte size of an image with little to no visible quality loss. Filestack’s compress feature handles this for PNG and JPG files automatically.
One easily-missed win: strip the metadata. EXIF data, GPS coordinates, camera settings, and editing history ride along inside every photo and add weight to every single file you serve. On user-uploaded content, that embedded location data is also a real privacy concern. Removing it makes files smaller and safer at the same time.
Javascript Image Editing in Summary
JavaScript image editing allows you to crop, resize, rotate, and flip photos, adjust your images’ brightness, saturation, and contrast, add filters, and more. The HTML5 canvas API gives you full pixel-level control if you want to build an editor yourself, while a processing API handles the same transformations — plus the advanced ones like smart cropping, face detection, and format conversion — in a single URL. So, if you’re looking for an easy-to-use JavaScript image editing library that supports a wide range of basic and advanced image editing features, Filestack is definitely the right choice.
Frequently asked questions (FAQs)
Can you use JavaScript for image editing and manipulation?
You can use canvas API or<canvas>HTML 5 element for JavaScript image editing. However, if you’re looking to edit images with JavaScript quickly, you can use a JavaScript editing library like Filestack.
Is image editing using JavaScript easy?
The basics are approachable — drawing an image to a canvas, applying a filter, or cropping with drawImage() takes only a few lines of code. Production-grade editing is a different story: face detection, smart cropping, format negotiation, and upscaling are all substantial engineering problems on their own. Tools like Filestack close that gap, letting you apply filters, crop, resize, rotate, and enhance image quality without building any of it yourself.
How do you create a new image using JavaScript?
Create a canvas with document.createElement('canvas'), draw whatever you need onto its 2D context, then export it with canvas.toDataURL() for a base64 string or canvas.toBlob() for a binary file you can upload.
How do you save an edited image from a canvas?
Use toBlob() to convert the canvas contents into a file, then trigger a download with a temporary object URL:
canvas.toBlob((blob) => {
  const url = URL.createObjectURL(blob);
  const a = document.createElement('a');
  a.href = url;
  a.download = 'edited-image.png';
  a.click();
  URL.revokeObjectURL(url);
}, 'image/png');
What is the best JavaScript image editor?
Some of the best JS image editors include Filestack, Filerobotgr, and Pintura Image Editor.
Sign up for free and start editing your images with Filestack File Processing!

Sidra is an experienced technical writer with a solid understanding of web development, APIs, AI, IoT, and related technologies. She is always eager to learn new skills and technologies.
Read More →