


Being a developer involves an intricate understanding of various tools and frameworks. One such invaluable tool is Postman, particularly for file uploads. In this article, we’ll explore the how-tos of Postman, its benefits, limitations, and steps to upload a file using it. We’ll also touch upon alternative methods for file uploads. Postman to send a file is one of those life-saving tools.
What do I mean?
As a developer, you don’t only need to know how to use syntaxes, you need to know how to create, build and share. This means you need to be comfortable with Postman File Upload software applications, when to use them, and how.
This isn’t only true for developers. As internet or social media users, everyone needs to have some basic knowledge of how to upload files. Because of this, the article below will give you a basic understanding of Postman upload file software.
This article will introduce Postman and provide a step-by-step guide to Postman file upload. So, let’s get down to business.
What is Postman?
Postman is a user-friendly HTTP software application that acts as a platform for developers to test, develop, share, create, and build APIs efficiently. Let’s delve deeper into what API and HTTP mean to appreciate Postman’s capabilities better.
Why do We Use Postman Upload File to Upload Files?
Postman upload file is a client-based, user-friendly tool. More than 9 million people use it. These are some of the reasons why:
- Postman is faster. All you need to do is install it on your device and you’re good to go.
- Easy to share your collections through links or your app to teams in their workspace.
- Vast community support, so you know where to go if you need additional help.
- Comprehensive and customizable for any use case
- Supports the merging of developers’ work to a shared mainline.
API and HTTP: A Quick Primer
The Application Programming Interface (API) serves as an intermediary between two software applications, facilitating their interaction. In the context of Postman, APIs allow functionalities such as Digest authorization, Basic authorization, Bearer token, Hawk authentication, API keys, and AWS signature.
Hypertext Transfer Protocol (HTTP), on the other hand, is the protocol used to access and transfer data on the world wide web, ranging from text, video, audio, and more.
Creating a Filegroup in Postman
Creating a filegroup in Postman is a straightforward process. Here are detailed steps, complemented with what you should see after each step and possible issues you might encounter:
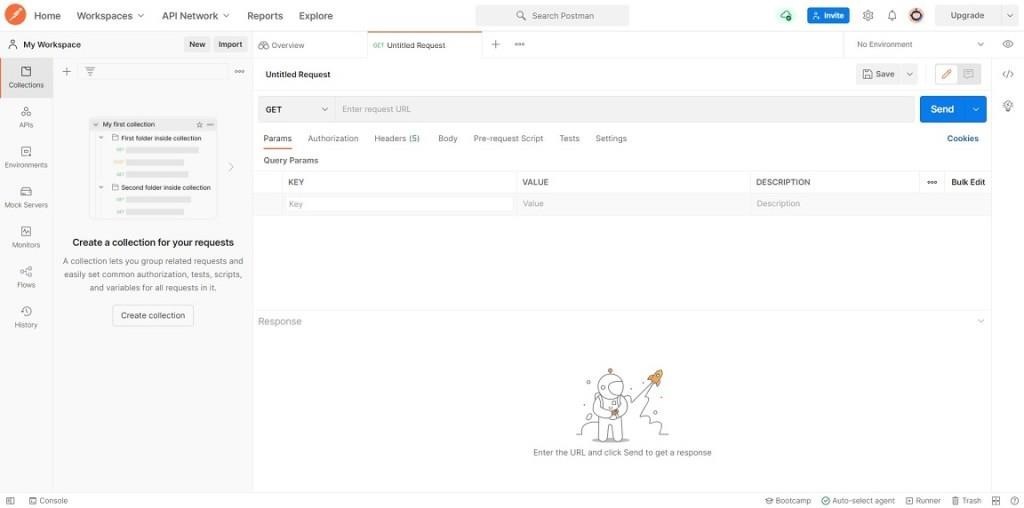
Step 1: Begin by downloading and installing Postman on your computer. Once the installation is successful, you should see the Postman interface.
Step 2: Create a new request. A blank request tab should appear.
Step 3: Change the request type to ‘POST’.
Step 4: Set ‘https://www.filestackapi.com/api/store/S3‘ as the request URL, which is the Filestack API endpoint for file uploads.
Step 5: Alter the body tab to ‘form-data’.
Step 6: Attach keys and link them to files. Finally, hit ‘Send’ and await your response.
Finally, click close and wait for your response.
What are the Limitations of Using Postman File Uploads?
- You can’t use it to upload 1000+ files
- When the files are large, it’s not easy to manage the collections and request
- It doesn’t manage files when it comes to code.
Understanding these limitations can help you strategize your file uploads more effectively.
How can You Save API Responses to a File in Postman?
You can save API responses in Postman by clicking on the ‘Download’ icon in the response section. Alternatively, go to the ‘Send’ section and click on ‘Save’. A download option will appear. Following that, Postman will ask for a destination to save the response.
What are Collections in Postman?
These are set of API requests stored in the Postman and can be assembled in a folder. The collection doesn’t have a specific amount of folders that it will contain. Collections assist the user to better document their request.
Benefits of Collections
These are some of the benefits or reasons why you need a collection:
- It saves time because the collection is capable of importing and exporting requests, so you import and export instead of the long process of transferring the request.
- Requests are easy to access because it has already been filed in a folder.
- It allows you to personalize your request by adding names and descriptions.
- It makes it possible to run personal requests as a whole in Postman.
What does POST Request Serve as in Postman?
Use the POST when you want to send extra information to the server through your request. Changes are expected to happen when a POST request is sent to the server, like updating and inserting.
How do I Use Postman to Upload Files?
These are the steps taken to upload a file using Postman:
Step 1
Call the APIs using POST HTTP. This automatically creates a Postman template.
Step 2
Go to the collection tab and create a file processing method. You have options like upload and download to visualize your file on this file.
Step 3
Then, make a Postman echo request and clear the body contents. Build a form data body to visualize the file as the upload is going on.
Step 4
Select ‘form-data’ as the body type by clicking on the body. Next, give a key to the file, which will come out as select files. Click on the select files to open your window. Then proceed to find your file.
Step 5
When you find it, click open to automatically upload your file.
Exploring More on File Uploads
This guide provides a solid foundation for using Postman for file uploads. However, the world of file uploads is vast and constantly evolving. Filestack is an excellent resource to continue your exploration and find more advanced and varied file uploading options.
Alternative Tools for File Uploads
While Postman is a highly efficient tool for file uploads, it’s worth exploring other tools like Curl, Swagger, or Insomnia. Each has its unique advantages and use cases, and understanding these can help you choose the best tool for your specific needs.
We hope this article provides a useful introduction to Postman and its use for file uploads. Do you have any experiences, questions, or tips related to file uploads using Postman or other tools? Share them in the comments below! For further reading, you can check out our other blog posts related to APIs, HTTP, and file management.
Want to Explore More on File Uploads?
This is just the basics of Postman and uploading files using Postman. Do you want to explore more on file uploads? Then all you have to do is visit Filestack, and you can get 100% genuine information and better options.
What are you waiting for? Check out the best file uploading options with Filestack.


Filestack is a dynamic team dedicated to revolutionizing file uploads and management for web and mobile applications. Our user-friendly API seamlessly integrates with major cloud services, offering developers a reliable and efficient file handling experience.