When you scan documents like invoices or receipts, they might be rotated, folded, or blurry. To work with them you need a process to detect your document inside, generate its bounding box, transform the detected document to fit the whole image (keeping its aspect ratio), and pre-process it to increase the OCR (optical character recognition) accuracy.
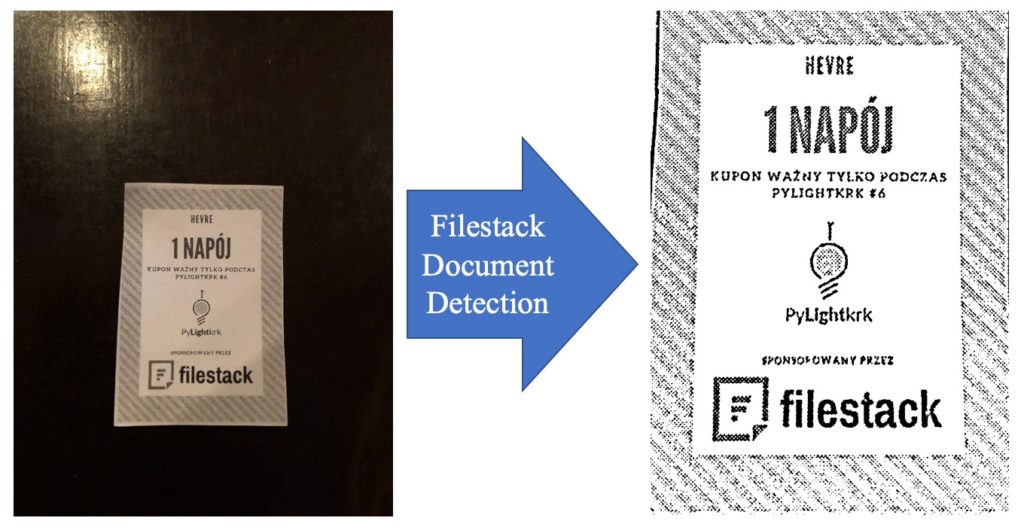
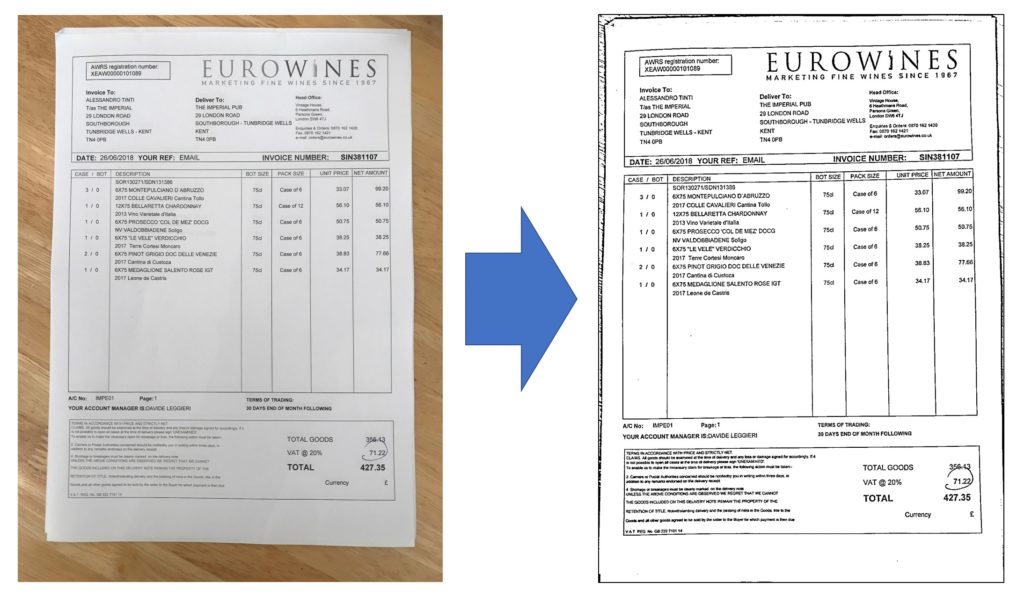
Here at Filestack we’ve developed a state-of-the-art model as one of our latest intelligence services to ease this process for you. Figure 1 shows an example of what Filestack’s Document Detection service does to find your document inside of an image and preprocess it.
If you would like to use this service, reach out to Filestack team to add it to your application.
In this blog, we’ll address how to use the Document Detection service in both synchronous and asynchronous tasks, as well as describing under the hood and how you can leverage it in your business. In one of our latest blog posts; Document Detection, Enhancement, and Preprocessing API, we have explained technical details of this feature and various techniques we used in order to solve this problem.
How to use Document Detection
Like most of the intelligence tasks at Filestack, generally there are two ways to use this service; synchronously using Filestack Processing API request, or asynchronously using Filestack Workflows.
Asynchronous method
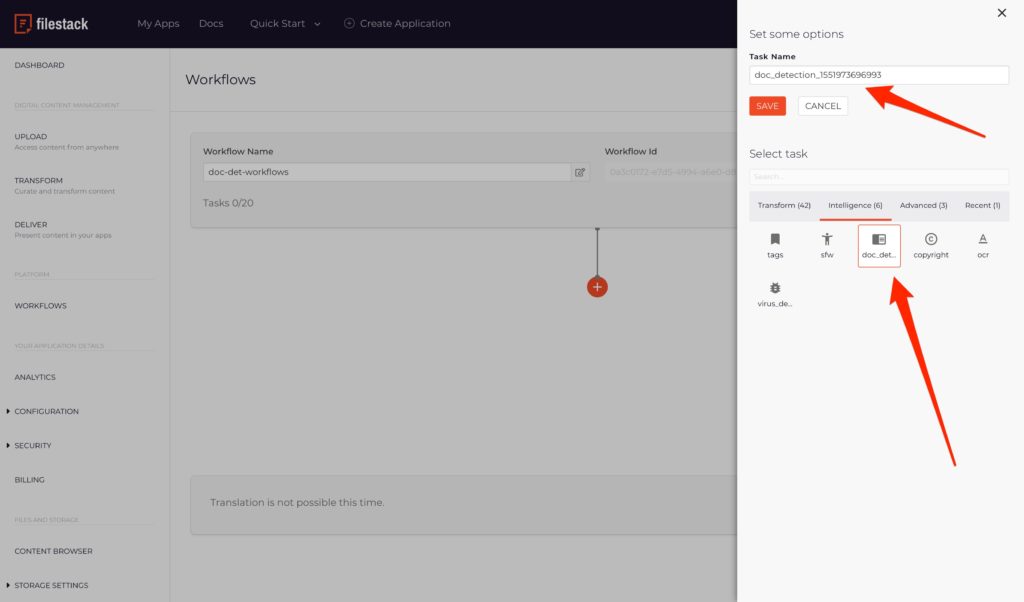
Workflows is one of our most popular Filestack platforms for using different services and tasks. Using Workflows you can use the UI (user interface) to build your services as well as the logic for your business. For using Document Detection, you can find it under intelligence tasks. Figure 2 shows an example of where you can find Document Detection in Filestack Workflows. Considering the complete instruction for triggering Document Detection workflows, you can configure webhooks to receive the result of Document Detection Workflows on your uploaded images. If you have any further questions, please contact our support team.
Synchronous method
If you wish to use Document Detection service synchronously, we have two solutions for it; using our Processing API in URL request or sending a POST request.
- Using external URL in your browser
- Sending a POST request to Filestack
Hint: Please be advised that your input image has to have a resolution no larger than 2000×2000 pixels. To use the Filestack resize service, please follow this link.
Prerequisite: Before starting these procedures, you need to make sure that you are using our Security with generated Policies and Signatures. For learning more about how to use security and to activate it, take a look here and follow our security instructions.
Synchronous method using external URL:
In order to use the Filestack Processing API with an external URL, first, you should have the handle of your uploaded image, and then you can use the URL structure below to get the result of this service in your image at any supported browser:
https://cdn.filestackcontent.com/security=policy:<”YOUR_BASE64_ENCODED_POLICY”>,signature:<”YOUR_HMAC-SHA256_SIGNATURE”>/doc_detection/<”YOUR_IMAGE_HANDLE”>
The result of this URL would be the final output of Document Detection service.
Synchronous method using POST request
For sending a POST request, you can use Postman. You can send a POST request to the above-mentioned URL, and then, you’ll receive a JSON response of the output like the example below:
[code]{
‘filename’: ‘IMG.jpg’,
‘handle’: ‘bwMOzwIfQZWa1ccZrRgJ’,
‘height’: 1911,
‘size’: 569697,
‘type’: ‘image/jpeg’,
‘url’: ‘https://cdn.filestackcontent.com/bwMOzwIfQZWa1ccZrRgJ’,
‘width’: 630
}[/code]
The response of the POST request indicates all information of the output generated by Document Detection service, such as the name (the same as the original image), handle, size, dimensions, mimetype, and the URL.
How does Document Detection work?
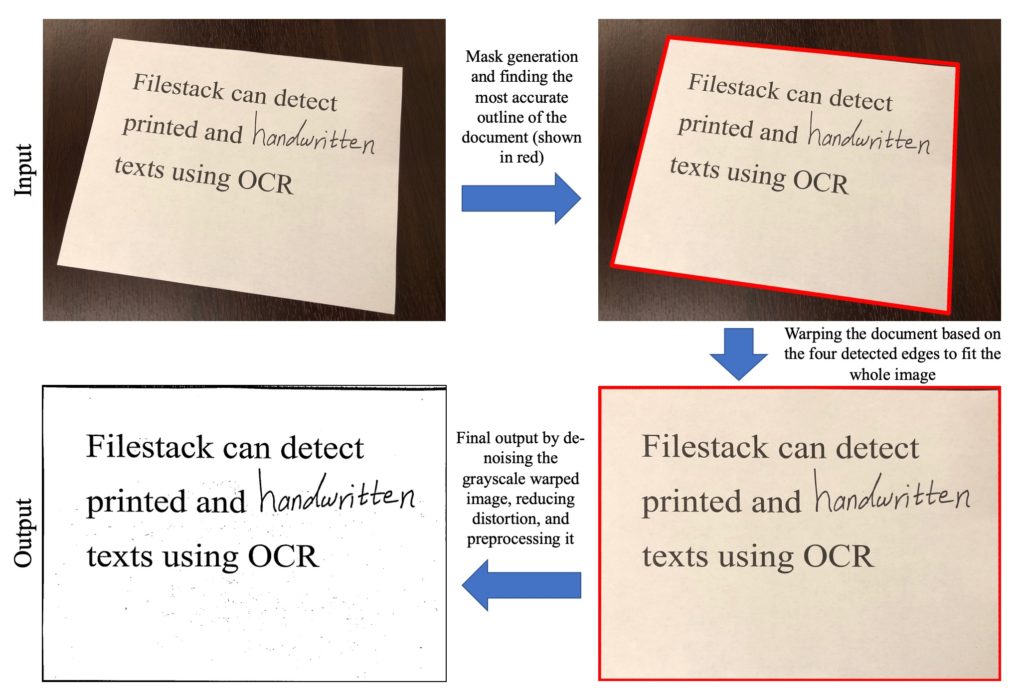
Document Detection works in four main steps:
- Generate the detected mask of the document in the image for segmentation using our custom designed deep neural network that has trained over thousands of image files.
- Find the most accurate circumscribed polygon over the detected mask. This part would find the predicted perspective edges of the document within the image.
- Warp the predicted document in the image to fit the whole image, all while keeping its aspect ratio. This part would fix any rotation, etc. in the document.
- Denoising the warped image, fixing the distortions, and generating the final result.
Figure 3 shows an example of the above process in finding the most accurate document within the original image.
More examples?
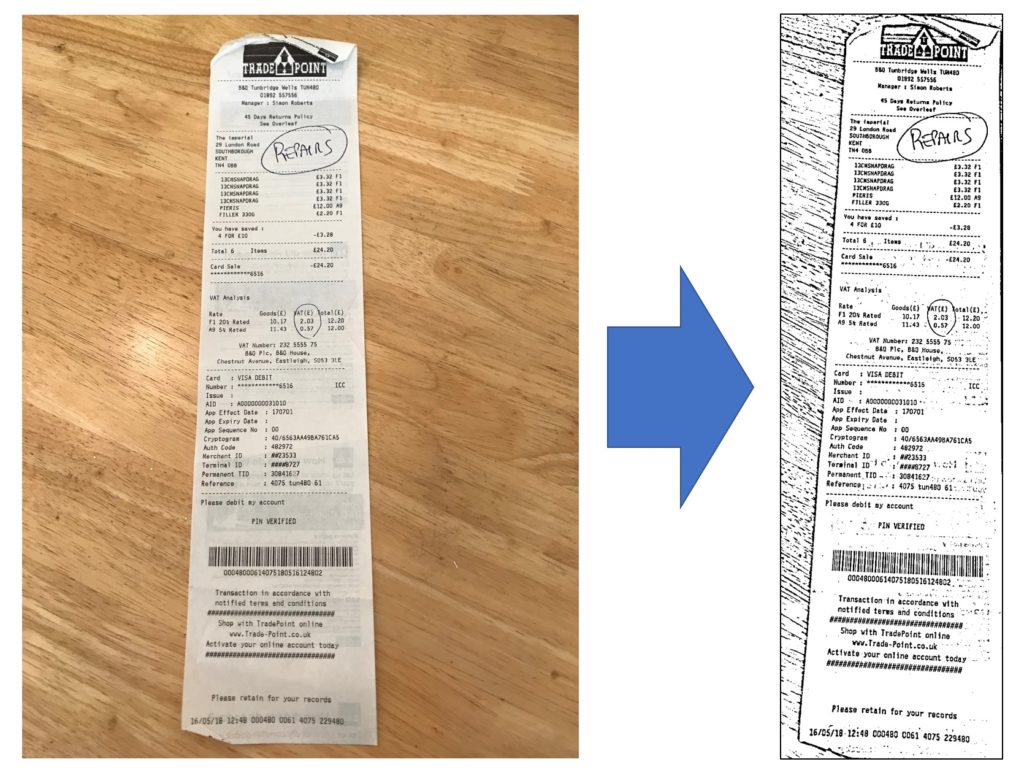
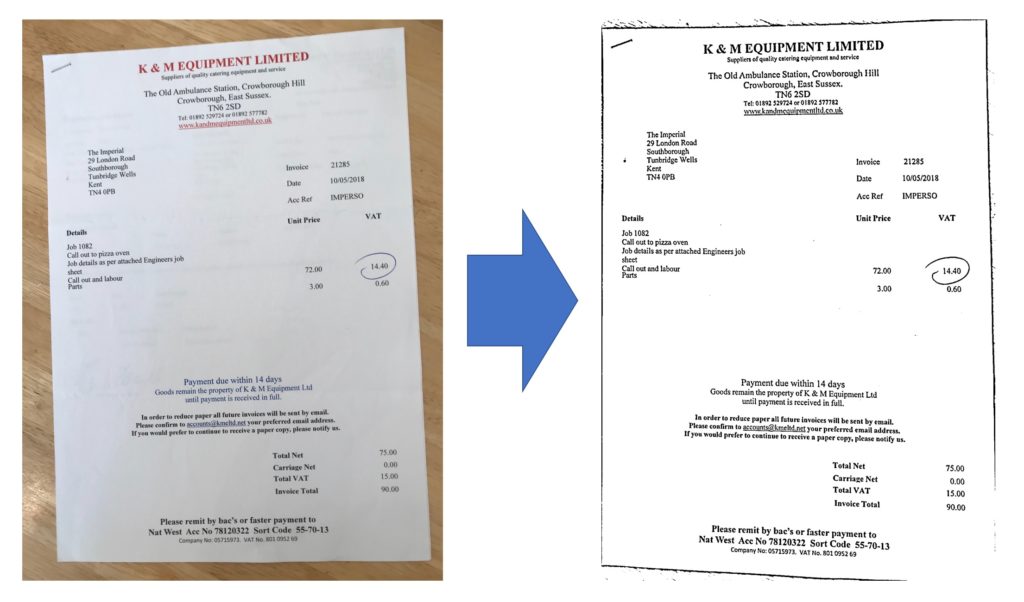
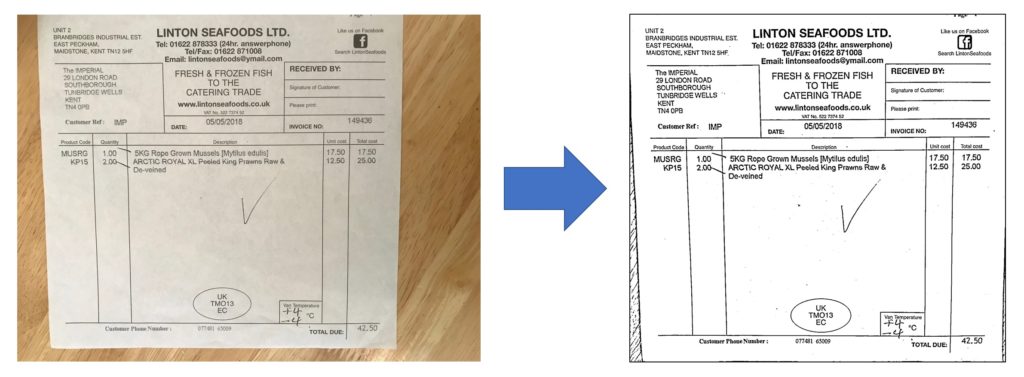
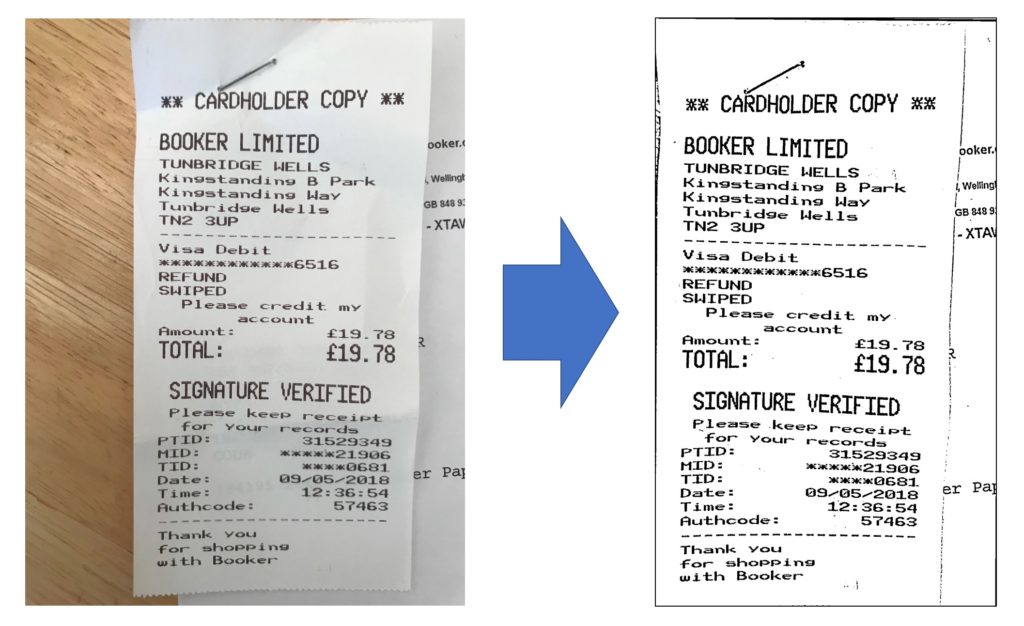
The following figures are pairs of input-output using Filestack Document Detection service.
Wrap up
This blog has addressed Document Detection service by Filestack, how it works, what is going on under the hood, and some examples of using it with different images. If you need further help with any part of this service, please contact our support team.
Filestack is a dynamic team dedicated to revolutionizing file uploads and management for web and mobile applications. Our user-friendly API seamlessly integrates with major cloud services, offering developers a reliable and efficient file handling experience.
Read More →