In the world of digital images, making your pictures look great is crucial. Filestack’s Transformation UI can help you enhance your images quickly and easily. Filestack’s Transformation UI lets you make your images look better with just a few clicks. You can adjust things like brightness, contrast, and size, and add filters and effects to give your images a professional touch. The best part is, you can see the changes in real-time and make adjustments until you’re happy with the result.
What sets Filestack’s Transformation UI apart is how fast and easy it is to use. Instead of spending a lot of time editing your images manually, you can achieve great results in just a few minutes. This saves you time and effort, so you can focus on creating amazing content. In this blog post, we’ll take a closer look at Filestack’s Transformation UI. We will also show you how you can use it to make your images look their best. Let’s start our journey now. .
What is a transformation UI?
A transformation UI is like a toolbox for editing pictures and other media files. It’s a part of an application that shows you buttons, sliders, and menus to change how your images look. With a transformation UI, you can do things like:
- Make a picture smaller
- Cut out a part you don’t want
- Add cool effects like filters.
The idea behind a transformation UI is to make editing easy for everyone. You don’t need to be an expert to use it. You can just click and drag things around until your picture looks just right. It’s like having a virtual artist’s studio on your computer screen.
People use transformation UIs for all sorts of things.
- They might want to make their photos look better for social media
- Or they might need to edit images for work.
Whatever the reason, a transformation UI makes it simple and quick to get the results you want.
What are the benefits of integrating a transformation UI?
Integrating a transformation UI into your app or system has many benefits.
✔️It helps users change and organize data quickly. This saves time and makes work easier.
✔️With a transformation UI, users can see changes to their data in real-time. This lets them fix any mistakes before saving.
✔️The UI is easy to use, even for people who aren’t tech-savvy. They can use it without needing special training.
✔️A transformation UI is flexible. Users can adjust it to fit their needs. This is helpful when different users have different needs.
✔️The UI can also work well with other tools. This means data can move between apps smoothly. This makes work more efficient.
How do you integrate a transformation UI?
You will find many methods to integrate a transformation UI. For example, you can also write a code from scratch to create a transformation UI. However, this method can be highly time consuming. To save your time and efforts, the best method is to use an API. Filestack makes it possible for you. Let’s explore how.
Filestack
Transformations UI enables users to easily transform images with a modern interface. This mobile-friendly solution offers various image editing features, such as:
- Applying filters
- Adjusting sizes
- Enhancing the user experience.
👉To integrate Transformations UI into your web application, include our UMD module in your code:
<script src="https://static.filestackapi.com/transforms-ui/2.x.x/transforms.umd.min.js"></script>

<link rel="stylesheet" href="https://static.filestackapi.com/transforms-ui/2.x.x/transforms.css" />
👉To display the transformed image, prepare a container:
<div style="text-align:center;">

  <img id="result" style="width:600px" />

</div>
👉Then, initialize Transformations UI:
const tr = new FilestackTransform('API_KEY')

tr.open(FILE_URL).then(res => { // replace FILE_URL with the image link

  document.getElementById('result').src = res // display the result

})
👉You can see this code in action below:
Example initialization with CNAME
const tr = new FilestackTransform('API_KEY', {

  client: {

    cname: 'fs.yourdomain',

  },

});
Example initialization with security
const tr = new FilestackTransform('API_KEY', {

  client: {

    security: {

      policy: '<policy>',

      signature: '<signature>'

    }

  },

});
Transforming a local file
👉Allow users to select a file from their system and pass it to Transformations UI
<input type="file" id="demoFile"/>

<div style="text-align:center;">

  <img id="result" style="width:600px" />

</div>

const tr = new FilestackTransform('API_KEY');

// apply listener with Transformations UI on input file change

document.querySelector('#demoFile').addEventListener('change', (res) => {

  tr.open(res.target.files[0]).then(res => {

    document.getElementById('result').src = res

  });

});
Storing transformations
To store the result of the transformations, combine Transformations UI with Filestack JavaScript SDK and its upload functionality:
const client = filestack.init('API_KEY'); // initialize Filestack Client with your API key

const tr = new FilestackTransform('API_KEY'); // initialize Transformations UI

tr.setConfigKey('output.blob', true); // set Transformations UI to return blob

tr.open(FILE_URL).then(res => {

  client.upload(res).then((uploadRes) => { // upload result of the transformation

    document.getElementById('result').innerHTML = JSON.stringify(uploadRes, null, 2);

  })

});👉Customize Transformations UI using `setConfig` or `setConfigKey`. When configuring transformation settings through the JavaScript SDK, review the available enum values for supported options such as alignment, fit, blur mode, and color space.
Building a web app with transformation UI
First, create an HTML file in the Visual Studio Code. Then, add the below code step-by-step:
HTML Setup
<!DOCTYPE html>

<html>

<head>

  <title>Image Transformation UI</title>

  <link rel="stylesheet" href="https://static.filestackapi.com/transforms-ui/2.x.x/transforms.css" />

  <!-- CSS styles are linked here -->

</head>

<body>

  <div class="container">

    <h1>Image Transformation UI</h1>

    <input type="file" id="fileInput"/>

    <div id="resultContainer">

      <img id="result" />

    </div>

  </div>

  <!-- JavaScript and external library are linked here -->

</body>
</html>
DOCTYPE Declaration (<!DOCTYPE html>): Specifies the document type and version of HTML used in the document.
<html> Element represents the root of an HTML document.
<head> Element contains meta-information about the document, such as its title and links to external resources.
<title> Element sets the title of the document displayed in the browser tab.
<link> Element links an external stylesheet to the document for styling purposes.
<body> Element contains the content of the document, visible to the user.
<div> Element with class “container” acts as a container for the page content.
<h1> Element represents a heading at the top of the page.
<input> Element with id “fileInput” allows the user to select a file for transformation.
<div> Element with id “resultContainer” contains the transformed image.
<img> Element with id “result” displays the transformed image.
CSS Setup
body {

  font-family: Arial, sans-serif;

  background-color: #f8f8f8;

  margin: 0;

  padding: 0;

  display: flex;

  justify-content: center;

  align-items: center;

  height: 100vh;

  background-image: url('https://media.istockphoto.com/id/1291422886/video/clean-soft-and-shiny-background-animation-abstract-simple-beautiful-blurred-motion-design-the.jpg?s=640x640&k=20&c=2fUgmZf_HXBrKE6ZIt-0oh69yGLy4J5aJuAORUURv9M=');

  background-size: cover;

}


.container {

  max-width: 800px;

  margin: 0 auto;

  padding: 20px;

  background-color: #EF4A25; /* Filestack blue */

  border-radius: 5px;

  box-shadow: 0 4px 8px rgba(0,0,0,0.1);

}


h1 {

  text-align: center;

  color: white;

}


#fileInput {

  display: block;

  margin: 20px auto;

  padding: 10px 20px;

  background-color: #007bff; /* Filestack blue */

  color: white;

  border: none;

  border-radius: 5px;

  cursor: pointer;

}


#resultContainer {

  text-align: center;

  margin-top: 20px;

}


#result {

  max-width: 100%;

  border-radius: 5px;

  box-shadow: 0 2px 4px rgba(0,0,0,0.1);

}
body Styles sets the background color, font family, and flex properties for the body element.
.container Styles styles the container for the page content, setting its maximum width, background color, border radius, and box shadow.
h1 Styles centers the heading text and sets its color to white.
#fileInput Styles the file input button, setting its background color, padding, border radius, and cursor.
#resultContainer Styles aligns the result image to the center and adds margin at the top.
#result Styles sets the maximum width and border radius for the result image, and adds a box shadow for a visual effect.
JavaScript Setup
<script src="https://static.filestackapi.com/transforms-ui/2.x.x/transforms.umd.min.js"></script>

<script>

  const tr = new FilestackTransform('A18L3T2eWRemxYIGwGlZsz');

  document.getElementById('fileInput').addEventListener('change', (e) => {

    tr.open(e.target.files[0]).then(res => {

      document.getElementById('result').src = res;

    });

  });

</script>
<script> Element links an external JavaScript file (transforms.umd.min.js) for the Filestack transformation functionality.
JavaScript Code creates a new instance of FilestackTransform with an API key, and adds an event listener to the file input element. When a file is selected, it opens the file using tr.open() and sets the result as the source of the #result image element.
Final code
<!DOCTYPE html>

<html>

<head>

  <title>Image Transformation UI</title>

  <link rel="stylesheet" href="https://static.filestackapi.com/transforms-ui/2.x.x/transforms.css" />

  <style>

    body {

      font-family: Arial, sans-serif;

      background-color: #f8f8f8;

      margin: 0;

      padding: 0;

      display: flex;

      justify-content: center;

      align-items: center;

      height: 100vh;

      background-image: url('https://media.istockphoto.com/id/1291422886/video/clean-soft-and-shiny-background-animation-abstract-simple-beautiful-blurred-motion-design-the.jpg?s=640x640&k=20&c=2fUgmZf_HXBrKE6ZIt-0oh69yGLy4J5aJuAORUURv9M=');

      background-size: cover;

    }

    .container {

      max-width: 800px;

      margin: 0 auto;

      padding: 20px;

      background-color: #EF4A25; /* Filestack blue */

      border-radius: 5px;

      box-shadow: 0 4px 8px rgba(0,0,0,0.1);

    }

    h1 {

      text-align: center;

      color: white;

    }

    #fileInput {

      display: block;

      margin: 20px auto;

      padding: 10px 20px;

      background-color: #007bff; /* Filestack blue */

      color: white;

      border: none;

      border-radius: 5px;

      cursor: pointer;

    }

    #resultContainer {

      text-align: center;

      margin-top: 20px;

    }

    #result {

      max-width: 100%;

      border-radius: 5px;

      box-shadow: 0 2px 4px rgba(0,0,0,0.1);

    }

  </style>

</head>

<body>

  <div class="container">

    <h1>Image Transformation UI</h1>

    <input type="file" id="fileInput"/>

    <div id="resultContainer">

      <img id="result" />

    </div>

  </div>


  <script src="https://static.filestackapi.com/transforms-ui/2.x.x/transforms.umd.min.js"></script>

  <script>

    const tr = new FilestackTransform('A18L3T2eWRemxYIGwGlZsz');

    document.getElementById('fileInput').addEventListener('change', (e) => {

      tr.open(e.target.files[0]).then(res => {

        document.getElementById('result').src = res;

      });

    });

  </script>

</body>

</html>
Here is the link to the GitHub code: https://github.com/devayesha23/Transformation_UI
Output
Run the code in Visual Studio Code and you will get the below screen:
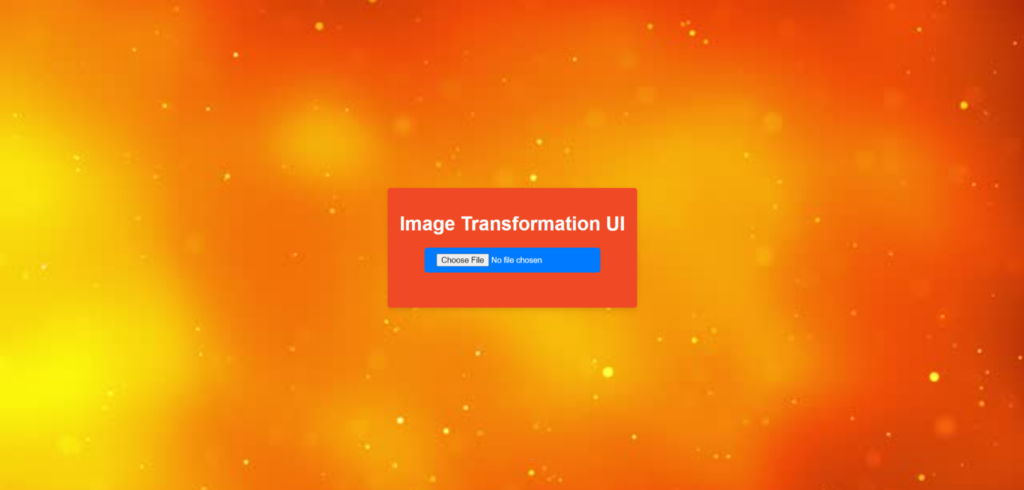
Click on the “Choose File” option and choose your targeted image.
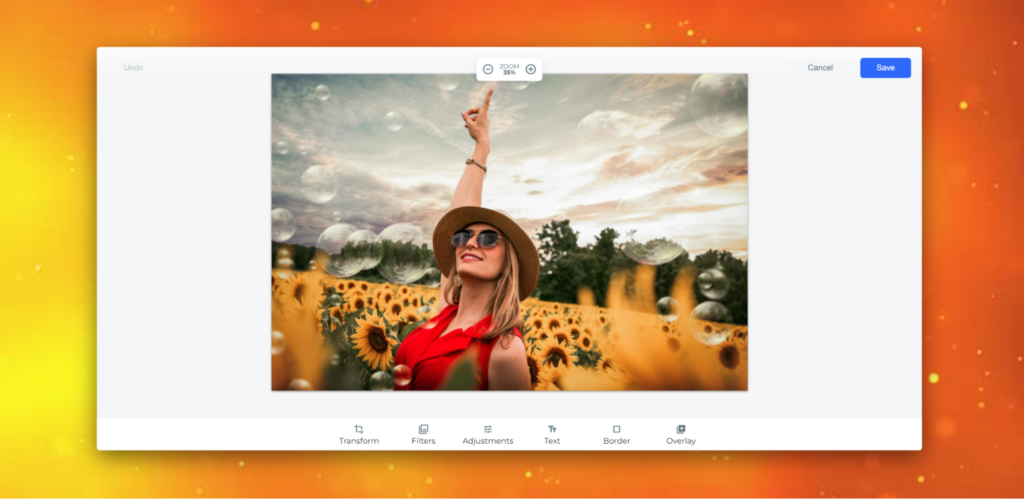
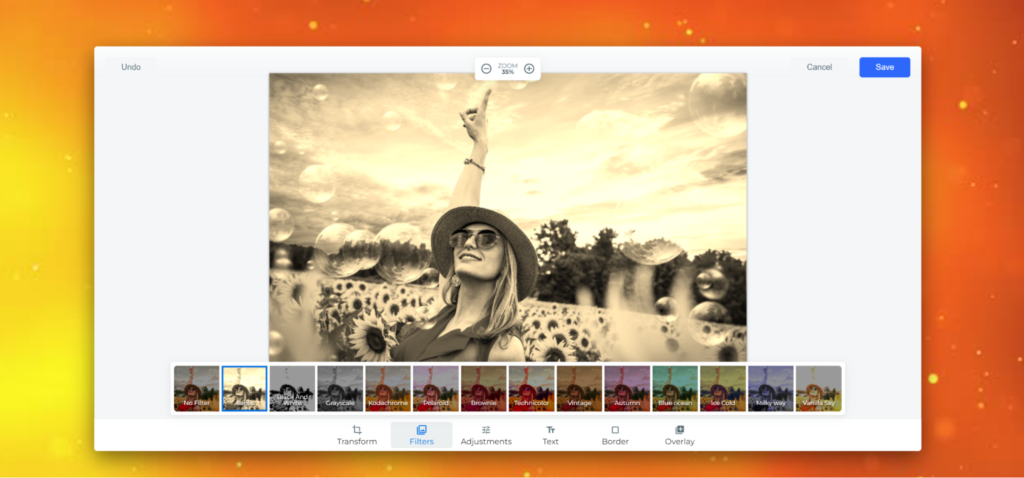
Next, you can see the following options in the above image:
- Transform
- Filters
- Adjustments
- Text
- Border
- Overlay
Let’s try them one by one.
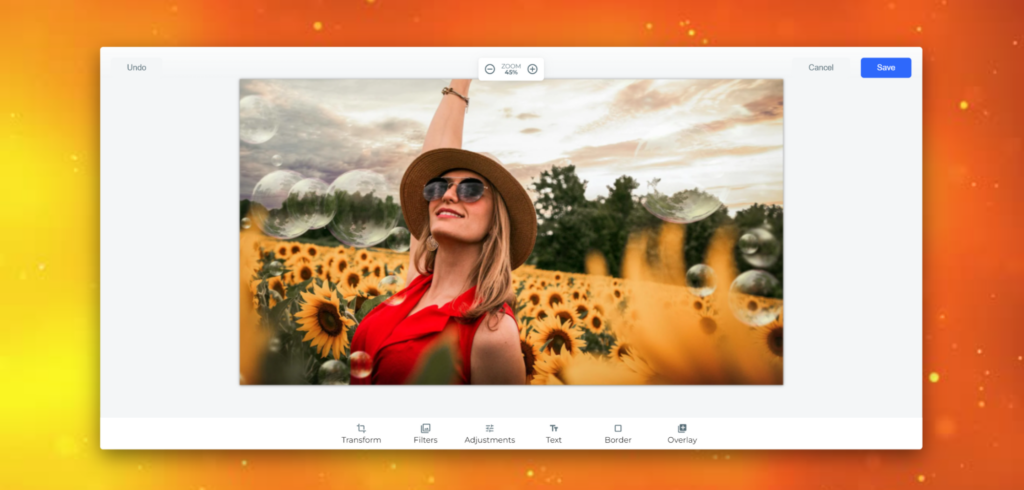
Choose any desired option under the Transform as under:

Let’s choose crop:
Here are the filters:
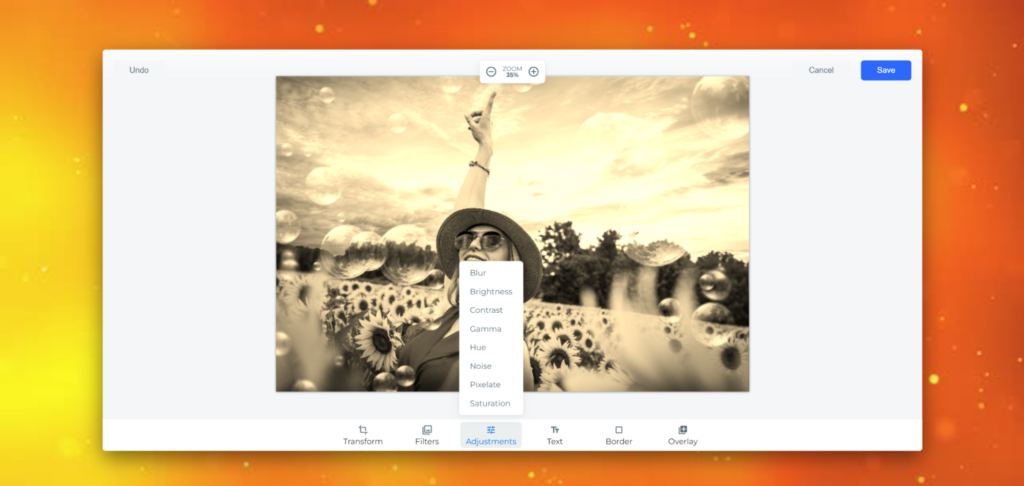
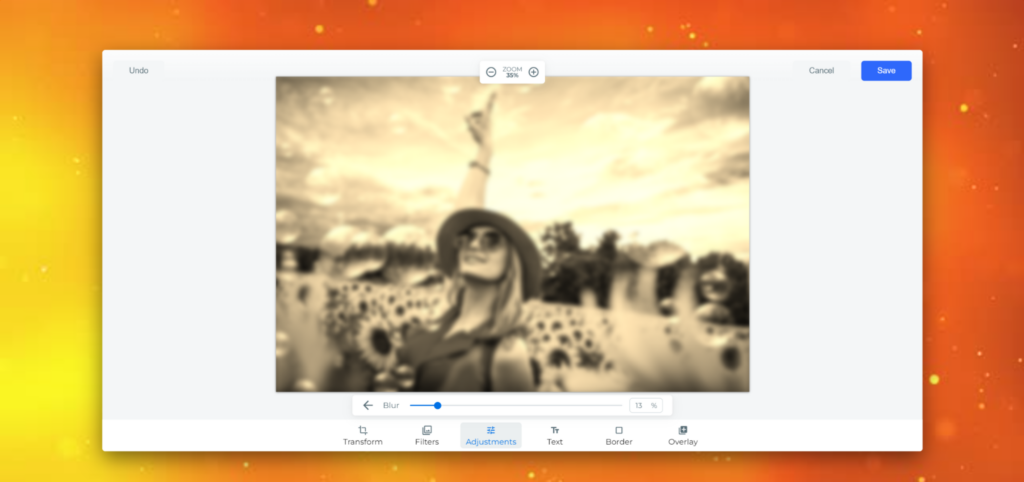
Here are different adjustment options and an example of blur adjustment:
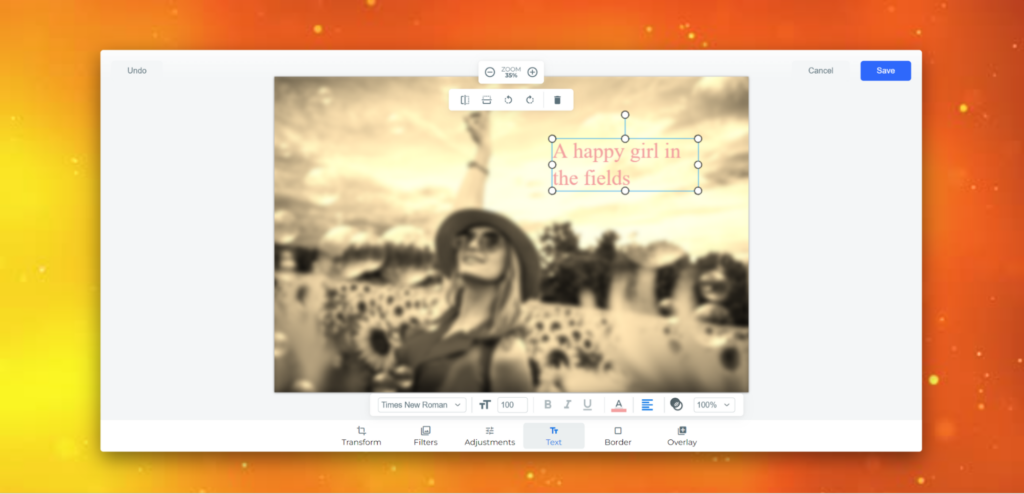
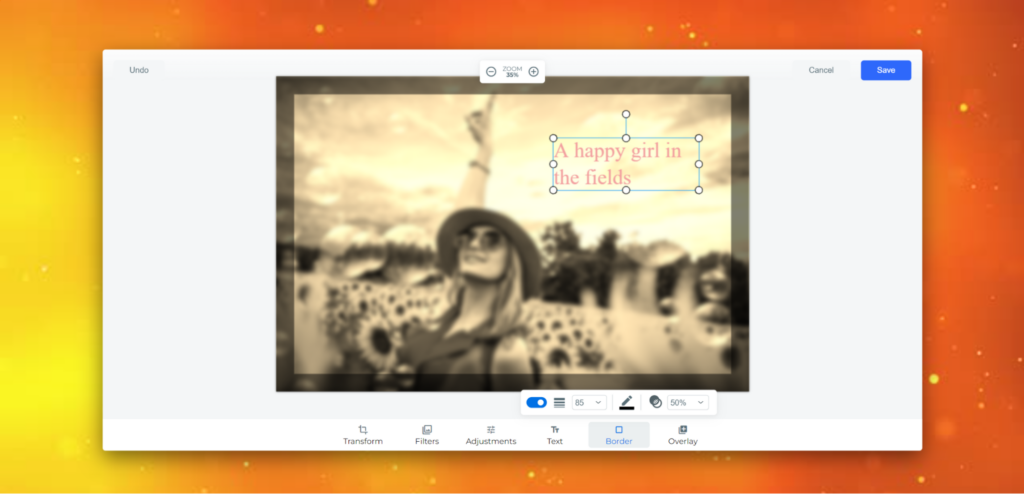
Here is how to add text:
Here is how to add borders:
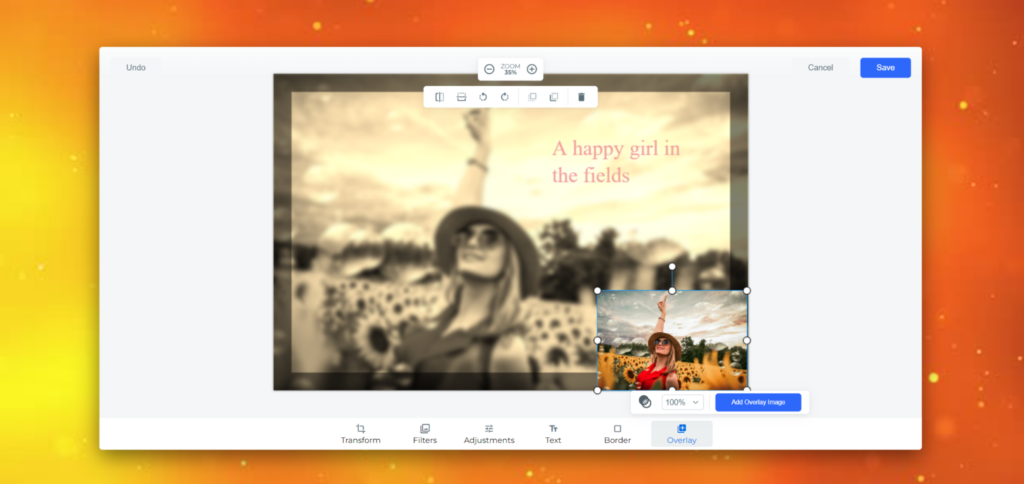
Finally, here is the option to add overlay image:
Conclusion
Filestack’s Transformation UI helps you make your images look better in just a few clicks. You can adjust things like brightness, contrast, and size, and add filters and effects. It’s easy to use and fast, so you can save time and effort. You can see the changes in real-time and make adjustments until you’re happy with the result.
What sets Filestack’s Transformation UI apart is how fast and easy it is to use. Instead of spending a lot of time editing your images manually, you can achieve great results in just a few minutes. This saves you time and effort, so you can focus on creating amazing content.
Integrating Filestack’s Transformation UI into your web application is simple. You just need to include the Filestack JavaScript library in your code and set up the Filestack client with your API key. Then, you can open the transformation UI to let users edit images easily.
Got it! If you have any more questions or need further clarification, feel free to ask.
FAQs
Why should I choose Filestack transformation UI?
Filestack Transformation UI has a simple, modern design that works well on phones and computers. With Filestack, you can do lots of things, like adding filters, changing sizes, and putting text on them. Filestack is always updating their tools, so you’ll always have the latest features.
Can I use the Filestack transformation UI for free?
Yes, you can use the basic features of Filestack transformation UI for free, but there are limits. The free plan allows you to perform a certain number of transformations on images up to a certain size. If you need more transformations or want to work with larger images, you’ll need to upgrade to a paid plan.
What are the steps to integrate the Filestack transformation UI?
Integrating the Filestack transformation UI into your website is simple. Here’s how you can do it:
- Add a link to the Filestack JavaScript library in your website’s code. This lets your website use Filestack’s features.
- Create a Filestack account and get an API key. Use this key to set up the Filestack client in your website’s code.
- Create a place in your website’s layout where the transformed image will appear.
- Use the Filestack client to open the transformation UI. This shows the user a window where they can choose an image and edit it.
- After the user finishes editing, the transformed image will be ready. Use the Filestack client to display this image in the container you prepared.
What are the best practices to integrate a transformation UI?
To integrate a transformation UI well, follow these tips:
- Make it easy for users to understand and use, with clear instructions and simple controls.
- Use efficient methods to make the UI fast and not use too much of your device’s resources.
- Test the UI on different browsers and devices to make sure it works well everywhere.
- Show helpful messages if something goes wrong and have a backup plan in case something doesn’t work.
- Use security measures to keep user data safe and stop anyone from doing anything bad.
- Keep improving the UI with new features and fixes to make it better for users.
Ayesha Zahra is a Geo Informatics Engineer with hands-on experience in web development (both frontend & backend). Also, she is a technical writer, a passionate programmer, and a video editor. She is always looking for opportunities to excel in her skills & build a strong career.
Read More →