Filestack comes with a rich set of features and gives clients total freedom in customizing its behavior. As developers, we can set constraints on the type of files a user can upload, their sizes, from what source a user is allowed to upload and so on.
In addition to this, Filestack provides other functionalities through its own API such as image transformations, file viewing capabilities, responsive images, etc. Check out the documentation for more information about it.
There is no doubt Filestack fulfills different needs for multiple clients, yet a newbie may be overwhelmed at the beginning as there is much to learn. Thus, in this post we are going to build a practical sample app which highlights a few of Filestack capabilities.
The Fanfiction Site
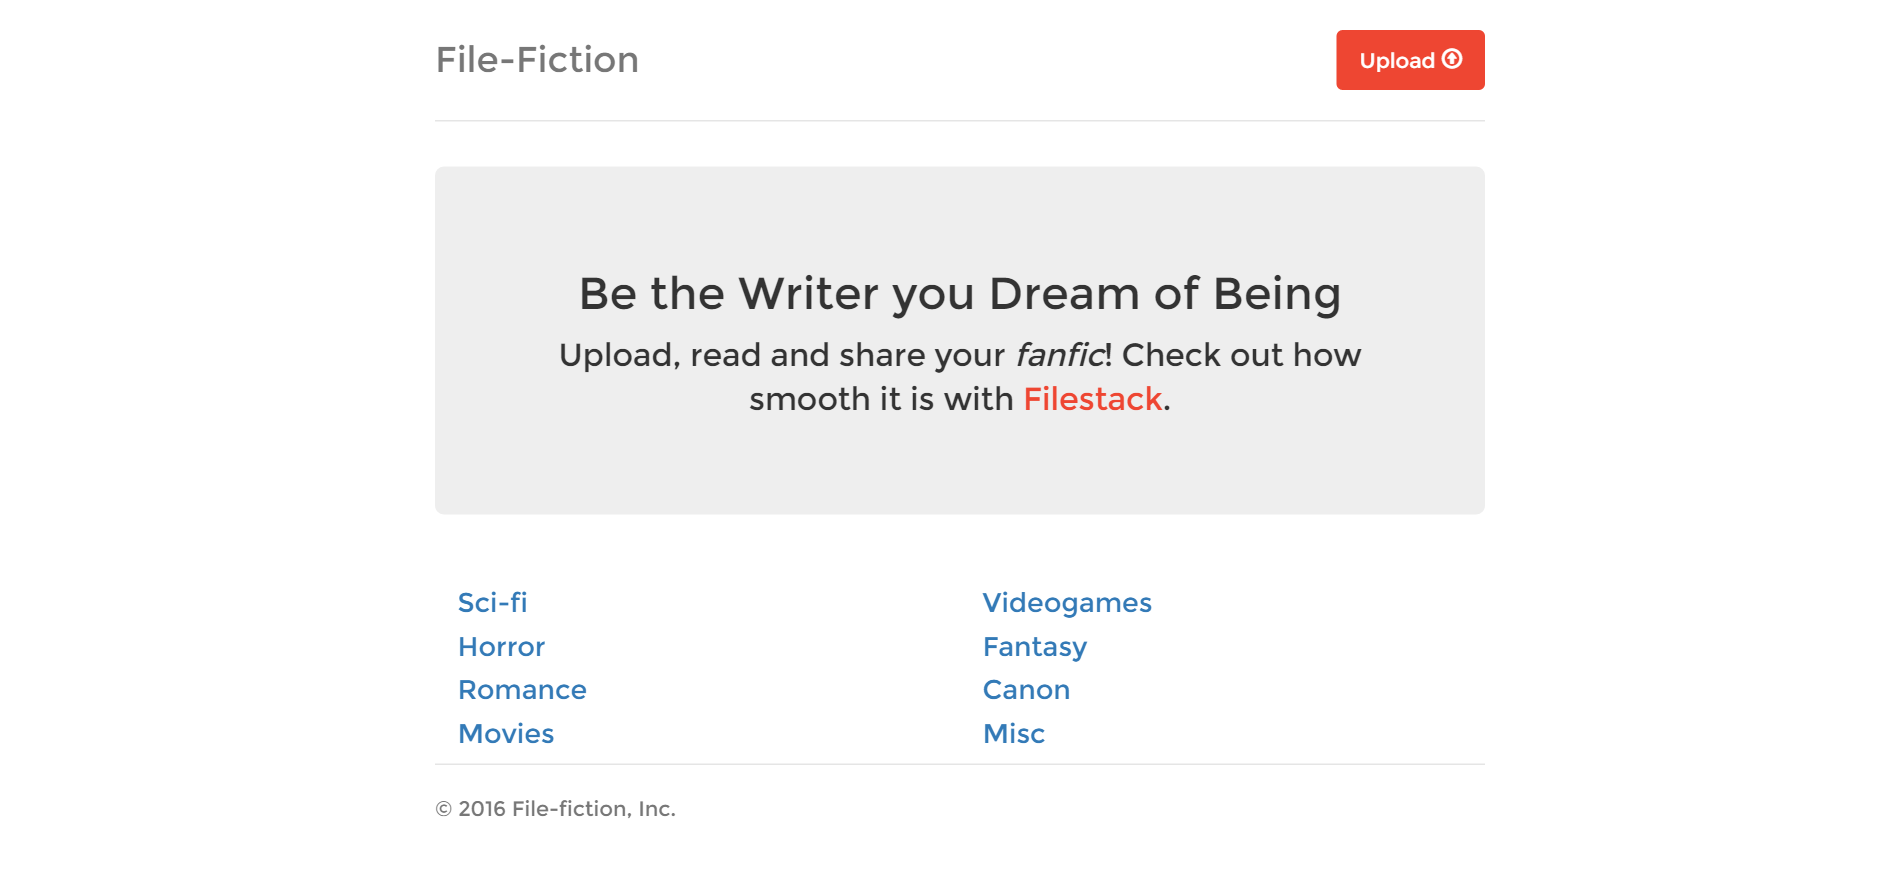
We are building a fanfiction-alike website called file-fic (…Yep, original) where users can upload their own fanfic. The fanfics are categorized by genre (Horror, Scifi, Romantic etc.) and shared to the public. To search the fanfic, a reader would first choose the category and then the story from the list.
The layout is very similar to the famous site fanfiction.net with a fresher look, a perfect candidate to show Filestack’s ability to manipulate documents.
This is how the app looks on its homepage:
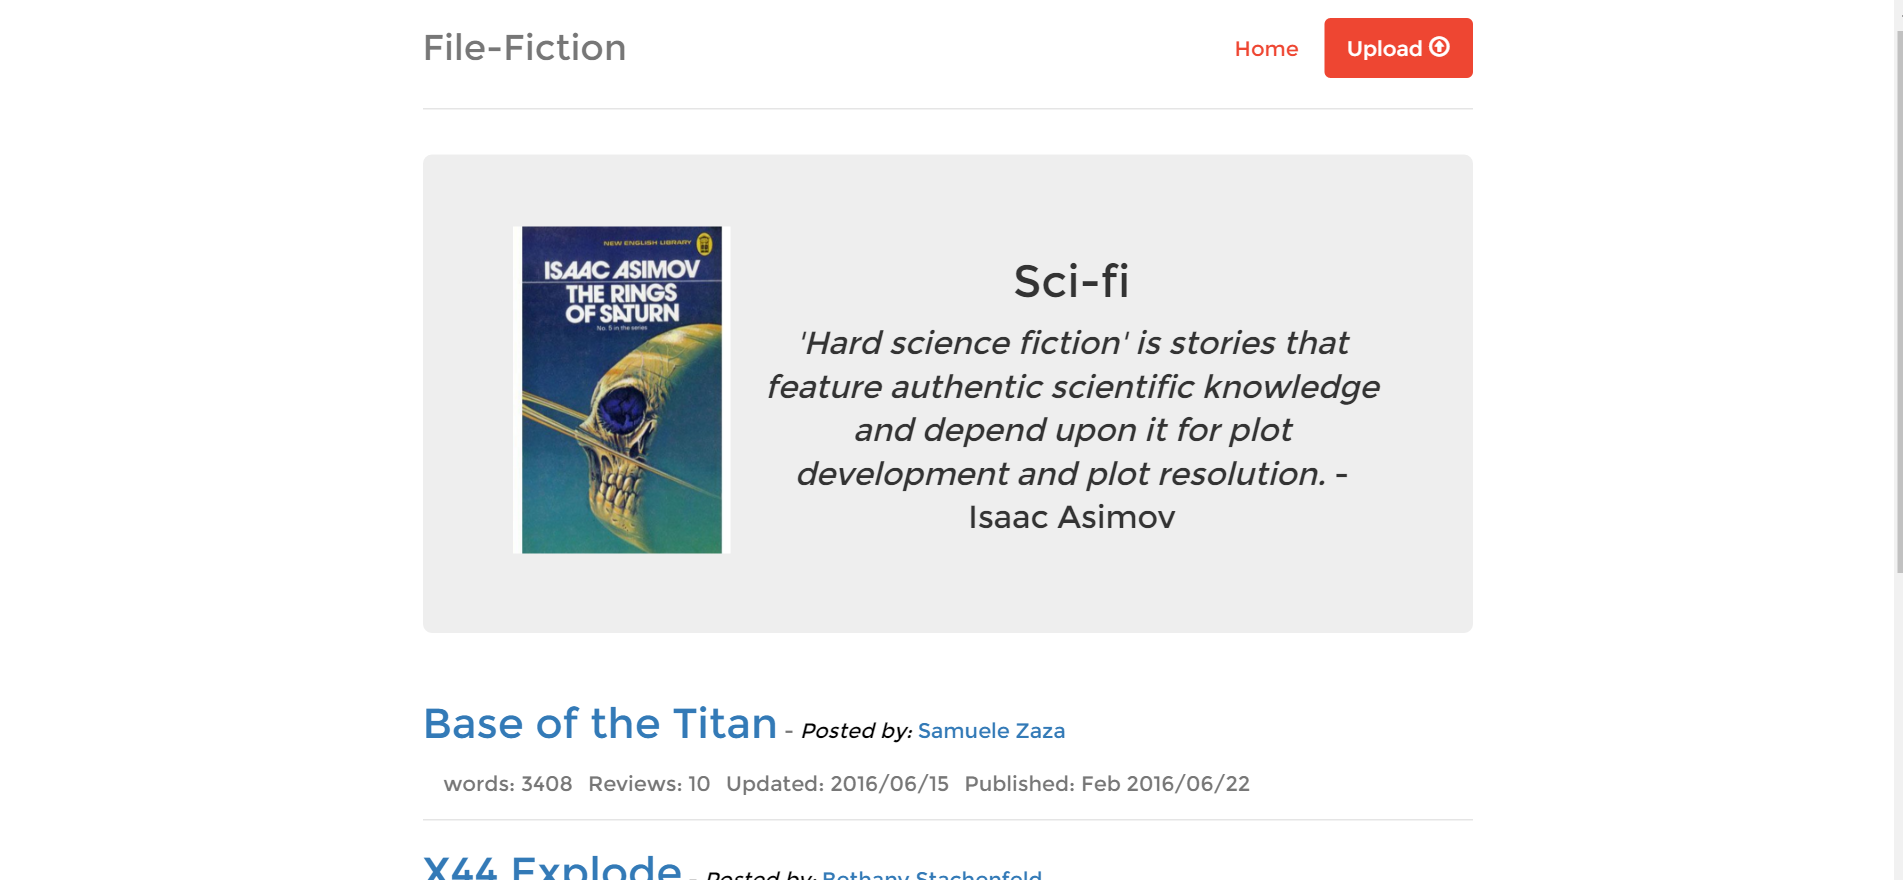
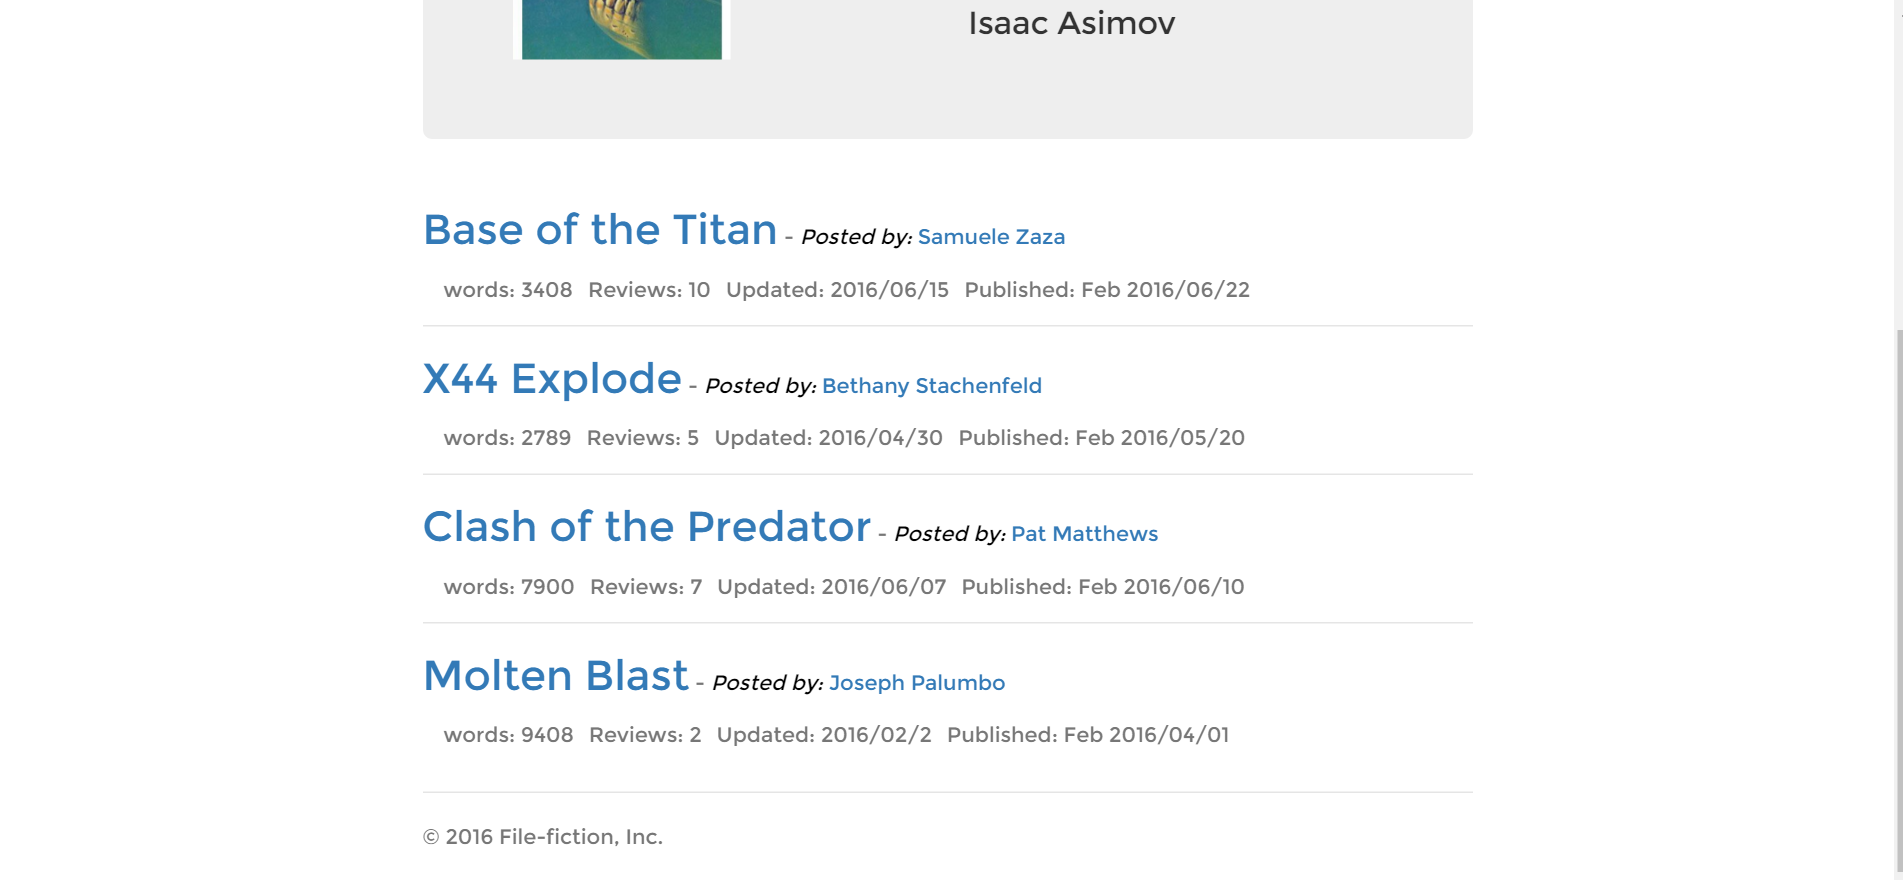
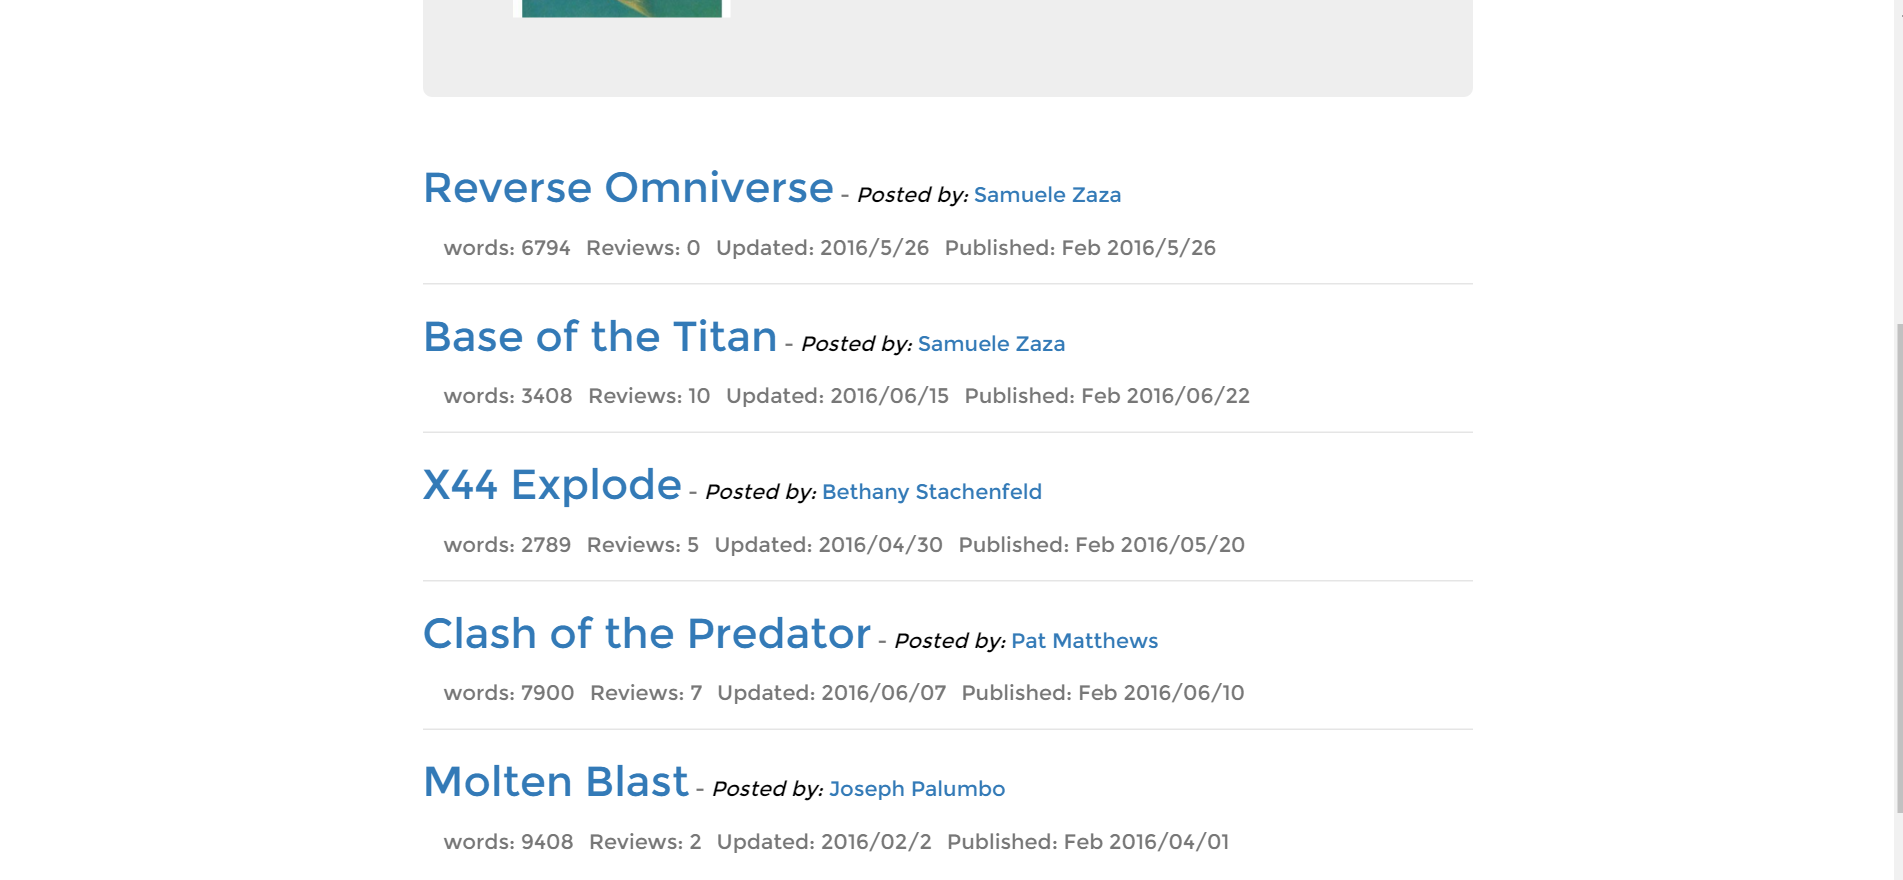
The list of fanfics in the Sci-fi category are listed with two sections to show both the the header and the list:
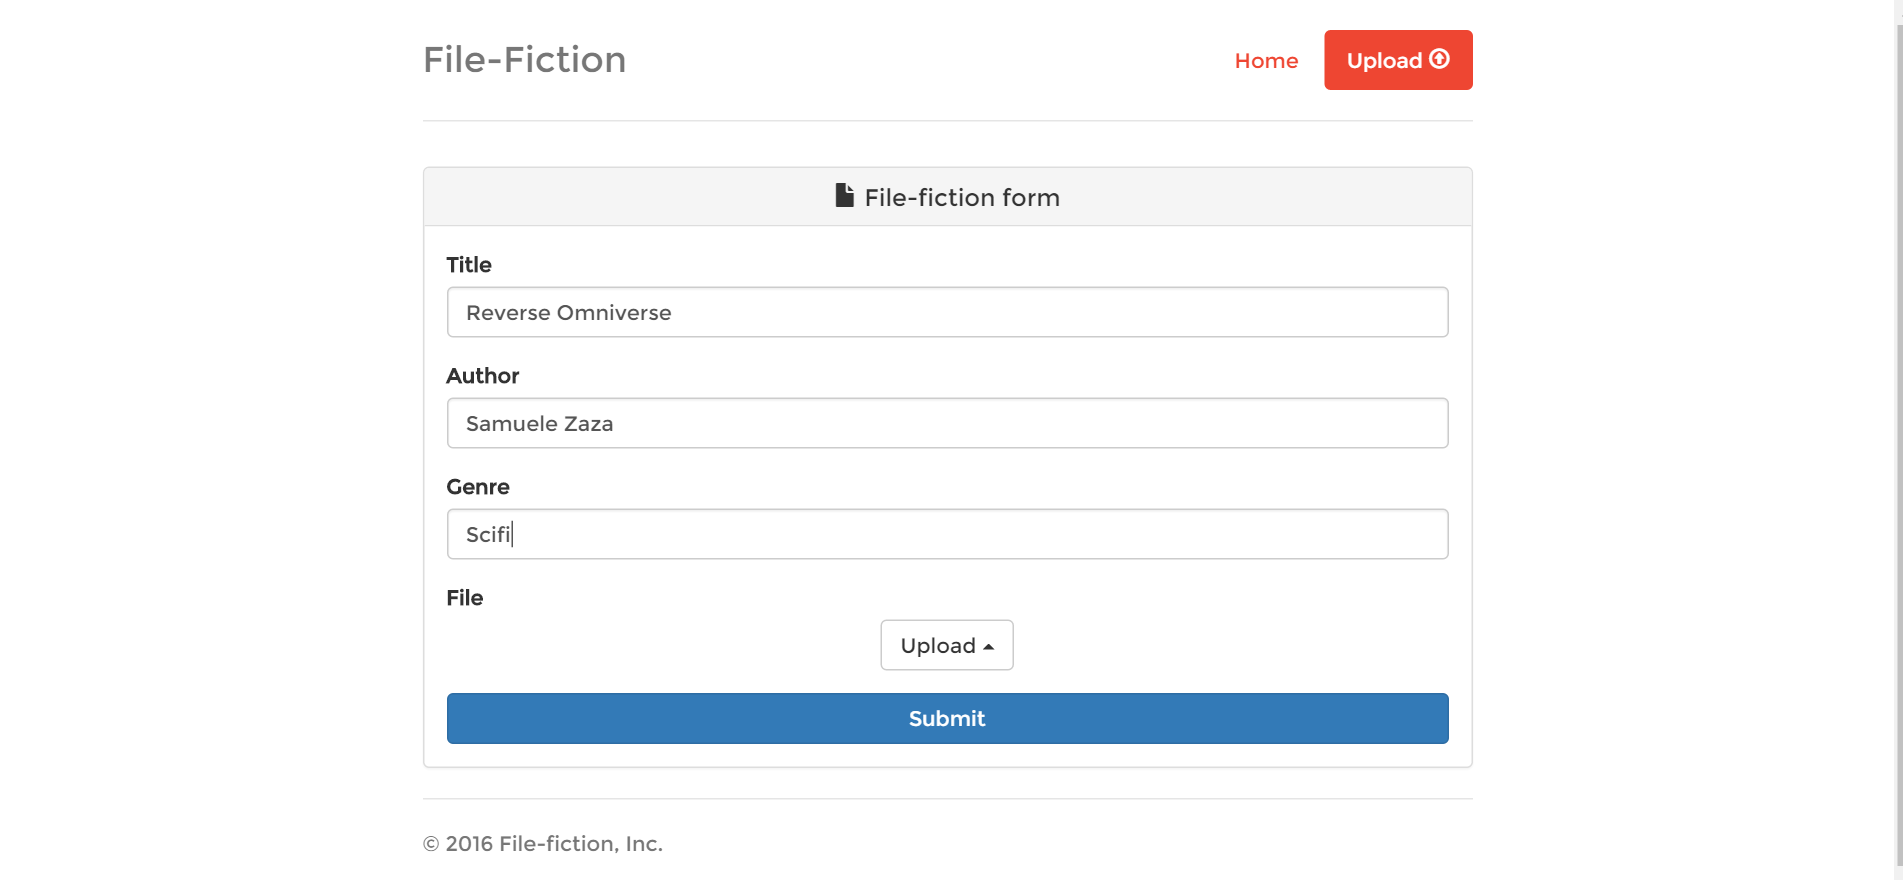
And the upload interface looks like this:

The app is written in Node.js for the server-side and JQuery for the communication with the API to add a document to the site. You can download it here.
NB: The app is simple and doesn’t take care of many technical aspects of the communication with the server as it exists to demonstrate Filestack.
Filestack Integration
Let’s see Filestack in action: On the upload page we will fill the form for all the required fields (Title, Author, Genre) and upload the file with the story.
Once we create the Filestack API key, Filestack provides a piece of code with an upload button already set for us:
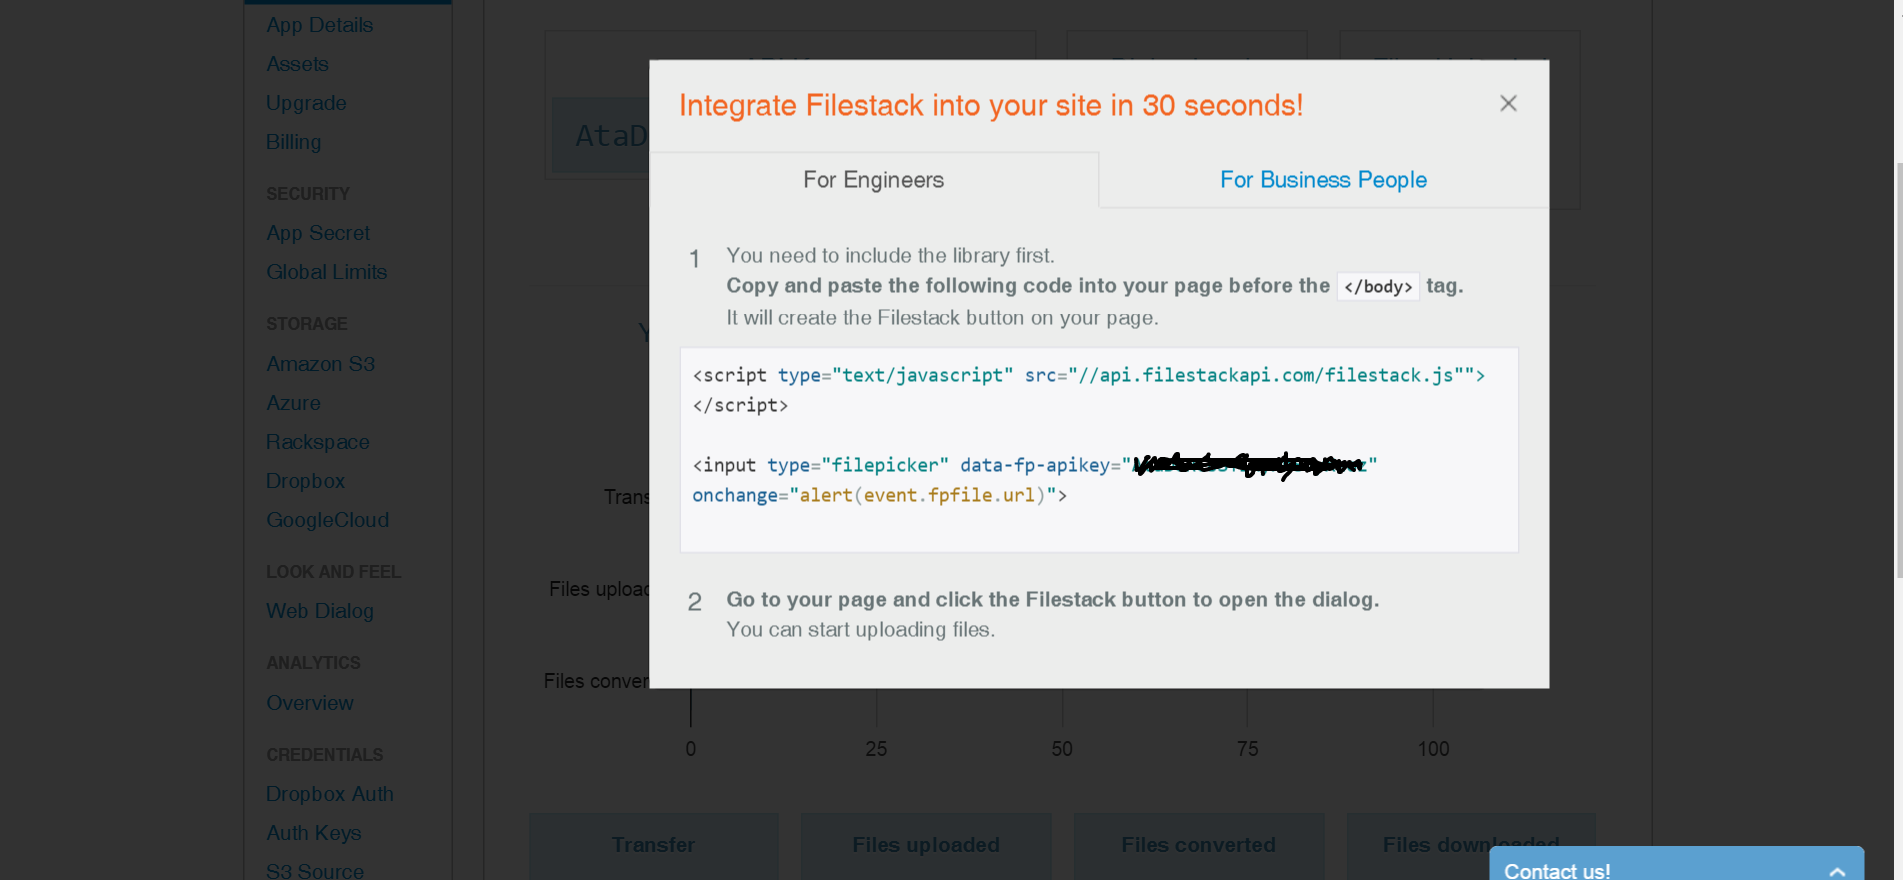
However, we want to have complete control on what the user can upload, so we need to customize our upload button first… But don’t forget to add the library!
File Upload through the Pick Function
Precisely, let’s define our constraints:
1. The file must be a document so its extension is limited to .pdf, .doc, .docx, .ppt, .txt.
2. The maximux size for the file is 5 MB (fair enough!).
3. The sources from where to upload the file are the user’s computer, Google Drive, Amazon Cloudrive, an external URL or Evernote.
NB: Filestack provides really tons of other sources like Facebook, Instagram etc. but be careful with the mime-type of the allowed files: For example in our website Facebook does not allow a mime-type application/pdf so it cannot be used as source.
The upload button in the form will call Filestack through the function .pick() and here is the code:
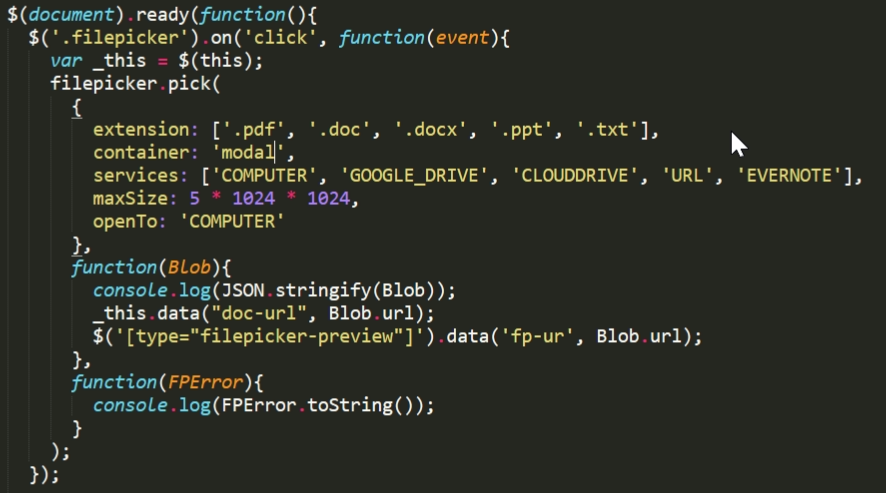
The first parameter of .pick() is the set of options to define a constraints for the user: We use the property extension instead of mimeType to list the allowed extension as Filestack automatically infers the mime-type from them. By the way, extension and mimeType cannot be used together!
MaxSize is in byte so we just need to multiply 1024 bytes times 1024 to reach 1MB, then times 5 for our constraint.
Let’s take a look at the UI when we add a new document:
And once we click on the upload button the modal will show up:
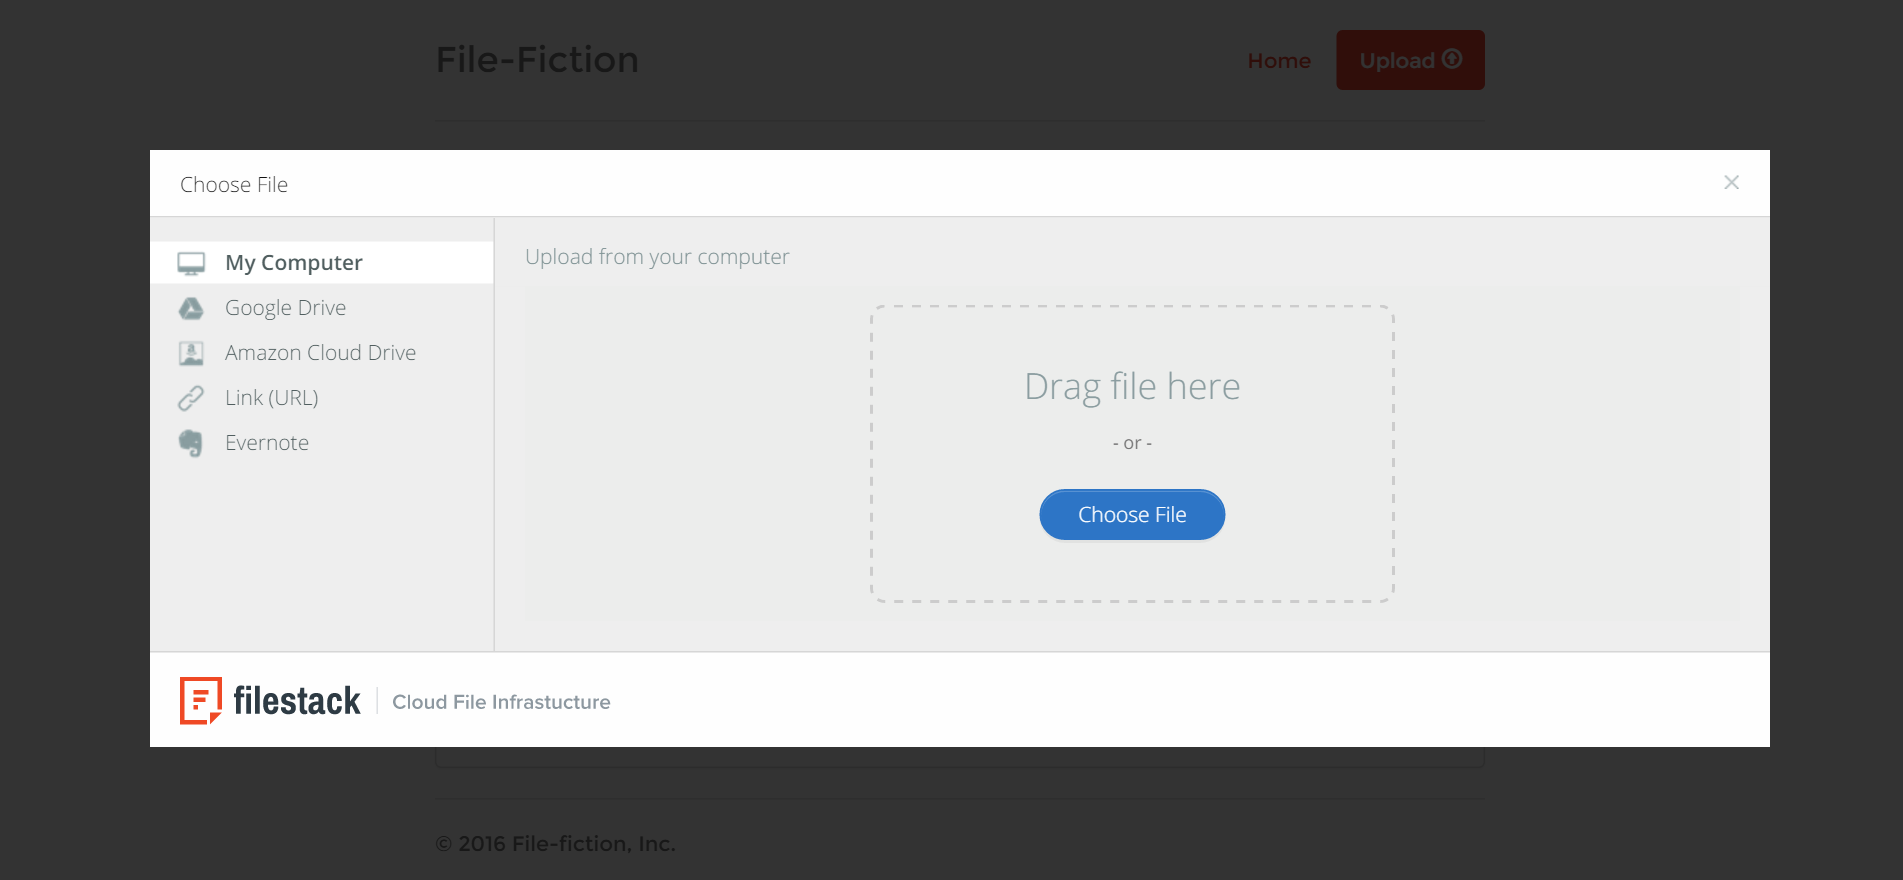
On the left-side, only the allowed sources we previously defined are listed. Let’s test the allowed extensions to see what happens if we force Filestack to upload a picture:
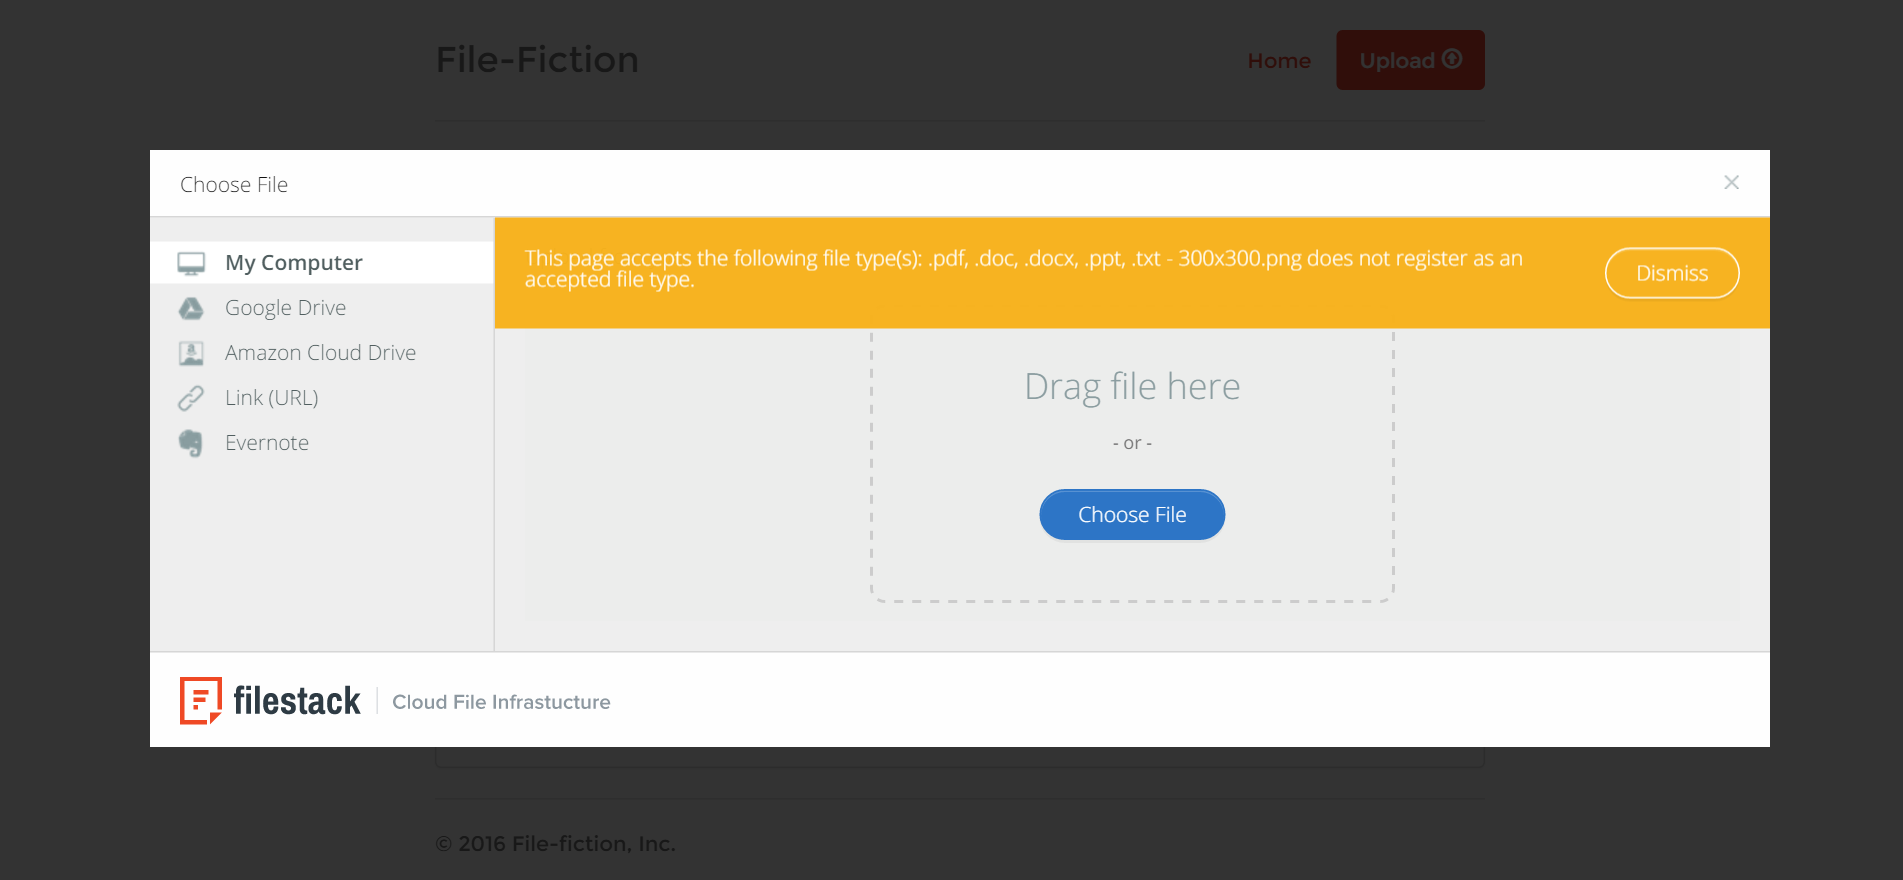
Cool, it successfully discriminates among extensions!
Now that we uploaded the right document, if you remember the code I previously showed, the function pick returns an object with some information about the operation. Among these there is the URL for retrieving the document.
To show you the response, I use a Chrome extension to beautify JSONs :
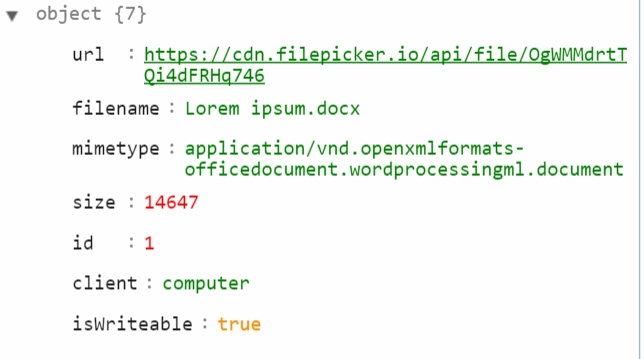
As explained before, Filestack automatically infers the correct mime-type for the document, which you can tell by the response. The URL is going to be sent to the Server among the other fields for creating a new entry in the Sci-fi fanfic category.
So, if everything goes smoothly we should now be able to see the new document in the Sci-fi list, let’s check:
Document Transformation
Great our Fanfiction website is growing! …And new problems arise as well:
Our File-fic website does not require subscription so anyone can read stories for free. But we should protect the work of our authors, shouldn’t we? We definitely don’t want the story to be modified. Filestack, again, can help to achieve this.
Its API provides Document Transformation too, so we can transform the file into a PDF and then safely link to the file.
How? When a user clicks on the title of the fanfic to start reading it, we do not link directly to the link, but instead have Filestack provide the link for us.
Check out this code:

This function sends the uploaded document URL to the API, specifies the new format for it, and opens it in a new tab of the browser.
NB: If you read the documentation you noticed the API key is required.
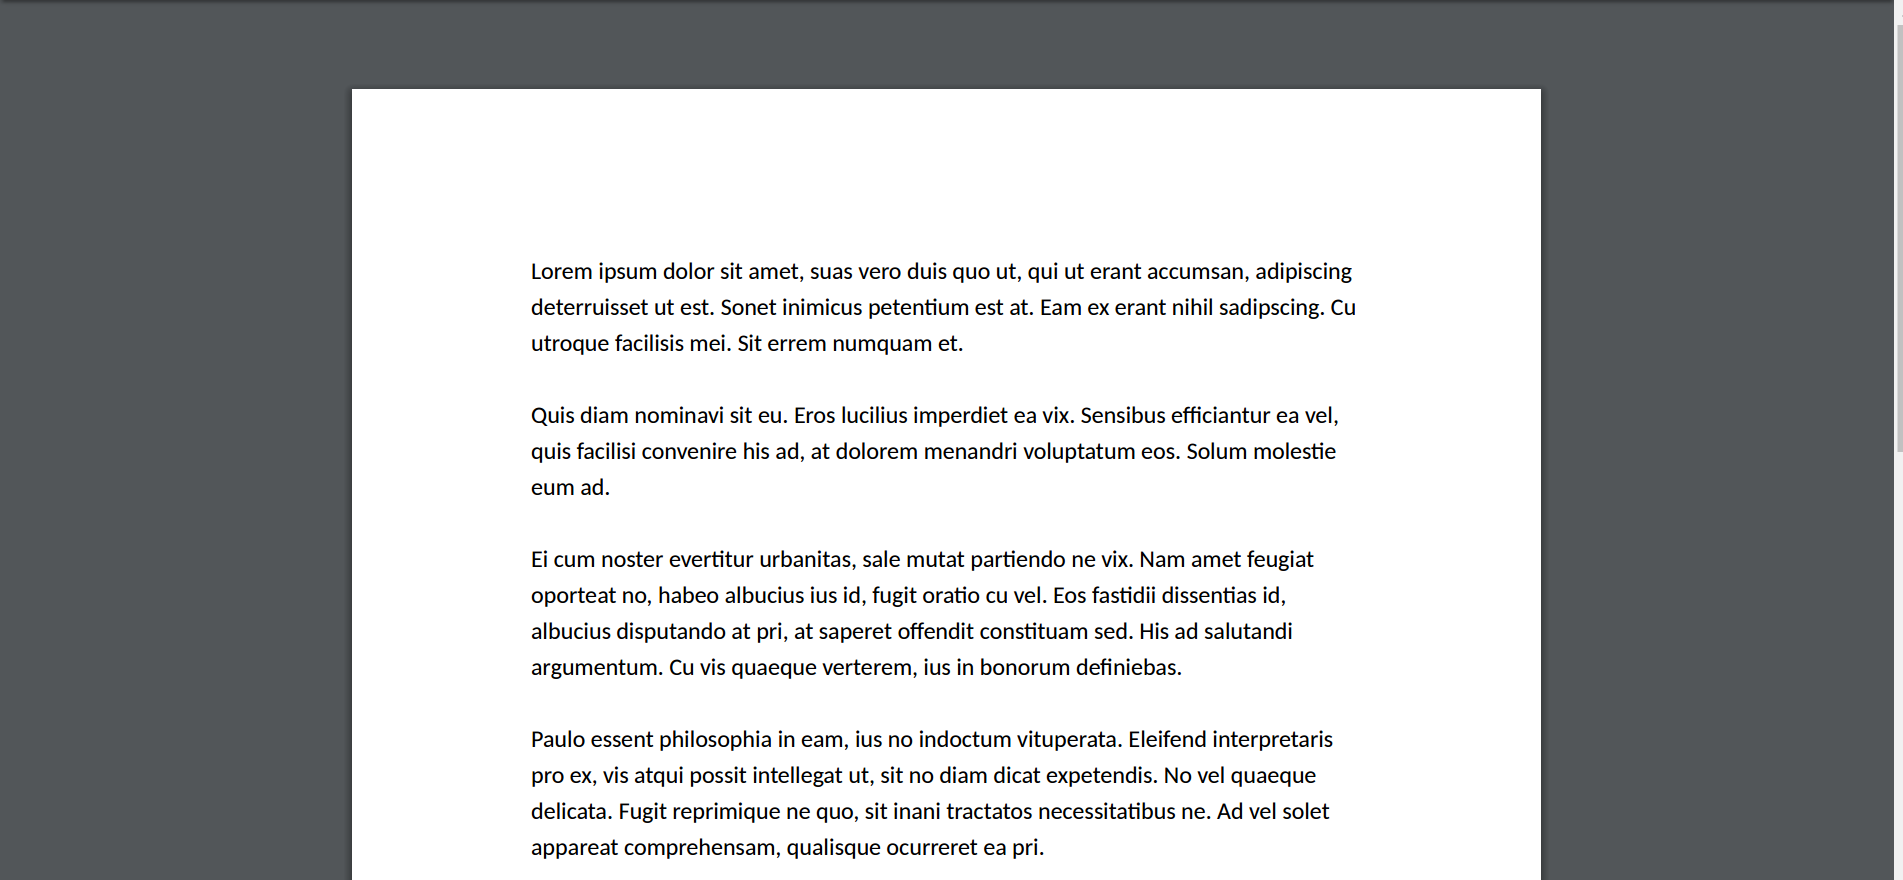
Finally, here is the document in .pdf format for users to read.
Conclusion
In this tutorial we built a fanfiction-alike website where users can share their own fanfics.
The purpose of the tutorial was to show how easily we can integrate Filestack to safely upload limited types of documents.
In addition to this, we investigated Filestack’s document transformation API, which comes in handy to transform all the documents into a single extension (PDF) to avoid text modification.
Filestack is a dynamic team dedicated to revolutionizing file uploads and management for web and mobile applications. Our user-friendly API seamlessly integrates with major cloud services, offering developers a reliable and efficient file handling experience.
Read More →