Welcome to a whole new level of image magic! If you’re a developer looking to make your pictures pop, Filestack’s Intelligent Smart Crop Technology is here to make it happen. In the fast-moving world of websites and apps, making images look awesome is a big deal. Filestack’s Smart Crop is here to elevate the image-uploading experience.
No more wasting time messing with manual cropping! With Filestack, you save time and still get enhanced images. In this blog, we’re diving into the integration of Filestack’s Smart Crop. We’ll talk about what makes it tick, how you can use it, and why it’s a game-changer for your digital projects. Let’s go!
What is smart crop technology?
Smart Crop is a Filestack feature that helps you easily adjust the shape of your images. While it keeps their original proportions intact. It automatically trims away unnecessary parts, saving you time. Hence, you can ensure that your pictures look just the way you want them to.
Moreover, this feature gives you control over your image composition. It’s a straightforward solution for customizing images without any unnecessary complications.
Filestack allows smart cropping by using the smart_crop. Here are the parameters to implement smart_crop:
| PARAMETER | VALUE | OPTIONS | DESCRIPTION |
| mode | string | auto, face, object, auto | The mode determines how the image is cropped. “Auto” uses face detection for optimal results when faces are present. You can also specify “object” or “object:<your_object>” to crop against a particular object, e.g., “dog.” |
| width* | integer | (1-10000) | Width of the output image. |
| height* | integer | (1-10000) | Height of the output image. |
| fill_color | string | Specifies the color for bars that appear when the file is cropped. Choose from the colors listed in the Color Options. | |
| coords | boolean | false, true | If true, the task will return a JSON object with the coordinates of the cropped area. |
Here is an example of basic smart cropping using Filestack:\
https://cdn.filestackcontent.com/smart_crop=width:400,height:400/HANDLE
We will integrate the above feature in the coming sections. Let’s explore the benefits of smart cropping first.
What are the benefits of smart crop technology?
The Smart Crop feature by Filestack is super helpful for making pictures look just right. Here are the reasons why it’s great:
✔️Smart Crop by Filestack is great for adjusting pictures to look just right.
✔️It ensures they fit the shape you want without changing their original appearance.
✔️You don’t have to spend time fixing images manually. Smart Crop does it for you, saving time and making your work faster.
✔️It gets rid of the not-so-interesting parts, making your pictures look better.
✔️Whether you’re working on a website, app, or design, Smart Crop fits right in. It’s like a one-size-fits-all tool.
✔️Smart Crop lets you choose how your images get cropped. You can even focus on faces or specific objects.
✔️Using Smart Crop ensures your pictures look awesome. This is great for keeping people interested and happy when they visit your site or use your app.
How do you integrate smart crop into your application?
👉First, create an account at Filestack.
👉Next, access the API key.
👉Third, integrate the API key into your application.
✔️Important Note: The Filestack smart crop feature is available only on the premium plans.
Let’s begin the integration of our smart crop feature. First, create an index.html file and add the below code:
HTML Structure
<!DOCTYPE html>This declaration defines the document type and version of HTML being used.
<html lang="en">This opening tag indicates the beginning of an HTML document. The `lang` attribute specifies the language of the document as English.
Head Section
<head>
    <!-- Meta tags, title, and external script link go here -->
    <meta charset="UTF-8">
    <meta name="viewport" content="width=device-width, initial-scale=1.0">
    <title>Your Web Page</title>
    <!-- Include the Filestack library -->
    <script src="https://static.filestackapi.com/filestack-js/3.x.x/filestack.min.js"></script>
    <style>
        /* CSS styles go here */
    </style>
</head>
The `<head>` section contains metadata, including a character set, viewport settings, the title of the webpage, and a link to an external JavaScript library.
Body Section
<body>
<!-- HTML content goes here -->
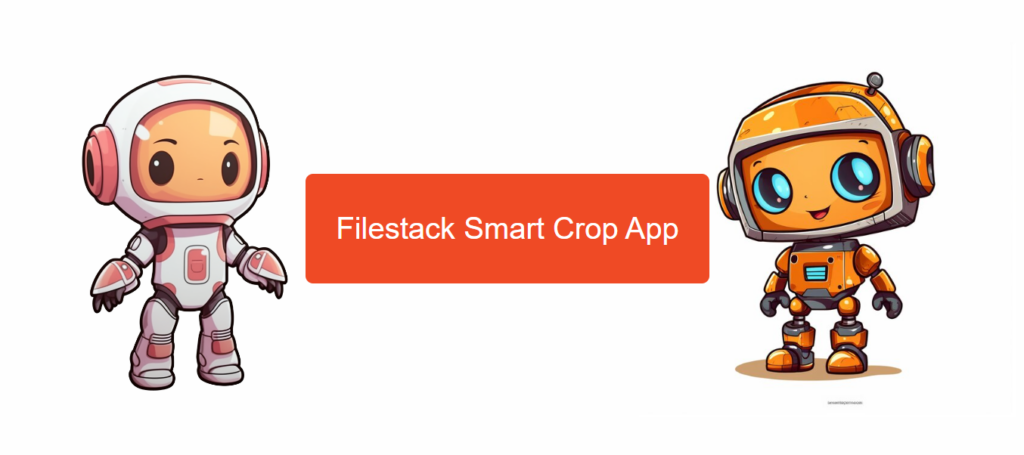
<img id="leftCartoon" src="https://static.vecteezy.com/system/resources/previews/025/251/571/original/cute-cartoon-robot-on-transparent-background-ai-generated-digital-illustration-png.png" alt="Left Cartoon">
<img id="rightCartoon" src="https://img.freepik.com/premium-photo/cartoon-robot-with-blue-eyes-orange-skin-standing-front-white-background_893012-68155.jpg" alt="Right Cartoon">
<div id="filestackContainer" style="display: none;">
<!-- Filestack picker will be dynamically added here -->
</div>
<button id="smartCropButton" onclick="showSmartCropOptions()">Filestack Smart Crop App</button>
<div id="smartCropOptions">
<label for="widthInput">Width:</label>
<input type="number" id="widthInput" placeholder="Enter width">
<label for="heightInput">Height:</label>
<input type="number" id="heightInput" placeholder="Enter height">
<button id="generateUrlButton" onclick="generateSmartCropUrl()">Generate Smart Crop URL</button>
<button id="accessUrlButton" onclick="redirectToSmartCroppedImage()">Access Smart Cropped Image</button>
</div>
<script>
// JavaScript code goes here
</script>
</body>The `<body>` tag contains the visible content of the webpage, including:
- Two cartoon images
- A hidden Filestack container
- Buttons for smart cropping
- Aa script tag for JavaScript.
CSS Styling
<style>
    body {
        display: flex;
        align-items: center;
        justify-content: center;
        height: 100vh;
        margin: 0;
        background-color: #FEFEFE;
        background-size: cover;
    }

    #leftCartoon, #rightCartoon {
        position: absolute;
        top: 50%;
        transform: translateY(-50%);
        width: 500px;
        height: auto;
    }

    /* ... other CSS rules ... */

</style>
The CSS styles include rules for:
- Centring the body content
- Positioning and styling the cartoon images
- Setting the background colour.
JavaScript Functions
<script>
    const apikey = 'Add_Your_API_Key';
    const client = filestack.init(apikey);
Here, the script starts by declaring a constant variable `apikey` with the Filestack API key. It then initializes the Filestack client using this API key.
function showSmartCropOptions() {
        const options = {
            onUploadDone: (res) => {
                const fileHandle = res.filesUploaded[0].handle;
                document.getElementById('filestackContainer').setAttribute('data-filehandle', fileHandle);
                document.getElementById('filestackContainer').style.display = 'none';
                document.getElementById('smartCropButton').style.display = 'none';
                document.getElementById('smartCropOptions').style.display = 'block';
                document.getElementById('generateUrlButton').style.display = 'block';
            },
        };

        const picker = client.picker(options);
        picker.open();
    }
The `showSmartCropOptions` function is triggered when the “Smart Crop” button is clicked. It sets up options for the Filestack picker, and on upload completion. It hides the Filestack container, the “Smart Crop” button, and displays the smart crop options along with the “Generate Smart Crop URL” button.
function generateSmartCropUrl() {
        const widthInput = document.getElementById('widthInput').value;
        const heightInput = document.getElementById('heightInput').value;

        if (!widthInput || !heightInput) {
            alert('Please enter both width and height.');
            return;
        }

        const fileHandle = document.getElementById('filestackContainer').getAttribute('data-filehandle');
        const smartCropUrl = `https://cdn.filestackcontent.com/smart_crop=width:${widthInput},height:${heightInput}/${fileHandle}`;

        alert(`Smart Crop URL: ${smartCropUrl}`);
        document.getElementById('accessUrlButton').style.display = 'block';
        document.getElementById('accessUrlButton').setAttribute('data-url', smartCropUrl);
    }
The `generateSmartCropUrl` function is called when the “Generate Smart Crop URL” button is clicked. It retrieves user input for width and height, validates the inputs, and then constructs a smart crop URL using the Filestack file handle. The generated URL is displayed in an alert, and the “Access Smart Cropped Image” button is displayed.
  function redirectToSmartCroppedImage() {
        const smartCropUrl = document.getElementById('accessUrlButton').getAttribute('data-url');
        window.location.href = smartCropUrl;
    }
</script>
The `redirectToSmartCroppedImage` function is triggered when the “Access Smart Cropped Image” button is clicked. It retrieves the smart crop URL from the button’s data attribute and redirects the browser to that URL.
Final Code
<!DOCTYPE html>

<html lang="en">

<head>

    <meta charset="UTF-8">

    <meta name="viewport" content="width=device-width, initial-scale=1.0">

    <title>Your Web Page</title>

    <!-- Include the Filestack library -->

    <script src="https://static.filestackapi.com/filestack-js/3.x.x/filestack.min.js"></script>

    <style>

        body {

            display: flex;

            align-items: center;

            justify-content: center;

            height: 100vh;

            margin: 0;

            background-color: #FEFEFE;

            background-size: cover;

        }

        #leftCartoon, #rightCartoon {

            position: absolute;

            top: 50%;

            transform: translateY(-50%);

            width: 500px; /* Increased the size to 5 times the original */

            height: auto;

        }

        #leftCartoon {

            left: 10px;

        }

        #rightCartoon {

            right: 10px;

        }

        button {

            padding: 50px 40px;

            font-size: 40px;

            cursor: pointer;

            margin: 10px;

            border: none;

            border-radius: 10px;

            z-index: 1; /* Ensure the button is above the cartoons */

        }

        #smartCropButton {

            background-color: #EF4A25;

            color: white;

        }

        #smartCropOptions {

            display: none;

            text-align: center;

            margin-top: 20px; /* Added a small gap */

        }

        label {

            font-size: 18px;

            margin: 10px;

            display: block;

        }

        input {

            padding: 10px;

            font-size: 16px;

            margin: 5px;

            border: 1px solid #ccc;

            border-radius: 5px;

            width: 200px; /* Adjusted the width */

            display: block;

            margin: 10px auto; /* Center the inputs */

        }

        #generateUrlButton {

            background-color: #3498db;

            color: white;

            /* Set the size 3 times smaller */

            padding: 17px 33px;

            font-size: 13px;

        }

        #accessUrlButton {

            display: none;

            background-color: #EF4A25;

            color: white;

            /* Set the size 3 times smaller */

            padding: 17px 33px;

            font-size: 13px;

        }

    </style>

</head>

<body>

<!-- Your HTML content here -->

<img id="leftCartoon" src="https://static.vecteezy.com/system/resources/previews/025/251/571/original/cute-cartoon-robot-on-transparent-background-ai-generated-digital-illustration-png.png" alt="Left Cartoon">

<img id="rightCartoon" src="https://img.freepik.com/premium-photo/cartoon-robot-with-blue-eyes-orange-skin-standing-front-white-background_893012-68155.jpg" alt="Right Cartoon">

<div id="filestackContainer" style="display: none;">

    <!-- Filestack picker will be dynamically added here -->

</div>

<button id="smartCropButton" onclick="showSmartCropOptions()">Filestack Smart Crop App</button>

<div id="smartCropOptions">

    <label for="widthInput">Width:</label>

    <input type="number" id="widthInput" placeholder="Enter width">

    <label for="heightInput">Height:</label>

    <input type="number" id="heightInput" placeholder="Enter height">

    <button id="generateUrlButton" onclick="generateSmartCropUrl()">Generate Smart Crop URL</button>

    <button id="accessUrlButton" onclick="redirectToSmartCroppedImage()">Access Smart Cropped Image</button>

</div>

<script>

    const apikey = 'ADDYOURAPIKEY';

    const client = filestack.init(apikey);

    function showSmartCropOptions() {

        const options = {

            onUploadDone: (res) => {

                const fileHandle = res.filesUploaded[0].handle;

                document.getElementById('filestackContainer').setAttribute('data-filehandle', fileHandle);

                document.getElementById('filestackContainer').style.display = 'none';

                document.getElementById('smartCropButton').style.display = 'none';

                document.getElementById('smartCropOptions').style.display = 'block';

                document.getElementById('generateUrlButton').style.display = 'block';

            },

        };

        const picker = client.picker(options);

        picker.open();

    }

    function generateSmartCropUrl() {

        const widthInput = document.getElementById('widthInput').value;

        const heightInput = document.getElementById('heightInput').value;

        if (!widthInput || !heightInput) {

            alert('Please enter both width and height.');

            return;

        }

        const fileHandle = document.getElementById('filestackContainer').getAttribute('data-filehandle');

        const smartCropUrl = `https://cdn.filestackcontent.com/smart_crop=width:${widthInput},height:${heightInput}/${fileHandle}`;

        alert(`Smart Crop URL: ${smartCropUrl}`);

        document.getElementById('accessUrlButton').style.display = 'block';

        document.getElementById('accessUrlButton').setAttribute('data-url', smartCropUrl);

    }

    function redirectToSmartCroppedImage() {

        const smartCropUrl = document.getElementById('accessUrlButton').getAttribute('data-url');

        window.location.href = smartCropUrl;

    }

</script>

</body>

</html>
Output
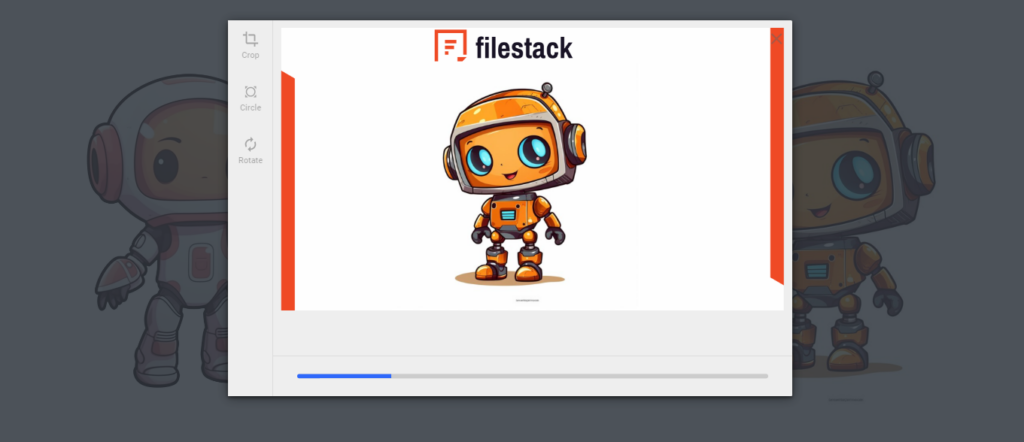
First, run your code in the Visual Studio Code. It will bring you to the following page:
Click on the orange button “Filestack Smart Crop App”. It will open the Filestack file uploader as under:
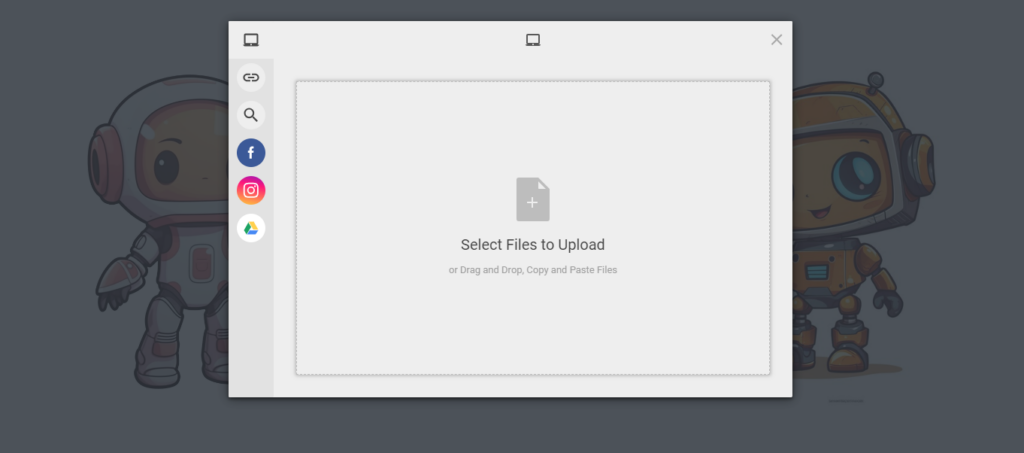
The next step is to click on “Select Files to Upload”. Select a file from your local directory and click on upload as under:
It will show a progress bar for uploading as under:
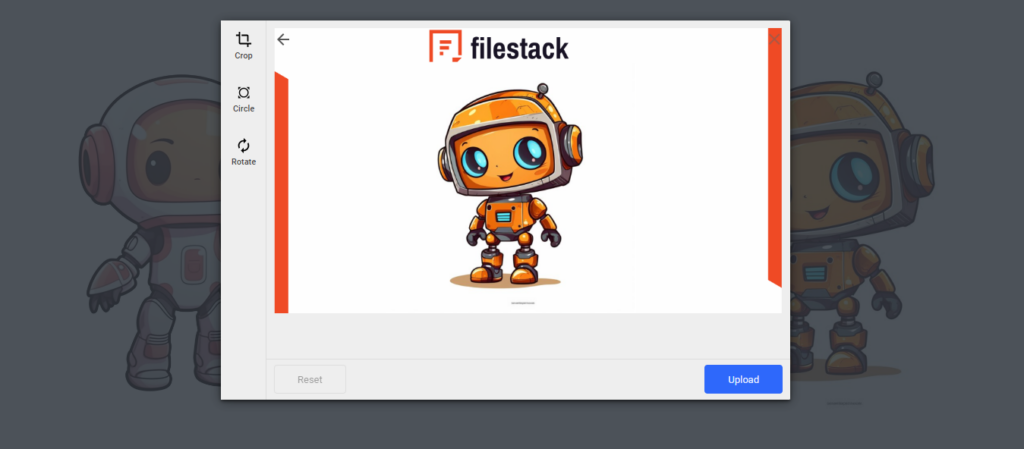
The next step is to set the height and width dimensions:
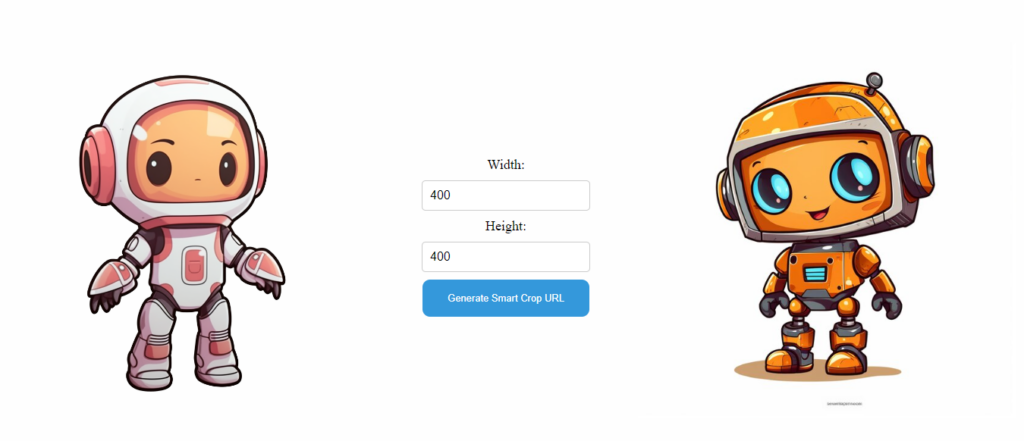
Click on the blue button to generate the smart cropped image. Then, click on the access button under
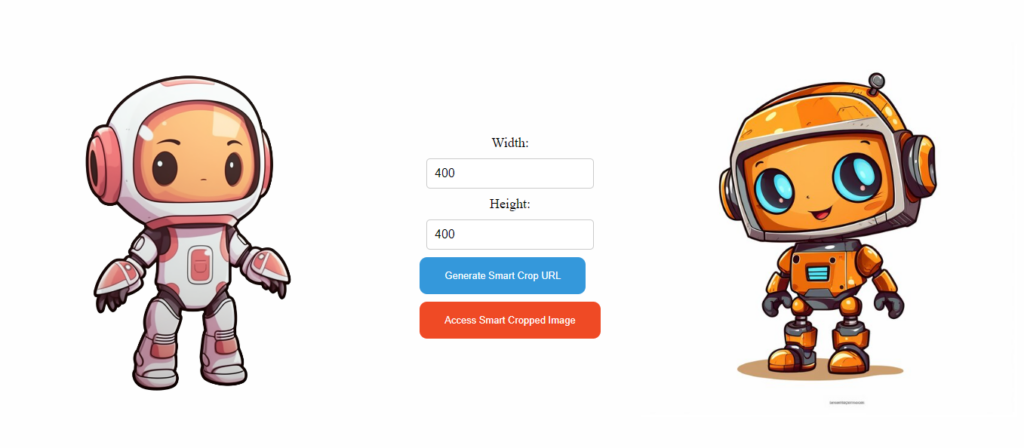
Once you click on the “Access Smart Cropped Image”, it will bring you to the image as under:
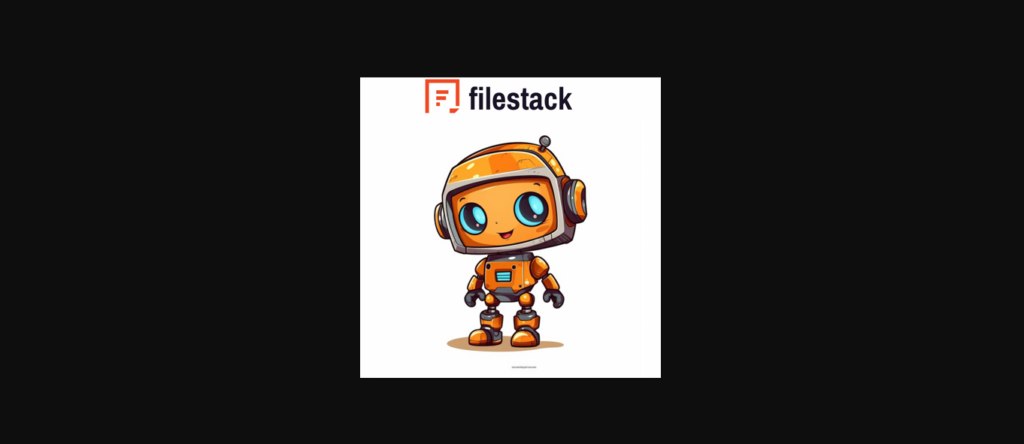
Note that the original image is given below:
Image Smart Crop: Conclusion
Filestack’s Smart Crop is an amazing feature for developers. It makes pictures look better without the need for manual cropping. This feature is a time-saver, and it’s easy to use.
Smart Crop adjusts images to fit the desired shape without changing how they originally looked. It automatically removes unnecessary parts, making the process simple. Whether you’re working on a website, app, or design, Smart Crop is a straightforward way to customize images.
To use Smart Crop, just follow three steps. First, create an account on Filestack. Second, get the API key. Third, put it into your app. Remember, Smart Crop comes with premium plans.
With its easy setup and ability to enhance images effortlessly, Filestack’s Smart Crop is a great tool for developers who want to improve the visual experience for their users.
Image Smart Crop: FAQs
What is the image smart crop feature by Filestack?
Filestack’s Smart Crop trims images automatically to the desired shape, preserving their original look. It removes unnecessary parts, making customization easy. Perfect for developers, it simplifies image enhancement in websites, apps, and designs.
Why should I integrate the image smart crop feature into my app?
Integrating the Smart Crop feature into your app ensures your images look just right. It saves time and fits images to the desired shape. Moreover, it removes unnecessary parts automatically. Smart Crop simplifies customization for a seamless and enhanced visual experience.
What are the best file-uploading sites?
Filestack is one of the best file-uploading sites with smart cropping features.
Do all file-uploading sites give a smart crop feature?
Check the API’s documentation to know all the features it offers.
Sign Up at Filestack today – Experience the best smart cropping technology.
Ayesha Zahra is a Geo Informatics Engineer with hands-on experience in web development (both frontend & backend). Also, she is a technical writer, a passionate programmer, and a video editor. She is always looking for opportunities to excel in her skills & build a strong career.
Read More →