


Document upload has become an essential feature for many modern web apps. Whether you’re building a file management system, a project management tool, an e-commerce platform, or a simple content-sharing app, enabling users to upload documents is a core requirement. As a developer, you must ensure that your document upload UI is user-friendly to provide a seamless user experience. This is where enabling users to upload documents functionality comes in handy. Drag and drop in document upload UI enables users to select and drag a file/files and drop them onto the document upload interface. This makes the whole uploading process simpler, quicker and more intuitive, enhancing the user experience.
In this article, we’ll cover core concepts for implementing drag-and-drop file upload in your applications.
Advantages of Drag and Drop in Document Upload UI


Implementing drag and drop in document upload UI (user interface) offers various benefits, such as:
- Enhanced user experience: Drag and drop makes it easier for users to upload multiple files with just a few clicks. They don’t have to follow the traditional steps of uploading files, which require more time.
- Visual Feedback: With drag-and-drop, users get quick visual feedback about the uploading process, such as file icons moving, highlighting the drop zone, and file upload progress. This way, users get assurance that their actions are being recognized by the uploader.
- Enhanced Engagement: A well-designed drag-and-drop interface makes the upload process more interactive and engaging. This, in turn, improves overall user satisfaction.
Common use cases and scenarios
- File upload on websites: Websites or apps that require users to upload documents can greatly benefit from drag-and-drop functionality. Examples include job application portals, social media platforms, customer service centers, and cloud storage services.
- Content Management Systems: In CMS platforms, drag-and-drop can make it easier to upload media files or organize content.
- E-Commerce: Online stores can use drag and drop for product image uploads. This will enable sellers to add images to their listings quickly and easily.
- Collaboration Tools: Project management or team collaboration tools often include drag-and-drop file uploads. It facilitates sharing of documents, images, and other resources among team members.
Basic Implementation Steps for Drag and Drop in Document Upload UI


Setting up the HTML structure
To implement drag-and-drop functionality in your file uploader widget, you’ll need a basic HTML structure. It will include a drop zone where users can drag and drop their files. This drop zone can be a simple div element with a suitable ID or class for styling and JavaScript targeting.
<div id="drop-zone" class="drop-zone">
    <p>Drag and drop files here, or click to select files</p>
    <input type="file" id="file-input" multiple style="display: none;">
</div>
In the above code, we’ve added a div with the ID drop-zone. This will be the document uploader zone where users can drop their files. The input element is hidden but it will be triggered when the drop zone is clicked. This way, users can also select files manually if they want to.
Adding CSS for Visual Feedback
We’ll use CSS for styling and making our drag-and-drop interface more attractive. We can also use CSS to add visual feedback. For example, we can highlight the drop zone when a user drags a file over it.
.drop-zone {
    width: 100%;
    max-width: 600px;
    height: 200px;
    border: 2px dashed #cccccc;
    border-radius: 10px;
    display: flex;
    align-items: center;
    justify-content: center;
    text-align: center;
    color: #cccccc;
    cursor: pointer;
}

.drop-zone.dragover {
    border-color: #0000ff;
    background-color: #f0f8ff;
    color: #0000ff;
}
In the above code:
- We’ve styled the drop zone with a dashed border, rounded corners, and centered text.
- The dragover class changes the border color and background color when a user drags a file over the drop zone. This will provide visual feedback to the user.
Using JavaScript for Drag and Drop Functionality
Finally, we’ll use JavaScript to handle the drag-and-drop functionality:
const dropZone = document.getElementById('drop-zone');
const fileInput = document.getElementById('file-input');

dropZone.addEventListener('click', () => {
    fileInput.click();
});

dropZone.addEventListener('dragover', (event) => {
    event.preventDefault();
    dropZone.classList.add('dragover');
});

dropZone.addEventListener('dragleave', () => {
    dropZone.classList.remove('dragover');
});

dropZone.addEventListener('drop', (event) => {
    event.preventDefault();
    dropZone.classList.remove('dragover');
    const files = event.dataTransfer.files;
    handleFiles(files);
});
Here’s how the above code works:
- We’ve added an event listener to trigger the file input when a user clicks the drop zone. This will allow users to select files manually if they prefer this method.
- The dragover event occurs when a file is dragged over the drop zone.
- event.preventDefault(): This prevents the default behavior.
- The dragleave event occurs when the dragged file leaves the drop zone area.
- dropZone.classList.remove(‘dragover’) removes the ‘dragover’ class. This means the drop zone will go back to its original state.
- The drop event occurs when the user drops files on the drop zone.
- dropZone.classList.remove(‘dragover’) removes the ‘dragover’ class. This will indicate that the drag-and-drop action is complete.
Handling File Data Transfer
In the JavaScript code in the previous section, we defined a function named handleFiles. Here’s its implementation:
function handleFiles(files) {
    const fileArray = Array.from(files);
    fileArray.forEach(file => {
        console.log('File name:', file.name);
        // Process or upload the file here
    });
}
In the above code:
- The files are converted into an array using Array.from(). This will make them easier to work with.
- The function logs the name of each file to the console.
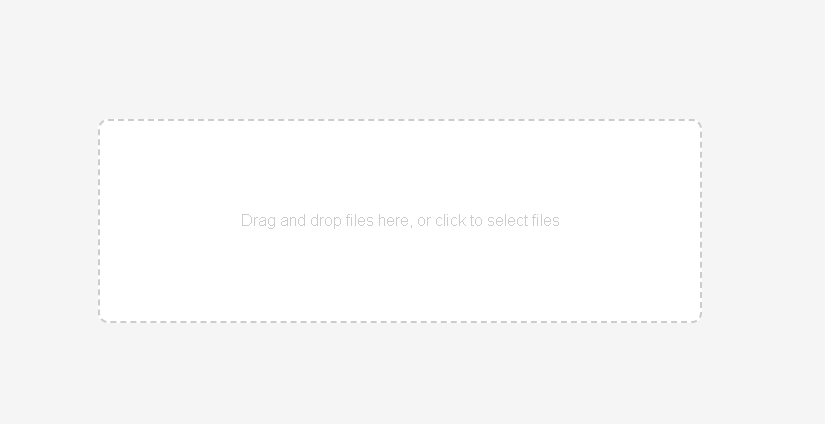
Output
When you combine the above code snippets and open it in your browser, you’ll see the following drag-and-drop interface:

You can also modify the above code further to:
- Display the file name or an icon
- Add progress bars
- Enable users to upload multiple files simultaneously
- Enable users to upload files directly from various sources, such as Google Drive, Facebook, etc.
However, implementing the above features from scratch is complex and time-consuming. That’s why developers often use a pre-built document upload solution, such as Filestack.
Filestack for Pre-Built File Upload Functionality
Filestack is a cloud-based file management platform that offers various pre-built functionalities to integrate into your application. This includes a drag-and-drop file uploader, image transformations, file conversions, and more.
Here are the key features of the Filestack File Uploader:
Secure Uploads and Easy Implementation
Filestack offers a highly secure and fast pre-built file uploader widget called the File Picker. The uploader has a clean, simple, and attractive interface and is customizable. Moreover, It supports a wide range of file types, including various documents and image types.
Filestack abstracts much of the complexity involved in integrating a document uploader into apps. Implementing the uploader requires only a few lines of code.
Filestack also leverages Intelligent Ingestion™. This allows the uploader to adjust to changing network conditions, guaranteeing upload success 99.999% of the time.
Here’s how you can easily implement Filestack File Uploader:
Include the Filestack JavaScript SDK UMD module in your code:
<script src="//static.filestackapi.com/filestack-js/3.x.x/filestack.min.js"></script>Configure the client with your Filestack API Key and open the default File Picker:
const client = filestack.init(YOUR_API_KEY);
client.picker().open();
Output:
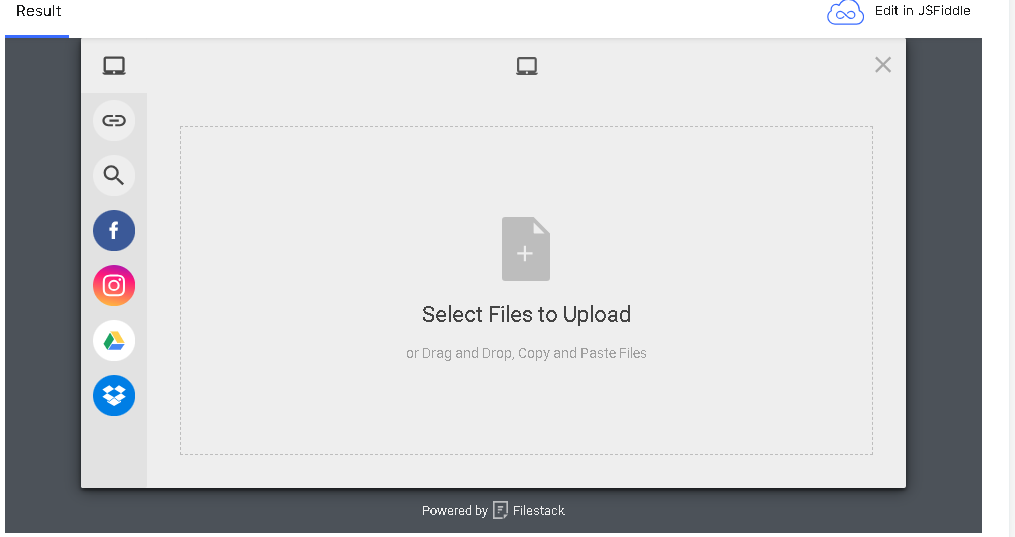

That’s it – You just need a few lines of code to integrate the uploader!
Drag-and-Drop Interface
Filestack file uploader supports multiple ways to upload files, including:
- Drag and drop uploads
- Selecting files manually
- Copy and paste files
Moreover, it displays the file name if it’s a document or a preview/thumbnail if it’s an image. It also shows a progress bar while the file is being uploaded.
Various integrated sources
Filestack file uploader supports more than 20 integrated sources, requiring no integration work on your part. These integrations include Facebook, Instagram, Google Drive, Dropbox, and more. This means users can directly upload from these sources, enhancing the user experience.
Cloud storage integrations
Filestack stores all the uploaded files in an S3 bucket by default. However, you can also integrate other cloud storage solutions with the uploader, such as:
- Amazon S3
- Google Cloud Storage
- Microsoft Azure
- Dropbox
- Rackspace
Enhancing the Drag and Drop Experience
- Provide clear visual feedback to users during drag operations. This will make their interaction more user-friendly and intuitive. For example, you can change the appearance of the drop zone when a user drags a file over it.
- Display a message or icon within the drop zone to let users know that they can drag and drop files there.
- Use visual indicators to show whether the dragged files are accepted or rejected based on file type or size.
- Enable users to upload multiple files simultaneously. Also, display a progress bar for each file.
- Validate files before upload and handle errors or issues efficiently.
Integrating with Back-end Systems
Integrating the file upload system with back-end systems ensures that files are transferred reliably from the client to the server. Here are a few points to consider when integrating with back-end systems:
- Check if your server-side script is configured to handle multipart/form-data encoding.
- Implement chunked uploads for large files. This involves splitting a file into multiple smaller chunks and uploading each chunk separately.
- Use asynchronous techniques, such as AJAX or fetch API, to upload files without blocking the UI.
- Manage responses from the server and handle any errors that occur during the file upload process. Common errors include file size limits exceeded, unsupported file types, or server-side issues.
- Implement retry mechanisms for failed uploads.
- Validate file inputs on the server side to prevent uploading of malicious files.
- Implement authentication and authorization mechanisms to ensure that only authorized users can access the uploaded content.
Testing and Optimization

- Check whether your file/document upload system works seamlessly across different web browsers. Test the file upload feature on all major browsers.
- Ensure that the document upload interface works correctly on different screen sizes and orientations.
- Use compression techniques to reduce file size and improve upload speed.
- Optimize the client-side code to minimize the processing load on the user’s device.
- Ensure that the server handling file uploads is optimized for performance. This includes using efficient file storage solutions, load balancing, and caching mechanisms.
Conclusion
Drag-and-drop in document upload UI enables users to upload multiple files quickly. They can simply drag a file and drop it onto the uploading interface. This is a more user-friendly and intuitive way to upload files than the traditional uploading method.
Implementing drag-and-drop in document upload UI involves
- Setting up the HTML structure
- Styling the U and providing visual feedback using CSS
- Adding event listeners for drag-and-drop events
- Handling file data transfer
However, creating a drag-and-drop file uploader with additional features like progress bars, integrations with services like Dropbox and Google Drive, etc., is complex and time-consuming. To simplify this process, you can use a solution like Filestack.
Filestack offers a pre-built file uploader/File Picker that supports drag-and-drop uploads, progress bars, various integrated sources, and more. Moreover, integrating the uploader into your app only requires a few lines of code.
Sign up for Filestack free today and implement an efficient document upload UI in your apps!
FAQs
How do I drag and drop files to upload?
If an uploader supports drag-and-drop functionality, you can simply select a file, drag it and drop it onto the uploader’s interface.
What is drag-and-drop UI?
Drag-and-drop UI allows users to drag a file and drop it onto the uploader’s interface to upload the file.
How do I drag and drop a PDF?
You can drag and drop a PDF file just like any other file. Simply drag it and drop it onto the uploader’s interface.


Sidra is an experienced technical writer with a solid understanding of web development, APIs, AI, IoT, and related technologies. She is always eager to learn new skills and technologies.