
You need user input to make a successful web application or website. That is where Bootstrap file upload can help. With a Bootstrap file upload feature, your users can upload photos, videos, and documents, as well as other file types to your project. For instance, let’s say you built a social messaging web app. Using Bootstrap file upload, users easily can upload profile pictures or other media.
In this post, we’ll take a look at how to implement Bootstrap file upload on your website or web application. In addition to that, we’ll take a look at some small changes that you can make to your code that will have a significant impact on your site or app’s functionality.
But, before that…
What is Bootstrap?

Bootstrap is a powerful, open-source user interface (UI) toolkit that helps you build fast, responsive websites and web applications. Created by Twitter, the Bootstrap framework comes bundled with a collection of basic HTML and CSS design templates (common UI components) as well as useful JavaScript tools. Most importantly, you don’t pay a dime to use Bootstrap — it’s free and open-source on GitHub. After its release in 2011, Bootstrap rose quickly to popularity for its features and ease of use.
Many web designers and developers around the world use the Bootstrap framework. Here are some of the reasons why:
- Consistent design
- Responsiveness
- Flexibility
- Easy to use
- Wide browser compatibility
- Smooth learning curve
Bootstrap offers rich extensibility using JavaScript plugins and it’s compatible with any code editor or IDE you choose to use. Knowing this, you may wonder how to become an expert and use Bootstrap with your website or web application.
How do I Install Bootstrap?
It’s easy. You can get started with Bootstrap in a number of ways. Firstly, download the ready-to-use Bootstrap package, for source code access to its compiled CSS bundles and JavaScript plugins. It’s all there, but be aware that this version doesn’t come with documentation, source files, or any optional JavaScript dependencies like Popper.
Alternatively, you can include the framework in your favorite package managers such as npm, RubyGems, and others. For detailed setup information, stop by the installation guide [1] in the Bootstrap official documentation.
How do I Implement Bootstrap File Upload?
Implementing Bootstrap file upload functionality requires the file input function.
Here’s the default code for adding the file input field to your website:
<div class="mb-3">

  <label for="formFile" class="form-label">Default file input example</label>

  <input class="form-control" type="file" id="formFile">

</div>
And here’s the output you get from the code:
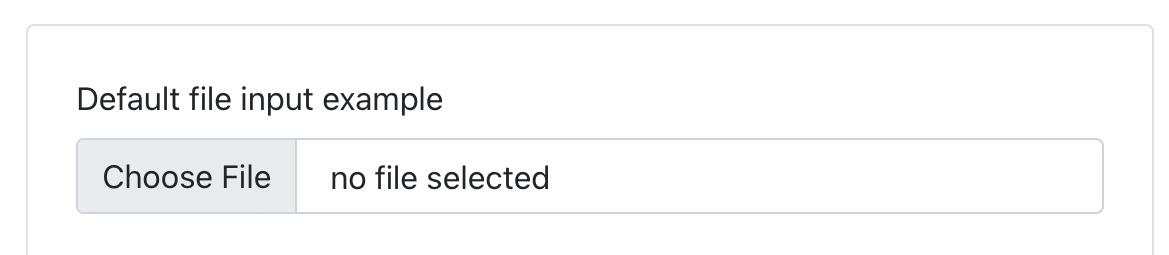
With the File Input field added, your user can upload one or more different file types (such as photos, documents, videos, .csv files, or any other type) from their local storage.
This functionality enhances the experience of your website and allows your audience to connect with you.
You can also enhance your file uploader‘ interface by checking out this beautifying Bootstrap file upload example.
What Are 7 Changes That’ll Make a Big Difference With Your Bootstrap File Upload?
If you ONLY want to implement the default Bootstrap file upload function, use the code above. You’re good to go with it. But, if you also want more control and to add some style to the file upload experience, here are some simple changes that would make a big difference.
#1: Can I Add multiple files?
The default code only allows a single file to be uploaded so, with this change, your user can upload multiple files.
Copy this code to add multiple file upload functionality:
<div class="mb-3">

  <label for="formFile" class="form-label">Default file input example</label>

  <input class="form-control" type="file" id="formFile"<span class="token tag"><span class="token attr-name">multiple</span></span>>

</div>
#2: Should I disable the file input function?
What about when you want the file upload control box to appear but remain inactive?
This is when you use the Disabled file input example to display a disabled upload box.
Here’s the code for this change:
<div class="mb-3">

  <label for="formFileDisabled" class="form-label">Disabled file input example</label>

  <input class="form-control" type="file" id="formFileDisabled" disabled>

</div>
#3: Can I upload small files?
Next, you can limit the size of the files a user can upload. This change only allows your user to upload smaller-sized files below a specified limit.
Use this code to implement this change:
<div class="mb-3">

  <label for="formFileSm" class="form-label">Small file input example</label>

  <input class="form-control form-control-sm" id="formFileSm" type="file">

</div>
#4: Can I upload large files?
If your use case requires larger files you can also allow that.
Use the code below to implement large file uploads:
<div>

  <label for="formFileLg" class="form-label">Large file input example</label>

  <input class="form-control form-control-lg" id="formFileLg" type="file">

</div>
#5: Can I add a color picker to the form?
Do you also want to let your user select a color?
If the answer is yes, then add a color picker to the file upload form.
Use the code below to add the color picker:
<label for="exampleColorInput" class="form-label">Color picker</label>

<input type="color" class="form-control form-control-color" id="exampleColorInput" value="#563d7c" title="Choose your color">
#6: Can I add data lists?
Adding data lists in your file upload system lets you create a group of options that can be accessed (and autocompleted) from within an input. It’s a great way to give your user choices or collect information.
Here’s the code to implement data lists:
<label for="exampleDataList" class="form-label">Datalist example</label>

<input class="form-control" list="datalistOptions" id="exampleDataList" placeholder="Type to search...">

<datalist id="datalistOptions">

  <option value="San Francisco">

  <option value="New York">

  <option value="Seattle">

  <option value="Los Angeles">

  <option value="Chicago">

</datalist>
#7: Can I create custom file input?
By creating a custom file input, you allow your users to upload images and other files at the same time.
It’s pretty easy — add a .custom-file-input class with HTML’s <input> attribute. You’ll also need to add a .custom-file-label class with a <label> attribute.
<div class="custom-file">

    <input type="file" class="custom-file-input" id="customInput" required>

    <label class="custom-file-label" for="customInput">Choose file...</label>

</div>
You can check out some Bootstrap file upload solutions in the official documentation [2].
Ready to enjoy a seamless Bootstrap file upload experience?
With Bootstrap, you can leverage reusable UI components to implement powerful file upload functionality in your websites and web applications. The days of writing CSS and JavaScript code from scratch are over. If you’re ready to start building powerful file upload solutions, then sign up with Filestack.
What does Filestack do for you?
Filestack offers a robust set of technology tools and API to improve your file upload, transformation, and delivery performance. You can even implement a responsive drag and drop file upload Bootstrap developers would appreciate.
The platform gets user content from anywhere and improves the file upload experience with a powerful, easy-to-use API.
It’s arguably the #1 developer service for uploads. Whether it’s fast and easy file uploads, URL ingestion, or iOS/Android device integration, Filestack has got you covered!
Don’t waste time! Head over to Filestack and sign up for free to start enjoying a seamless file uploading experience!
[1] https://getbootstrap.com/docs/5.1/getting-started/download/
[2] https://getbootstrap.com/docs/5.0/forms/form-control/#file-input
Bootstrap upload file FAQs
How can I upload a file in Bootstrap?
The answer is, you can’t, at least not with Bootstrap only. Bootstrap is a CSS framework for making interfaces and HTML elements responsive, mobile-friendly, and presentable. What you can do with it, however, is use Bootstrap to easily build elegant forms and file upload interface. For the complete file upload functionality, you’ll need HTML, JavaScript or a front-end framework, and a server-side scripting language like PHP.
You can style a file upload button with Bootstrap by using the “form-control” class. You can go further by applying HTML, CSS, and a little JavaScript.
Filestack is a dynamic team dedicated to revolutionizing file uploads and management for web and mobile applications. Our user-friendly API seamlessly integrates with major cloud services, offering developers a reliable and efficient file handling experience.
Read More →