

Three common problems can show up in the same sprint. An avatar appears sideways on Android. A 12 MB photo takes too long to upload on a weak connection. And an iPhone photo fails validation because it isn’t actually a JPG.
Most guides on how to upload JPG files on mobile stop once the file is selected. But that’s where the real problems often begin.
The photo might arrive rotated, be much larger than needed, or turn out to be a different format. Each of these problems has a clear cause and a simple fix.
To upload a JPG file on mobile, let users pick from camera or gallery, then handle the three traps that break JPG uploads: EXIF orientation (photos arriving sideways), oversized camera outputs (often 5-12MB), and format mismatches such as HEIC masquerading as JPG on iOS. Client-side resize plus server-side normalisation solves all three. Filestack converts, rotates, and compresses automatically on upload.
This article looks at each problem separately and then shows how to handle all of them in one step. That way, you don’t have to fix each upload bug as it appears.
Key Takeaways
- EXIF Orientation values 3, 6, and 8 mark a rotated capture. Ignore them, and the photo displays sideways or upside down.
- Phone cameras commonly output 5 to 12MB JPGs at 12 to 48 megapixels, far more than any screen needs to display.
- iOS saves photos as HEIC by default. A file named
photo.jpgis not proof that it holds JPG data. - A canvas resize on the client fixes orientation and file size in one step, since the redrawn pixels come out upright.
- Server-side normalisation catches every client you don’t control, including third-party apps and old app versions still in the wild.
Trap 1, The Sideways Photo (EXIF Orientation)
Phone cameras don’t rotate the pixel data when you turn the phone. They save the image as captured and write a rotation instruction into the EXIF metadata instead. Most photo apps read that instruction and display the photo the right way up. Plenty of image libraries and browsers don’t, and that’s when a portrait selfie shows up lying on its side in your app.
The Orientation tag can hold several values, but three of them cause almost every sideways bug: values 3, 6, and 8 mark a rotated capture, corresponding to 180, 90, and 270 degrees. If your upload pipeline ignores this tag, the photo saves and displays exactly as rotated.
The fix is to draw the image onto a canvas using the correct rotation before you upload it. Once it’s drawn, the pixels themselves are upright, so no downstream viewer can get it wrong again.
function drawUprightImage(file) {

return new Promise((resolve) => {

const img = new Image();

const reader = new FileReader();

reader.onload = (e) => {

img.onload = () => {

const canvas = document.createElement('canvas');

const ctx = canvas.getContext('2d');

getOrientation(file, (orientation) => {

const swap = orientation >= 5 && orientation <= 8;

canvas.width = swap ? img.height : img.width;

canvas.height = swap ? img.width : img.height;

switch (orientation) {

case 3: ctx.transform(-1, 0, 0, -1, canvas.width, canvas.height); break;

case 6: ctx.transform(0, 1, -1, 0, canvas.height, 0); break;

case 8: ctx.transform(0, -1, 1, 0, 0, canvas.width); break;

default: break;

}

ctx.drawImage(img, 0, 0);

canvas.toBlob((blob) => resolve(blob), 'image/jpeg', 0.9);

});

};

img.src = e.target.result;

};

reader.readAsDataURL(file);

});

}
Fixing orientation on the client helps, but it only covers the clients you control. Keep that in mind while we move to the next trap, which shares part of the same fix.
Trap 2, The 12MB Camera File
A modern phone camera shoots at 12 to 48 megapixels and saves the result as a JPG in the 5 to 12MB range. Almost nothing in your app needs that much resolution. A profile photo displays at a few hundred pixels wide. Even a full-screen image rarely needs more than 2000 pixels on its longest edge.
Uploading the full-size image uses extra time and data without giving you much benefit. It’s really a page-size problem, just happening during the upload.
The same rule used to speed up image loading applies here too: resize the image to the size you actually need before uploading it.
Resize on the client before the upload starts. Canvas resize also solves this in the same pass as the orientation fix above, since you’re already redrawing the image. Set a maximum dimension, scale the canvas to fit it, and export at a reasonable JPEG quality like 0.8 or 0.9. A 10MB original commonly comes out under 1MB with no visible loss on a phone screen.
Resizing the image on the device takes care of the file size before upload. The next problem is a little trickier because the file may look completely normal at first.

Trap 3, HEIC in JPG Clothing
iOS stores photos as HEIC by default, not JPG. Some pickers and share sheets hand the file over with a .jpg extension anyway, or a name that looks like a JPG, while the actual bytes are still HEIC. A file extension is a label someone chose. It is not proof of what’s inside the file.
Trusting the extension is how format bugs make it to production undetected in testing. The safest check is the byte signature at the start of the file, not the name. JPG files start with the bytes FF D8 FF. HEIC files carry a different signature entirely. Check the actual bytes, and convert if the signature doesn’t match what the extension claims.
This is where image transformation pipelines can make things easier. A common question is how to resize, crop, watermark, or change an image format on the fly.
Instead of processing the same image several times, you can use one transformation URL to handle multiple changes in a single request. Filestack can use the image’s EXIF data to correct its orientation, convert HEIC images to JPG or WebP, and compress the image in the same transformation chain.
| Trap | Symptom | Fix |
| EXIF orientation | Photo displays sideways or upside down | Read Orientation, draw upright via canvas or auto-orient on ingestion |
| Oversized camera file | Slow upload, timeout on weak connection | Resize to display target on the client before transfer |
| HEIC in JPG clothing | Validation fails, image won’t render | Check byte signature, convert HEIC to JPG or WebP server-side |
Now that we’ve covered all three problems, the next question is where to handle each one in your app.
Implementation, Web Form and Native
On mobile web, image uploads usually start with a file input. A common question is how to add image uploads to a web form. You can use <input type="file" accept="image/*" capture="environment"> to open the camera directly. If you remove capture, users can choose between the camera and gallery.
Native apps work a little differently. Both iOS and Android have SDKs that can handle camera and gallery permissions, so you don’t have to build that flow yourself.
React Native has its own approach. Image picker libraries return a local file URI instead of a browser File object, so your upload code needs to read the file from that URI first.
The fixes for orientation and file size stay the same across platforms. Only the way you get the file changes.
You can build all of this yourself, but that means maintaining similar upload logic for web, iOS, Android, and React Native. There is a simpler way to handle it.
The Managed Route, Normalise on Ingestion
You can handle all three problems with a single mobile file upload flow that automatically fixes orientation, converts formats, and compresses images as they are uploaded.
Instead of writing separate code for image rotation on the web, native SDKs, and HEIC checks, you can use one transformation process for every file as soon as it arrives.
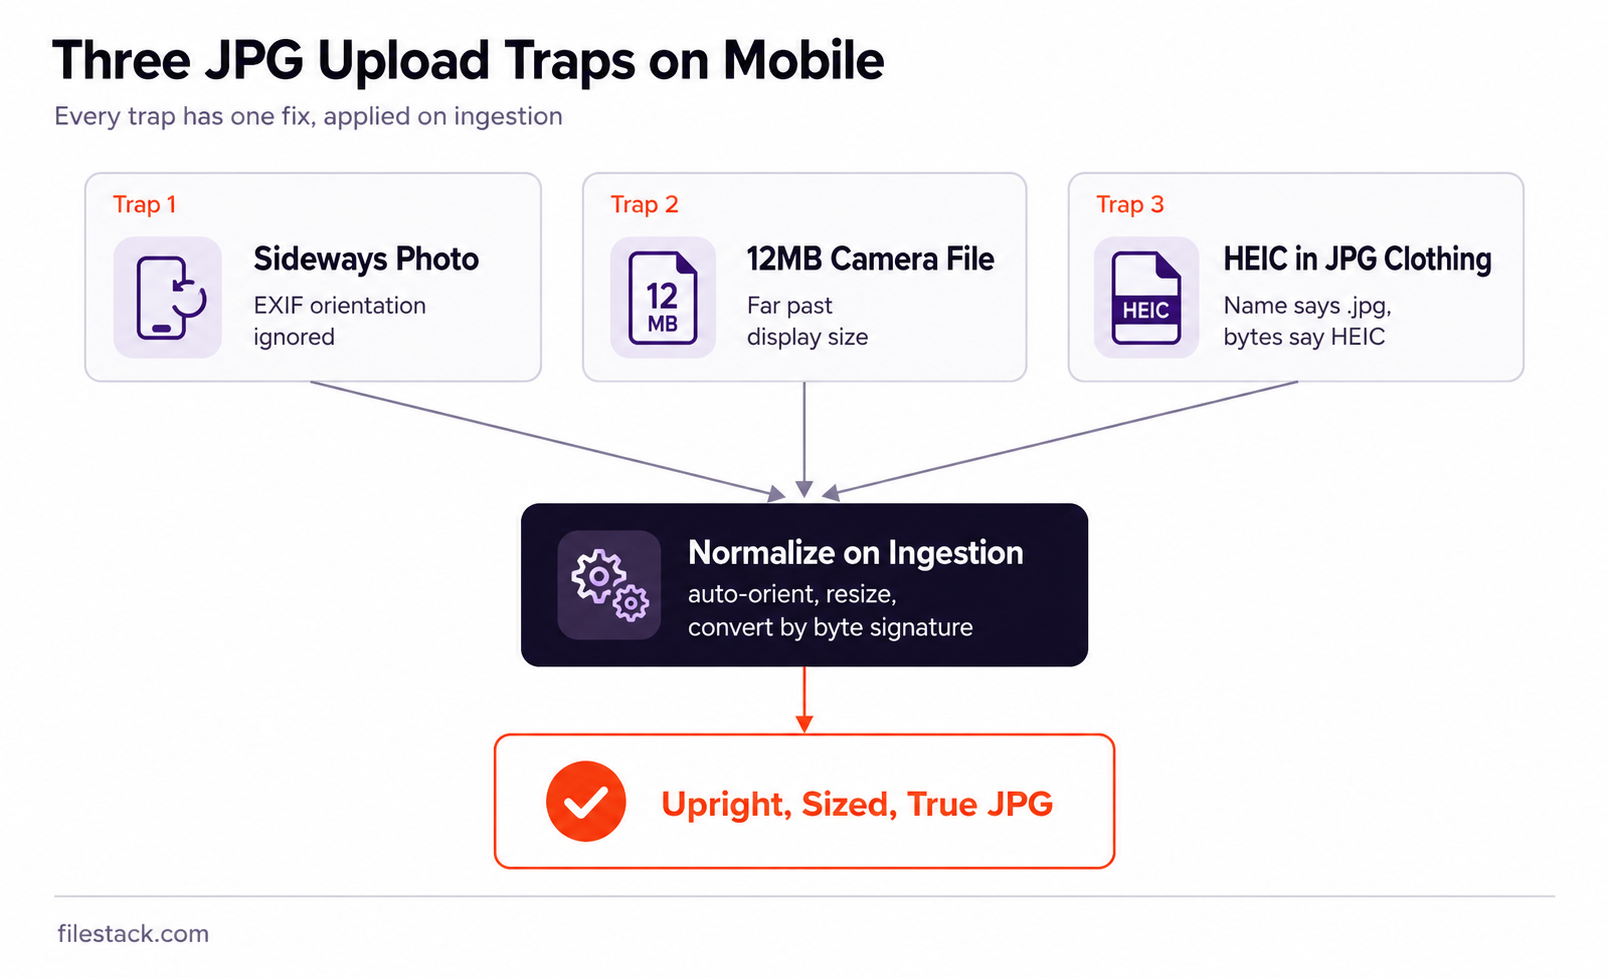
Server-side normalisation also handles files from places you don’t control. Older app versions, third-party integrations, and API requests might skip your client-side fixes. A server-side step catches these files too and makes sure they follow the same rules.
Once the file is normalised, you can create different image sizes for your app. This leads to another common question: how can you generate thumbnails automatically after an upload?
You can create thumbnails, medium previews, and full-size versions from the same normalised image. This is much simpler than running a separate resize job for each version.
💡For the resize math in more depth, see our guide on making pictures smaller before upload.
We’ve covered how to fix each problem. Here’s a quick summary to remember.
Conclusion: Trust Bytes, Not Extensions
Three traps, three fixes: orient from EXIF instead of trusting the file as captured, resize early instead of uploading the full camera output, and convert by byte signature instead of trusting the file extension. Client-side resize handles the traffic you can see. Server-side normalisation catches everything else.
Run a real phone photo through a transformation sandbox and check all three: does it come out upright, does it come out at a sane file size, and does it come out as an actual JPG regardless of what the original claimed to be.

Frequently Asked Questions
Why do my mobile photo uploads appear sideways?
EXIF Orientation is being ignored somewhere in the pipeline. Auto-orient on ingestion, or draw the image upright client-side using the Orientation tag before upload.
Why did an iPhone JPG upload fail validation?
It was likely HEIC with a JPG-style name. Check the byte signature rather than the file extension, and convert HEIC to JPG or WebP if the signature doesn’t match.
How big are phone camera JPGs?
Commonly 5 to 12MB at 12 to 48 megapixels. Resize to the display target before or during upload rather than sending the original file.

Shefali Jangid is a web developer, technical writer, and content creator with a love for building intuitive tools and resources for developers.
She writes about web development, shares practical coding tips on her blog shefali.dev, and creates projects that make developers’ lives easier.
Read More →