In today’s digital landscape, images and file uploads are integral to both websites and mobile apps, whether for user-generated content or internal use. Online tools, social media platforms, and internal systems all require efficient file upload capabilities to function smoothly. For instance, image editing tools and social media sites rely on effective file uploader services to handle image files.
Moreover, internal teams often need to upload various types of files, such as product images, logos, and videos. To accommodate these needs, developers must implement a reliable file uploader. Fortunately, HTML makes it straightforward to create a fast and functional image uploader. In this article, we’ll explore how to set up a basic HTML image uploader with ease.
Key Takeaways
- HTML Basics: HTML (Hypertext Markup Language) is a standard markup language that forms the building blocks of web pages. HTML, along with CSS and JavaScript, forms the basis of modern websites. HTML defines the page structure and content, but JavaScript is used for dynamic functions and CSS for styling.
- A Close Look at HTML Image Uploader: An HTML image uploader is a tool that allows users to upload images to a web page. This is usually done through a simple form and is part of the interactive features of web applications.
- How to Create an HTML Image Uploader: Creating a simple image uploader with HTML is quite easy using basic HTML tags. This process involves configuring the image upload form and the necessary tags.
- Adding an Image to a Button with JavaScript: Using JavaScript, it is possible to dynamically add an image to the image uploader button. This provides visual effects that increase the user interaction.
Discovering Filestack and How It Helps in File Uploads: Filestack is a platform that simplifies file uploading processes. It simplifies and optimizes developers’ file management by providing high-capacity uploading, conversion, and storage features.
Understanding HTML: The Building Blocks of Web Pages
HTML is the acronym for Hypertext Markup Language. It is the standard markup language used to create web pages. HTML, along with CSS (Cascading Style Sheets ) and JavaScript, form the basis of almost every modern website. With HTML, we essentially create the structure of the page, such as sections, paragraphs, and links, by using HTML elements like tags and attributes. In other words, it tells the web browser the content of a web page should be displayed. However, HTML isn’t a programming language because it doesn’t allow us to create dynamic functionality. As a result, we use JavaScript to add dynamic elements to our web page and CSS for styling.
There are several HTML tags available that we can use to create different elements. Here are some of the most used HTML tags:
- <html> – This tag basically defines the entire HTML page or document.
- <head> – It consists of meta information, such as the title of the page.
- <body>: This is basically the document’s body, and it consists of all the content that is visible on the web page, such as paragraphs, headings, images, lists, tables, hyperlinks, and more.
What Is An HTML Image Uploader?
An image uploader, as the name suggests, is a feature on a website or web app that allows users to upload image files. These include a JPEG image, PNG, GIF, etc. An image uploader also transfers the uploaded images to the server. It is provided as a built-in feature of the website by embedding it into the HTML code. As a result, users don’t need to download and install an image uploader separately. While creating an image uploader, developers must ensure that it is fast, secure, and efficient.
Thankfully, with HTML, we can implement the image upload feature pretty easily using the <input> (file input element)
How To Create An HTML Image Uploader?
Here are the simple steps for inserting and customizing an image uploader with HTML:
Using <input type=”file”> To Create The File Upload Button
Below is an example code for creating an upload file button in HTML:
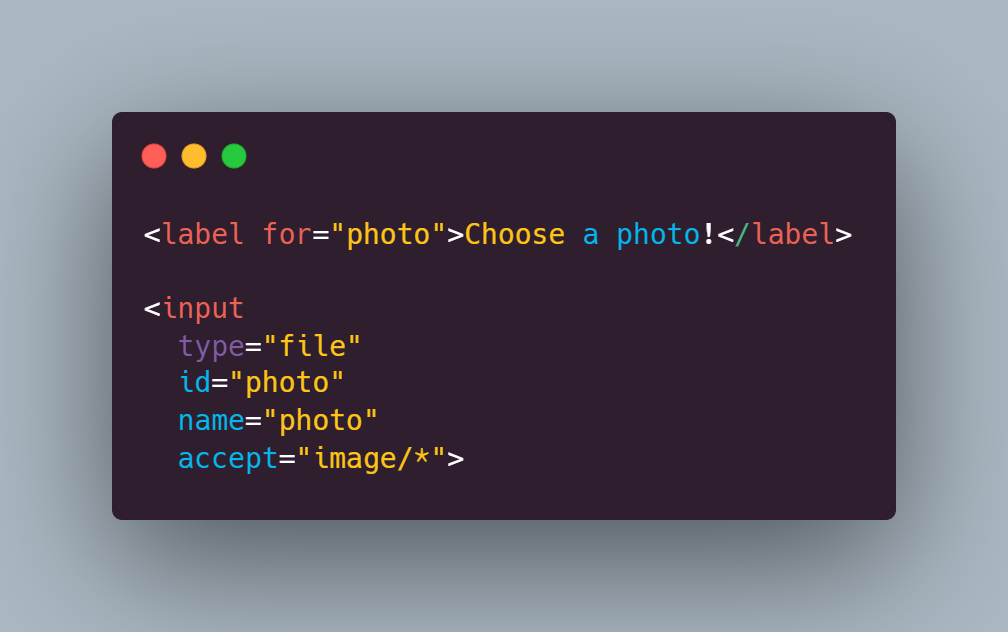
You can also find the code here.
That’s it. We’ve inserted the file upload button. Now, we can customize the image uploader as needed.
If you want to learn how to resize images in HTML, check out this article.
Customizing The Text Within The Button
If you want to display some other text instead of ‘choose file,’ you can use the code below to change the text within the file upload button:
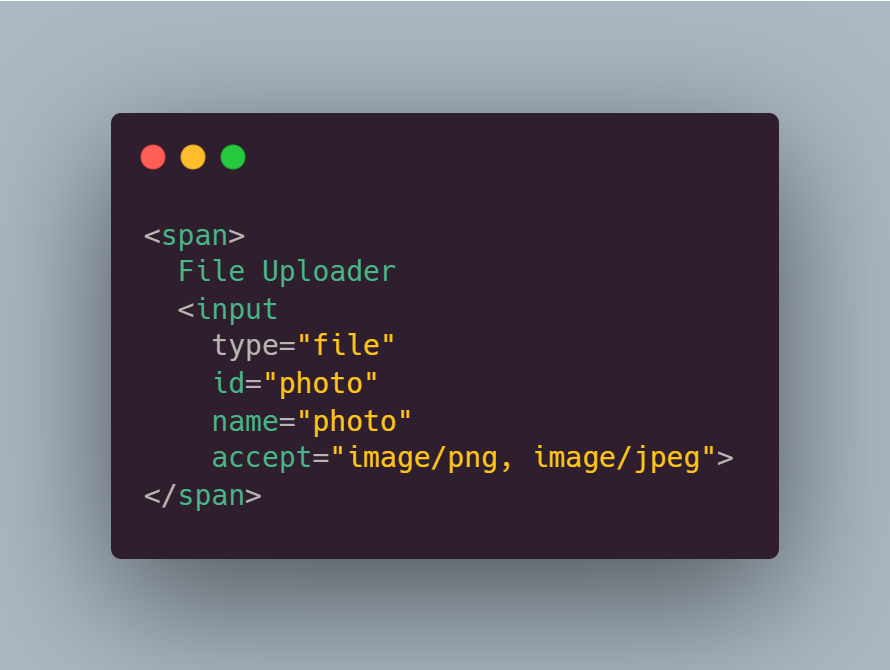
You can also find the code here.
Hiding The Button
In some cases, you may wish to hide the button. We can achieve this using CSS:
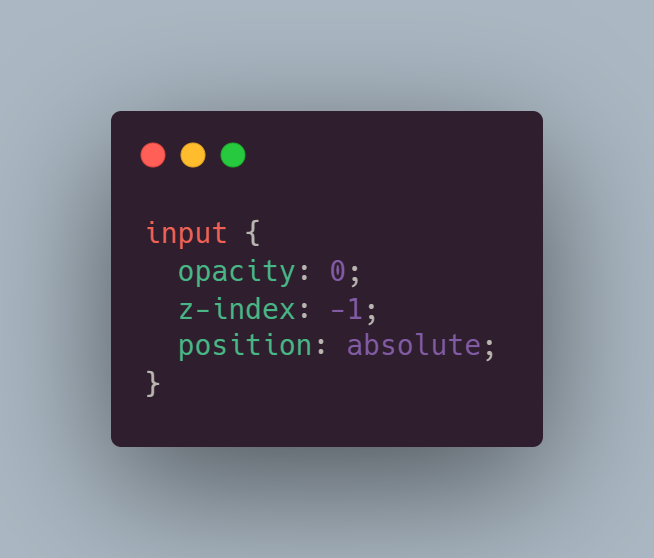
You can also find the code here.
Here we’ve set the opacity to 0, which will make the input transparent. The z-index value ensures that the element remains underneath everything else on the page.
Customizing The Design Of The HTML Image Uploader
We can also customize the button further to make it look attractive. For example, we can change the default grey buttons:
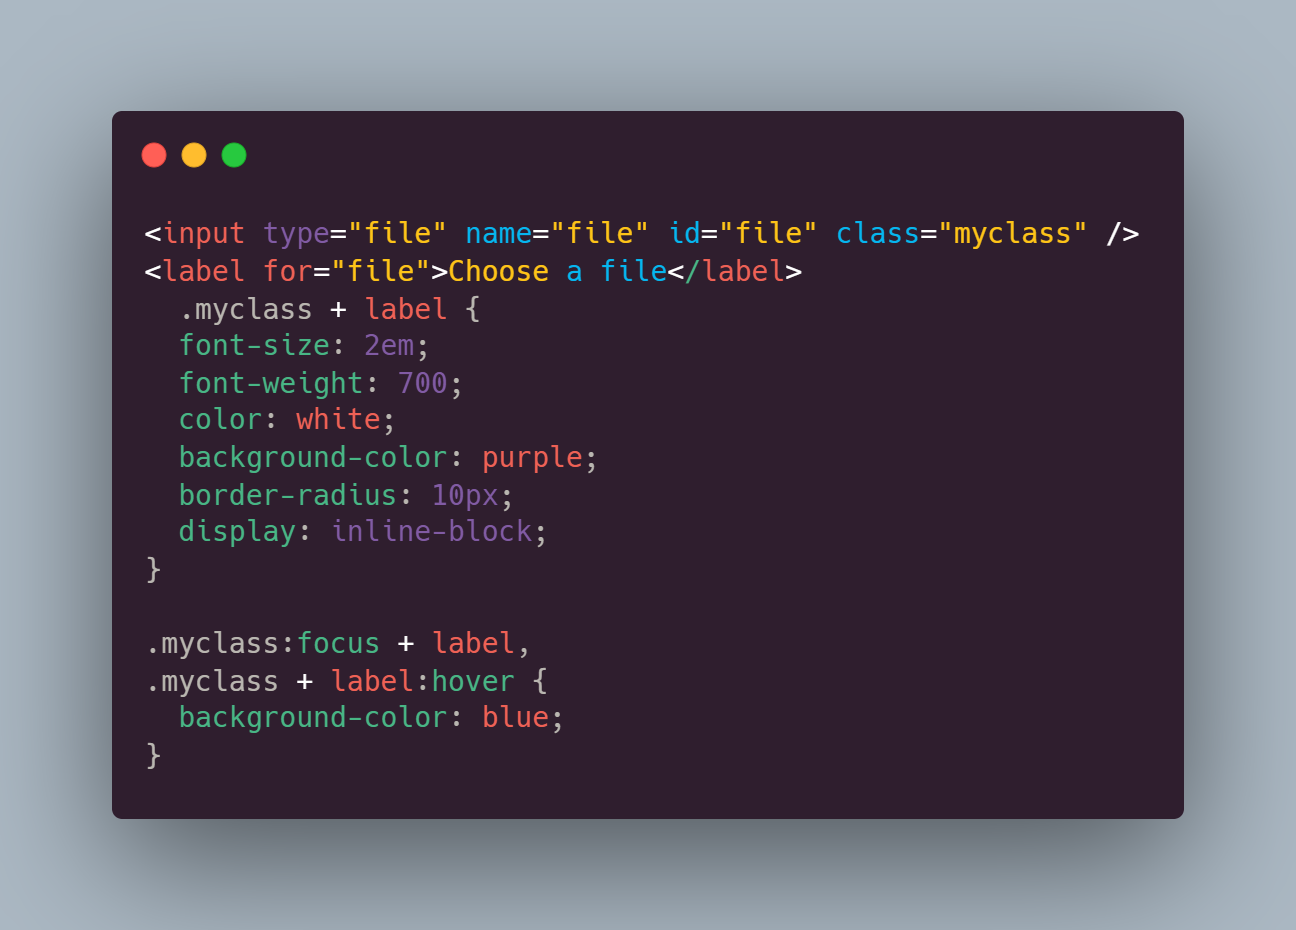
You can also find the code here.
However, we now have two file upload buttons – the default grey one and the customized button we created using the above code. To hide the default grey button, you can use the code provided in the above step.
Limiting Image File Types
Sometimes, we want to limit the types of files the users can upload to the server, especially for security purposes. We can specify the allowed file extension or extensions:
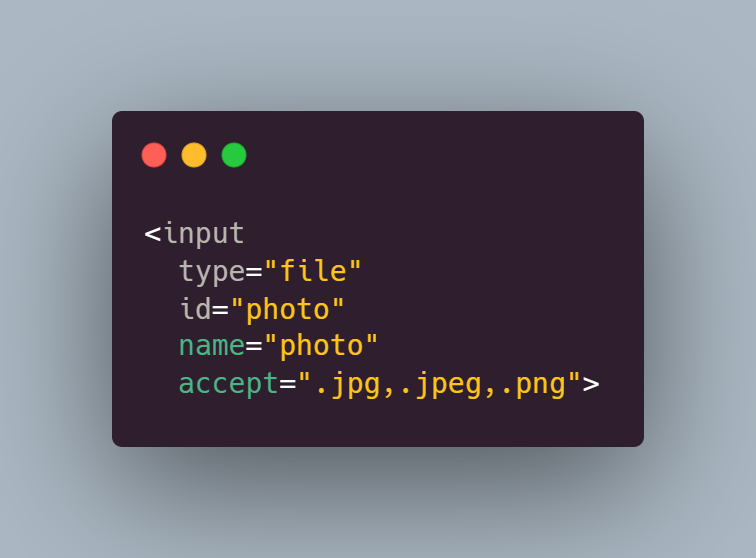
You can also find the code here.
Adding An Image To The Button Using JavaScript
Now, let’s write the JavaScript code to show the image in <img id=”output”> element.
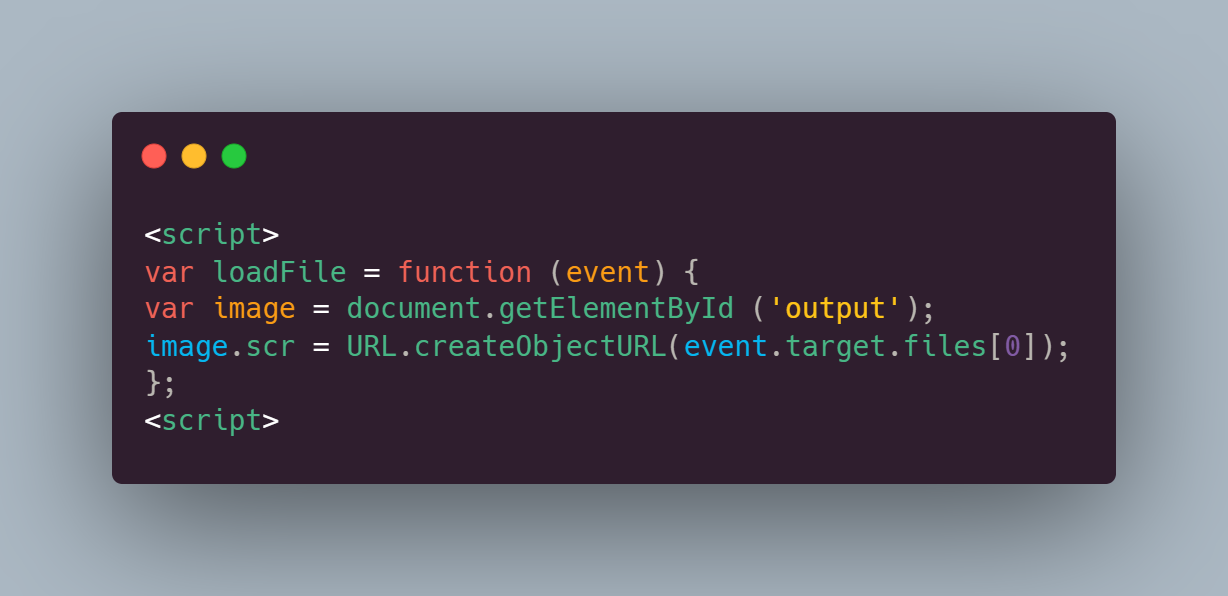
You can also find the code here.
What Is Filestack, And How Can It Help With File Uploads?
Filestack is an advanced yet easy-to-use and secure file uploader and file upload API. It allows you to enhance the appearance and performance of your file uploader with only two lines of code. Additionally, it enables developers to add drag-and-drop file upload capability to their websites quickly. The Filestack file uploader comes with a beautiful UI and has over 20 integrated sources, including Instagram, Facebook, and Dropbox, to improve user experience. With Filestack file uploader, you can enable image preview. Additionally, you can allow users to upload multiple files and also show a progress bar as well.
Filestack also offers image transformation and optimization features:
- It enables users to convert PNG and JPEG/JPG images to modern formats like WebP or JPEG XR. Both these file format types have better quality characteristics and compression.
- Filestack can scan each face in a picture and automatically determine the corrections needed.
- It can retrieve details from underexposed photos.
- With Filestack, you can upscale images while maintaining the image quality.
- Filestack also enables users to resize images and reduce image file size without losing image quality.
- You can remove the red eye effect from pictures using Filestack’s image processing API.
- Filestack also offers fully responsive images so that your images work well on various devices with different screen sizes, such as desktop, laptop, and mobile.
Frequently Asked Questions (FAQs)
What is a file uploader?
A file uploader is an essential feature of many websites that enables end-users to upload files, such as images, documents, videos, etc.
Can you create a file uploader with HTML?
Creating an HTML file uploader is super quick and easy. You can also customize the file upload button, such as changing the text or color of the button.
You can easily create a file upload button using HTML <input> element.
Sign up free and try the Filestack File Upload API today!
Sidra is an experienced technical writer with a solid understanding of web development, APIs, AI, IoT, and related technologies. She is always eager to learn new skills and technologies.
Read More →
