


Large file uploads can be frustrating for users. Problems like slow internet or a lost connection make it even worse.
Imagine uploading a 2GB video, reaching almost the end, and then the upload fails. You have to start again from the beginning. This is why pause and resume upload features are very important for a good user experience.
For a deeper understanding of the challenges with large files, see our complete guide to large file uploads.
In this tutorial, you will learn how to add pause and resume for large file uploads in a React app using Filestack’s SDK.
We will build a simple and complete solution that shows upload progress, handles errors, and manages upload state, everything you need to upload large files smoothly in your React application.
Before we begin building the upload component, let’s quickly look at what you’ll learn from this tutorial.
Key Takeaways
- Learn how to implement pause, resume, and cancel uploads using Filestack’s SDK in React.
- Understand how chunked uploads help prevent failed large file uploads.
- Track upload progress using Filestack’s progress callbacks.
- Improve reliability by handling unstable network connections.
- Build a user-friendly upload UI with clear status and controls.
Now that you know what you’ll build, let’s make sure you have everything ready to follow along.
Prerequisites
Before getting into the implementation, make sure you have:
- Basic knowledge of React and React Hooks.
- A Filestack account and an API key (create a Filestack account).
- Node.js and npm are installed on your system.
- A React project already set up (or you can create a React project using Vite).
💡Tip: If you need to set up basic file uploads in React first, check out our basic React file upload tutorial.
Once your environment is ready, it’s important to understand how Filestack makes pause and resume uploads possible.
Understanding Chunked Uploads in Filestack
Filestack uses chunked uploads to support pause and resume. This means large files are broken into small parts, and each part is uploaded one by one.
As announced in our Filestack File Picker 4.0 release, pause and resume functionality was introduced to improve upload reliability and user control. This makes uploads more reliable and user-friendly.
Here’s why this approach is useful:
- Resilience: If one small part fails, only that part needs to upload again.
- Pause & Resume: Uploading can stop and continue from the last uploaded part.
- Progress Tracking: You can easily show upload progress as each part finishes.
- Better for Poor Internet: Small parts upload more easily on slow or unstable networks.
When an upload is paused, Filestack remembers which parts are already uploaded. When you resume the upload, it continues from the same point instead of starting from zero.
Now that you understand how chunked uploads work behind the scenes, let’s start implementing this functionality in your React project.
Implementing Pause and Resume for Large File Uploads in React
Let’s start adding pause and resume functionality to make uploads more reliable and user-friendly.
Step 1: Install and Set Up Filestack SDK
First, install the Filestack JavaScript SDK in your project:
npm install filestack-jsNext, create a configuration file to store your Filestack settings:
// config/filestackConfig.js

export const FILESTACK_API_KEY = 'YOUR_API_KEY_HERE';export const UPLOAD_OPTIONS = {
intelligent: true, // Improves upload performance
intelligentChunkSize: 8 * 1024 * 1024, // Uploads file in 8MB parts
timeout: 60000, // Stops upload if it takes more than 60 seconds
};
Here, replace ‘YOUR_API_KEY_HERE’ with your actual Filestack API key.
The complete source code used in this tutorial is available here.
With the SDK installed and configured, the next step is to build the React component that will manage our upload logic.
Step 2: Create the Basic Component Structure
Now, let’s create a basic React component that will handle the file upload and keep track of its state.
Create a new file for the upload component:
// components/ResumableFileUpload.jsx
import React, { useState, useRef } from "react";
import * as filestack from "filestack-js";
import {
FILESTACK_API_KEY,
UPLOAD_OPTIONS,
} from "../../config/filestackConfig";const ResumableFileUpload = () => {
// State to track file and upload status
const [selectedFile, setSelectedFile] = useState(null);
const [uploadProgress, setUploadProgress] = useState(0);
const [uploadStatus, setUploadStatus] = useState("idle");
// idle, uploading, paused, completed, error
const [uploadedFileUrl, setUploadedFileUrl] = useState(null);
const [errorMessage, setErrorMessage] = useState(null);// Refs to store values between re-renders
const uploadInstanceRef = useRef(null);
const filestackClientRef = useRef(null);

// Create Filestack client when the component loads
React.useEffect(() => {
filestackClientRef.current = filestack.init(FILESTACK_API_KEY);
console.log("Filestack client initialized");
}, []);

return (
<div className="upload-container">
<h2>Resumable File Upload</h2>
<p>Status: {uploadStatus}</p>
<p>Progress: {uploadProgress}%</p>
{selectedFile && <p>File: {selectedFile.name}</p>}
</div>
);
};

export default ResumableFileUpload;
What this code does:
- Stores the selected file and upload progress.
- Keeps track of the upload state (idle, uploading, paused, etc.).
- Creates a Filestack client once when the component loads.
- Shows basic upload information on the screen.
How to test step 2:
Import and use the component in App.js:
// App.jsx
import ResumableFileUpload from "./components/ResumableFileUpload";function App() {
return (
<div className="App">
<ResumableFileUpload />
</div>
);
}
export default App;- Start your app using npm run dev.
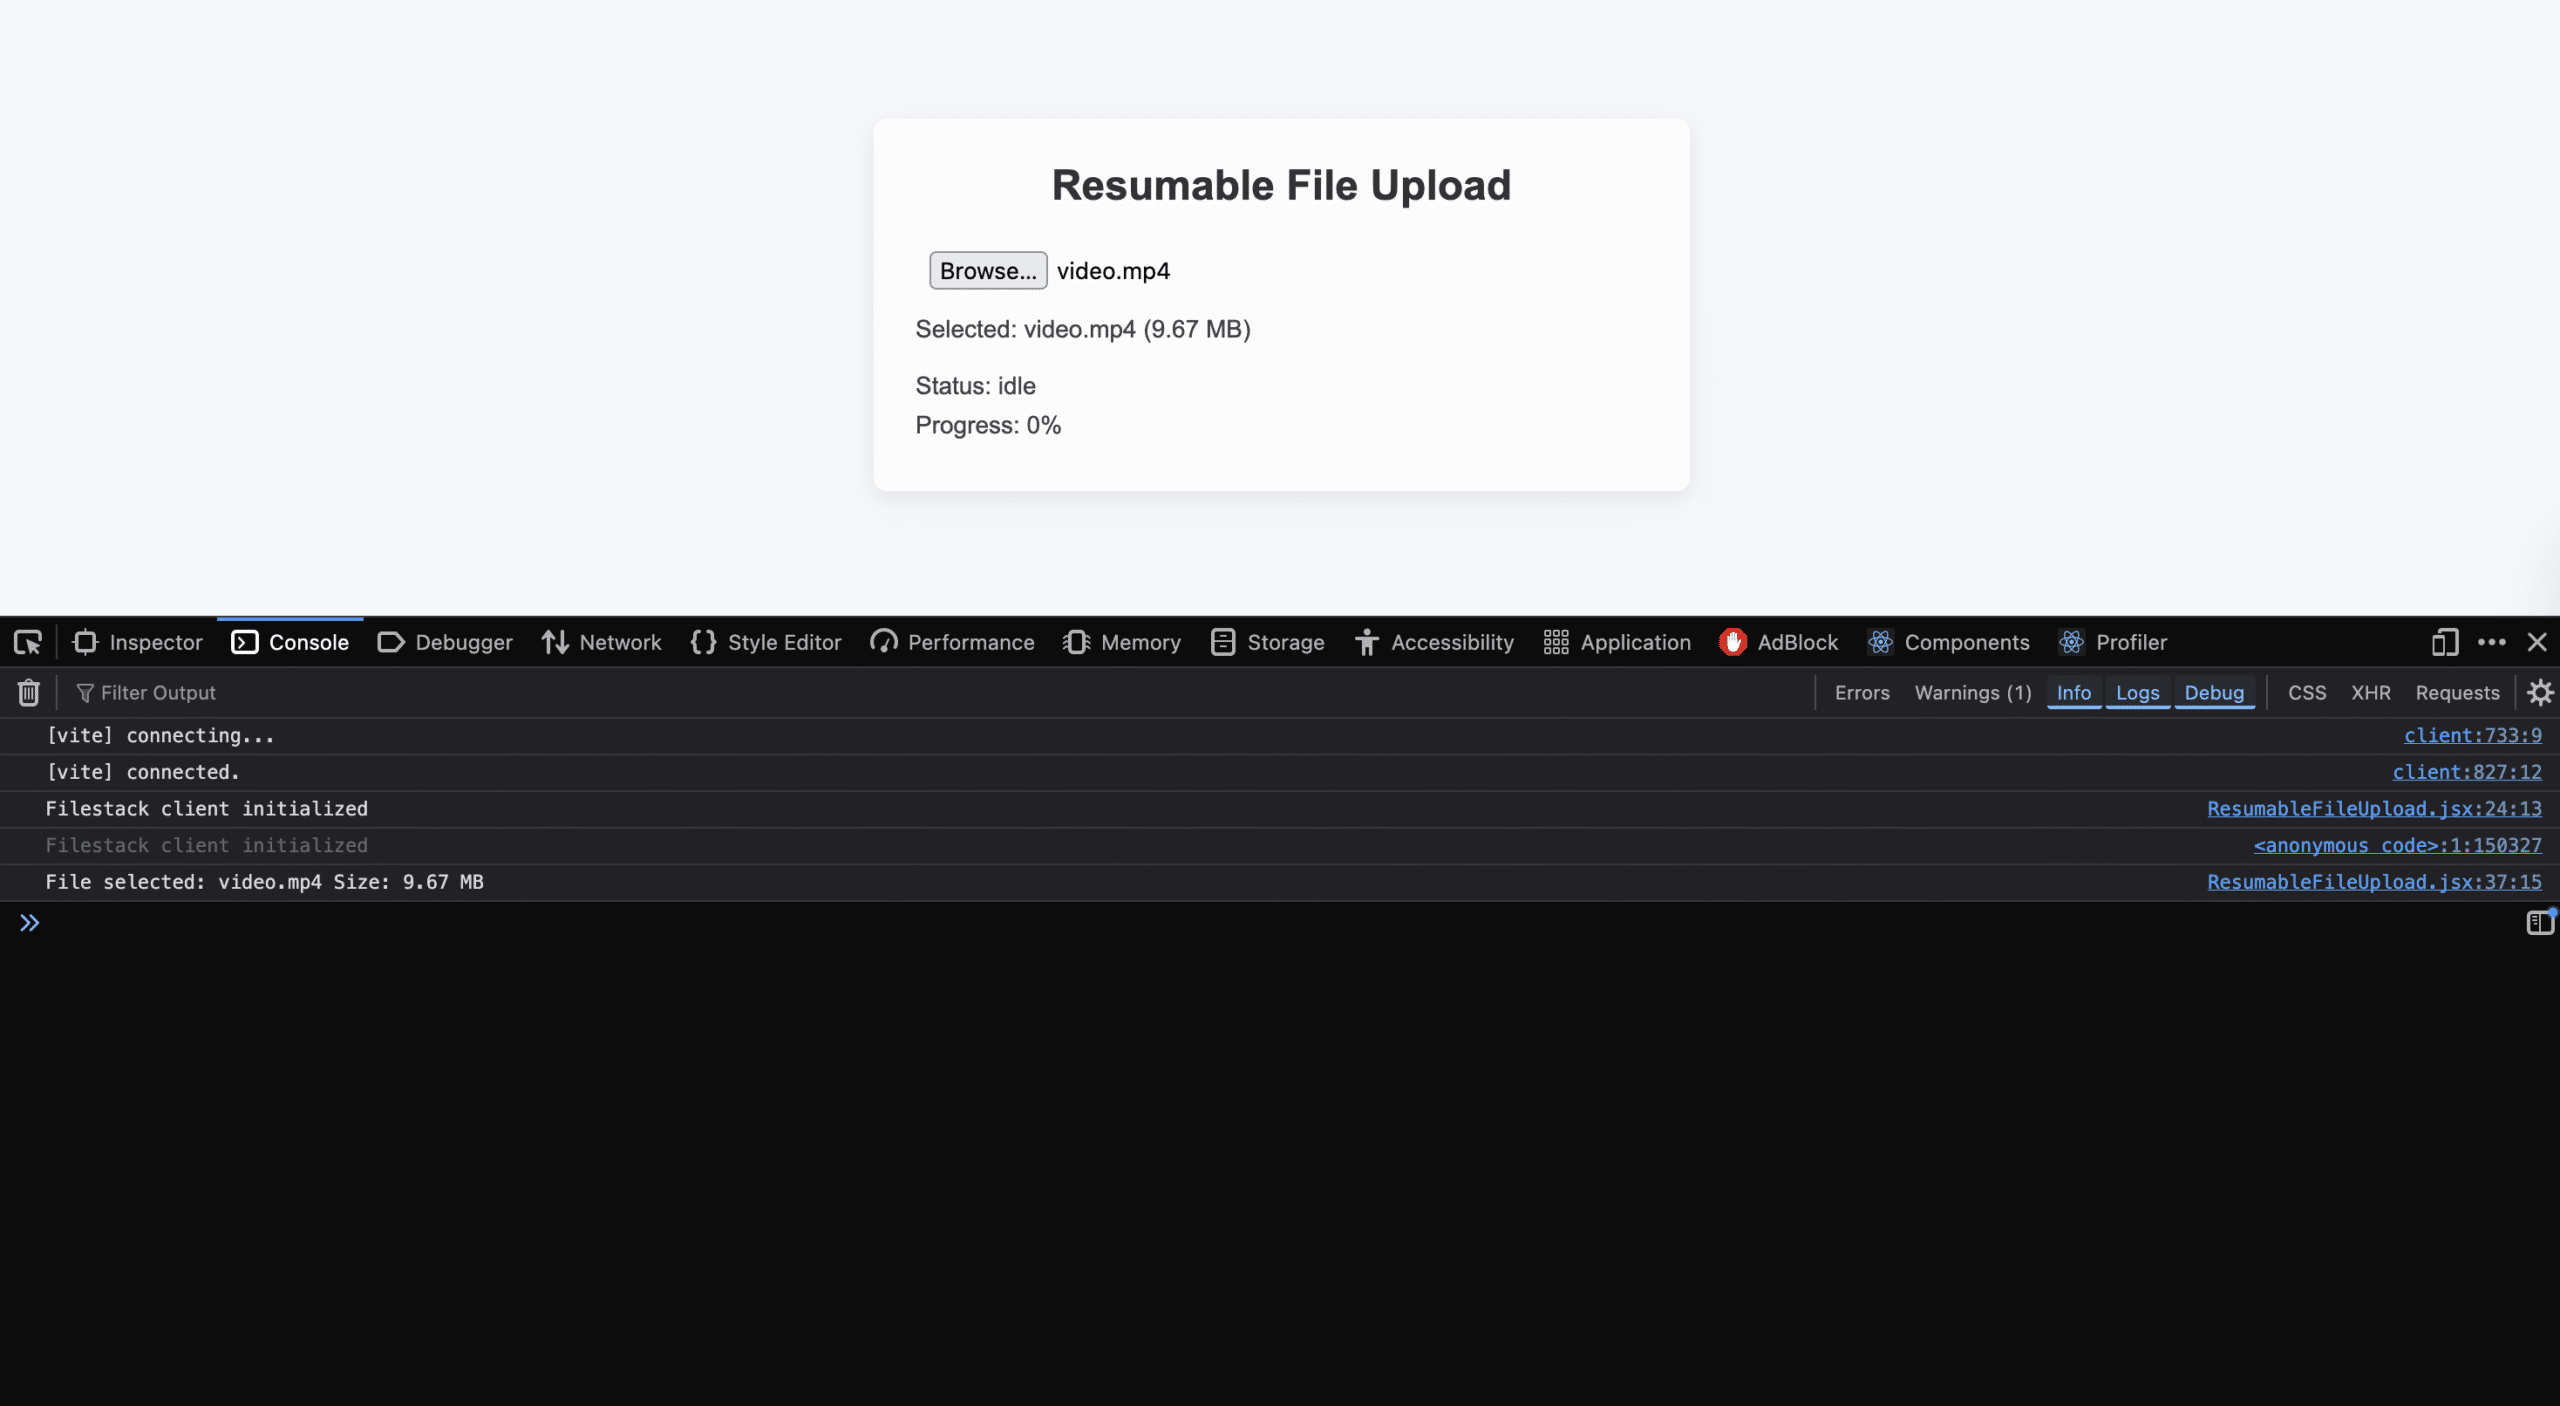
- Open the browser console and check for the message: “Filestack client initialised”.
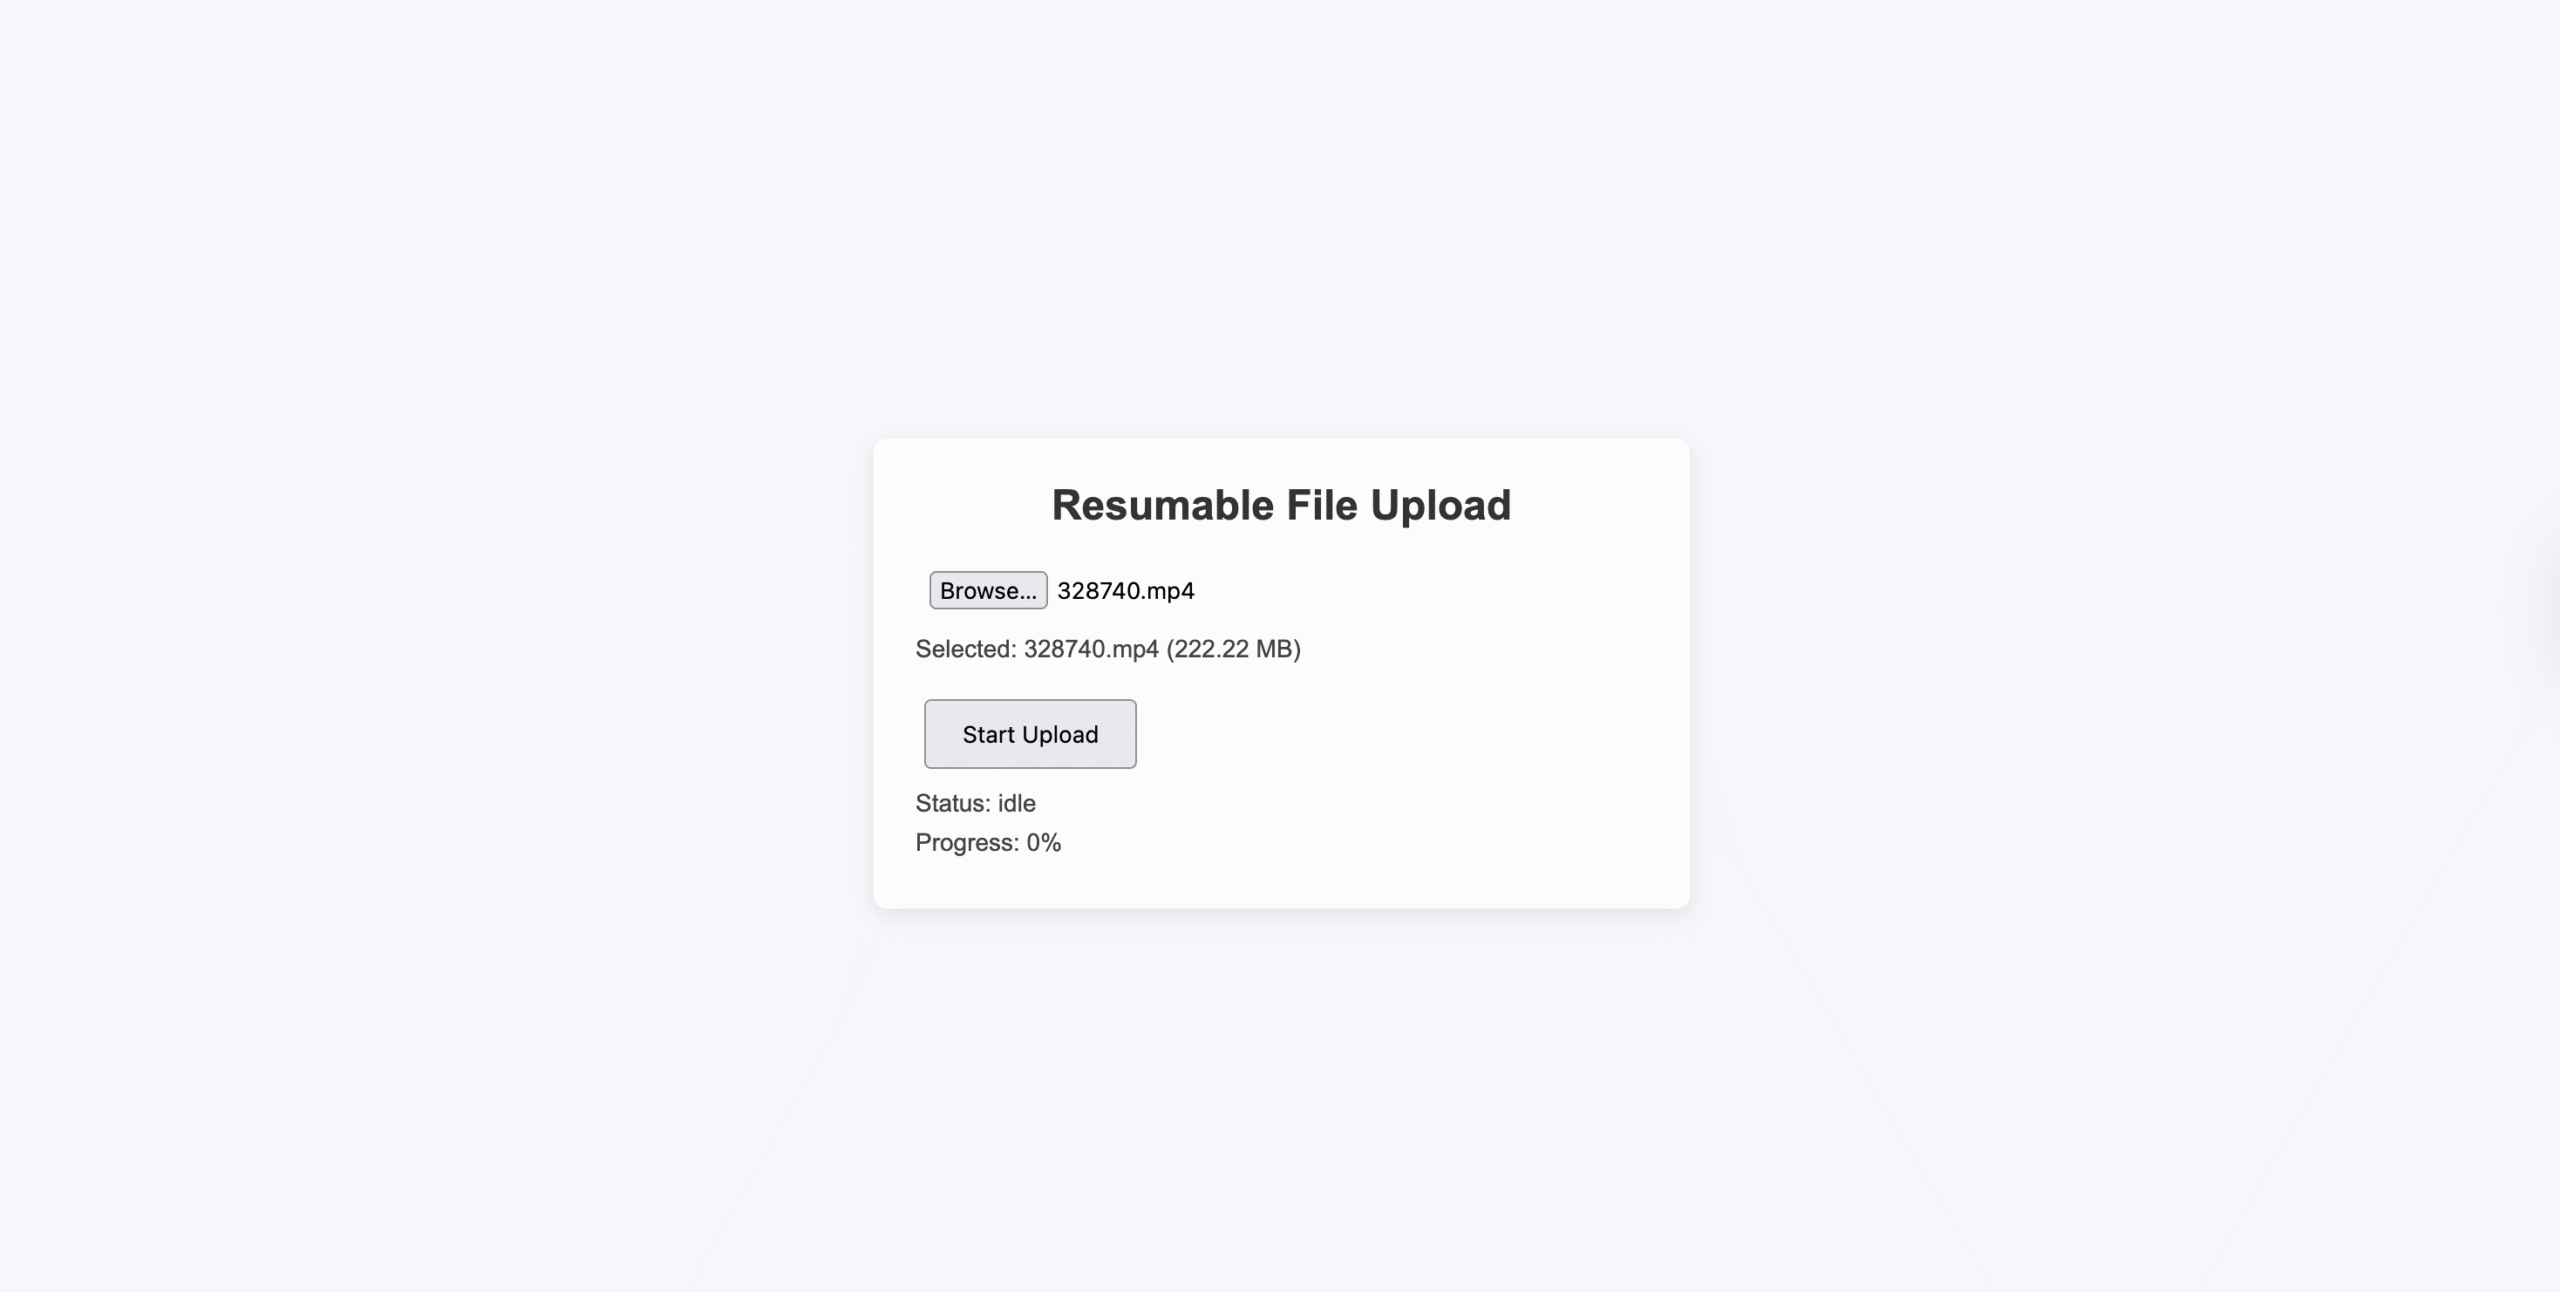
- On the page, you should see:
- Status: idle
- Progress: 0%
At this point, your basic upload component is ready.
Now that the component structure is ready, let’s allow users to select files for upload.
Step 3: Implement File Selection
Now, let’s allow users to choose a file and store it in the component state.
Add this function inside the ResumableFileUpload component (after the useEffect):
const handleFileSelect = (event) => {
const file = event.target.files[0];if (file) {
setSelectedFile(file);
setUploadProgress(0);
setUploadStatus('idle');
setErrorMessage(null);
setUploadedFileUrl(null);console.log(
'File selected:',
file.name,
'Size:',
(file.size / 1024 / 1024).toFixed(2),
'MB'
);
}
};
Next, update the JSX to show a file input and file details:
return (
<div className="upload-container">
<h2>Resumable File Upload</h2><div className="file-input-section">
<input
type="file"
onChange={handleFileSelect}
disabled={uploadStatus === 'uploading' || uploadStatus === 'paused'}
accept="*/*"
/>{selectedFile && (
<p className="file-info">
Selected: {selectedFile.name} (
{(selectedFile.size / 1024 / 1024).toFixed(2)} MB)
</p>
)}
</div>

<p>Status: {uploadStatus}</p>
<p>Progress: {uploadProgress}%</p>
</div>
);
What this code does:
- The user selects a file using the file input.
- The selected file is saved in the state.
- Upload progress and errors are reset.
- The file name and size are shown on the screen.
- File selection is disabled while an upload is running or paused.
How to test step 3:
- Refresh your browser.
- Click the file input and select a file (try a larger file, 50MB+).
- Check the browser console for the “File selected” log with file details.
- Verify the file name and size display correctly below the input.
- Select a different file and confirm the display updates.

After selecting a file, the next step is to actually upload it using Filestack.
Step 4: Start the Upload
Now we’ll start uploading the selected file using Filestack’s SDK and create an upload control token.
This token is required to pause, resume, or cancel the upload later.
Why Do We Need a Control Token
When you call client.upload(), Filestack allows pause, resume, and cancel only if you pass a control object into the upload call.
This object is then enhanced by the SDK with .pause(), .resume(), and .cancel() methods.
If you want to explore all available upload options and methods, you can check the official Filestack Client API documentation.
Add the Upload Function
Add this function after handleFileSelect inside your component:
// Add this ref at the top of the component
const uploadControlRef = useRef(null);const startUpload = async () => {
if (!selectedFile || !filestackClientRef.current) {
console.error("No file selected or Filestack client not initialized");
return;
}setUploadStatus("uploading");
setErrorMessage(null);

// Create a control token object
const uploadControl = {};
uploadControlRef.current = uploadControl;

const uploadOptions = {
...UPLOAD_OPTIONS,

onProgress: (event) => {
const percent = Math.round(event.totalPercent || 0);
setUploadProgress(percent);
},
};

try {
const result = await filestackClientRef.current.upload(
selectedFile,
uploadOptions,
{ filename: selectedFile.name },
uploadControl // 👈 IMPORTANT: pass the control token
);

setUploadedFileUrl(
`https://cdn.filestackcontent.com/${result.handle}`
);
setUploadStatus("completed");
setUploadProgress(100);
} catch (error) {
setUploadStatus("error");
setErrorMessage(error.message || "Upload failed");
console.error("Upload error:", error);
}
};
Add the Start Upload Button
Update your JSX to include the button:
{selectedFile && uploadStatus === 'idle' && (
<button
onClick={startUpload}
style={{ padding: '10px 20px', fontSize: '16px' }}
>
Start Upload
</button>
)}
Also, show the uploaded file link after completion:
{uploadedFileUrl && (
<p>
<a href={uploadedFileUrl} target="_blank" rel="noopener noreferrer">
View uploaded file
</a>
</p>
)}
What this code does:
- User selects a file.
- User clicks Start Upload.
- Filestack uploads the file in chunks.
- Tracks upload progress in real time.
- Creates a control token that enables pause, resume, and cancel.
- Stores the uploaded file URL on success.
- Handles errors safely using try/catch.
How to test step 4:
- Select a small file (5–10MB).
- Click Start Upload.
- Watch the progress percentage increase.
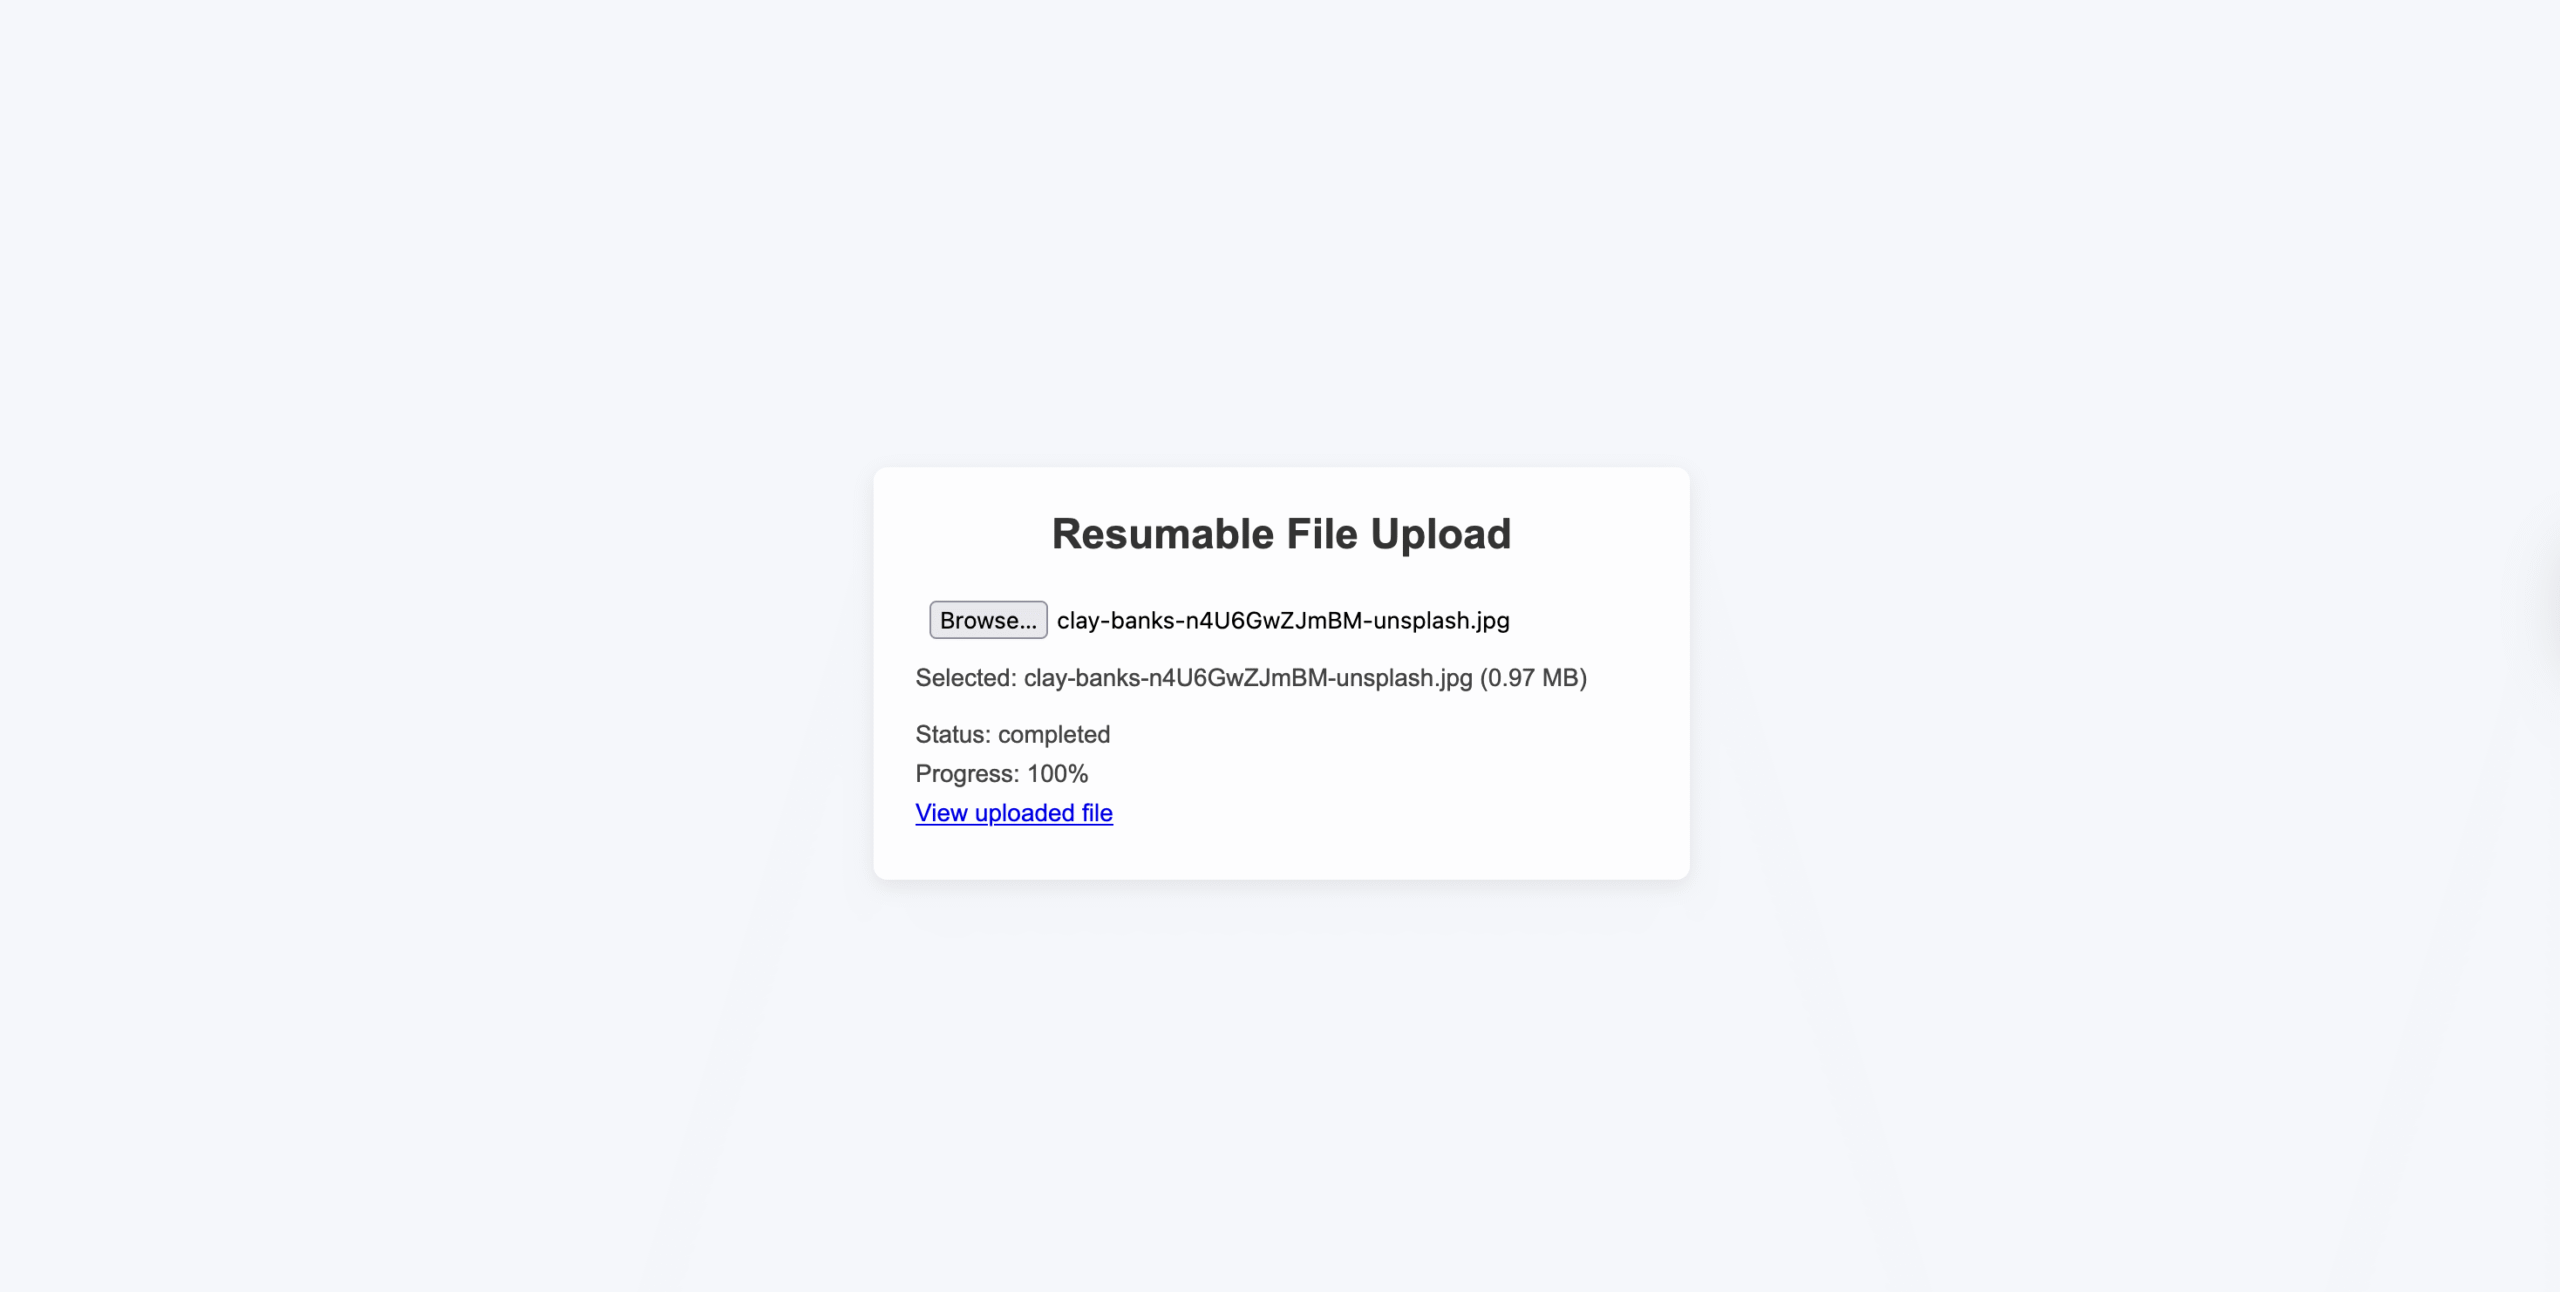
- Wait for the upload to finish.
- Status should be completed.
- Progress should show 100%.
- Click View uploaded file and confirm it opens.
At this point, the upload is working and ready to be controlled.

The upload is now working, but users still cannot control it. Let’s add pause, resume, and cancel functionality next.
Step 5: Add Pause, Resume, and Cancel Functionality
Now that we have a control token, we can pause, resume, or cancel the upload at any time.
These actions work because Filestack uploads files in chunks and keeps track of which chunks are already uploaded.
Add Pause, Resume, and Cancel Functions
Add these functions after startUpload inside your component:
// Add this ref near the top of your component
const isCancelledRef = useRef(false);const pauseUpload = () => {
if (uploadControlRef.current && uploadStatus === "uploading") {
uploadControlRef.current.pause();
setUploadStatus("paused");
console.log("Upload paused at", uploadProgress + "%");
}
};

const resumeUpload = () => {
if (uploadControlRef.current && uploadStatus === "paused") {
uploadControlRef.current.resume();
setUploadStatus("uploading");
console.log("Upload resumed from", uploadProgress + "%");
}
};

const cancelUpload = () => {
if (uploadControlRef.current) {
// Mark this as a user-initiated cancellation
isCancelledRef.current = true;

uploadControlRef.current.cancel();
uploadControlRef.current = null;

setUploadStatus("idle");
setUploadProgress(0);
setErrorMessage(null);

console.log("Upload cancelled by user");
}
};
What these functions do:
- pauseUpload: Stops uploading new chunks without losing progress.
- resumeUpload: Continues uploading from the last completed chunk.
- cancelUpload: Stops the upload completely and resets the state.
Update the startUpload Error Handling
Update the catch block inside startUpload:
try {
const result = await filestackClientRef.current.upload(
selectedFile,
uploadOptions,
{ filename: selectedFile.name },
uploadControl
);

setUploadedFileUrl(
`https://cdn.filestackcontent.com/${result.handle}`
);
setUploadStatus("completed");
setUploadProgress(100);
} catch (error) {
// If the user cancelled, do not treat it as an error
if (isCancelledRef.current) {
console.log("Upload cancelled, skipping error state");
isCancelledRef.current = false;
return;
}

setUploadStatus("error");
setErrorMessage(error.message || "Upload failed");
console.error("Upload error:", error);
}
Update the UI with Control Buttons
Now update your JSX to show the correct buttons based on upload status:
{selectedFile && uploadStatus === "idle" && (
<button
onClick={startUpload}
style={{ padding: "10px 20px", margin: "5px" }}
>
Start Upload
</button>
)}

{uploadStatus === "uploading" && (
<div>
<button
onClick={pauseUpload}
style={{ padding: "10px 20px", margin: "5px" }}
>
Pause
</button>
<button
onClick={cancelUpload}
style={{ padding: "10px 20px", margin: "5px" }}
>
Cancel
</button>
</div>
)}
{uploadStatus === "paused" && (
<div>
<button
onClick={resumeUpload}
style={{ padding: "10px 20px", margin: "5px" }}
>
Resume
</button>
<button
onClick={cancelUpload}
style={{ padding: "10px 20px", margin: "5px" }}
>
Cancel
</button>
</div>
)}
Keep the status and progress display:
<p>Status: {uploadStatus}</p>
<p>Progress: {uploadProgress}%</p>{errorMessage && <p style={{ color: "red" }}>Error: {errorMessage}</p>}{uploadedFileUrl && (
<p>
<a href={uploadedFileUrl} target="_blank" rel="noopener noreferrer">
View uploaded file
</a>
</p>
)}
What’s happening here:
- Filestack uploads the file in small chunks.
- When you pause, it stops uploading new chunks.
- When you resume, it continues from the last uploaded chunk.
- Already uploaded data is not lost.
- Cancelling stops the upload entirely.
How to Test Step 5:
- Select a large file (100MB+ recommended for this test).
- Click “Start Upload”.
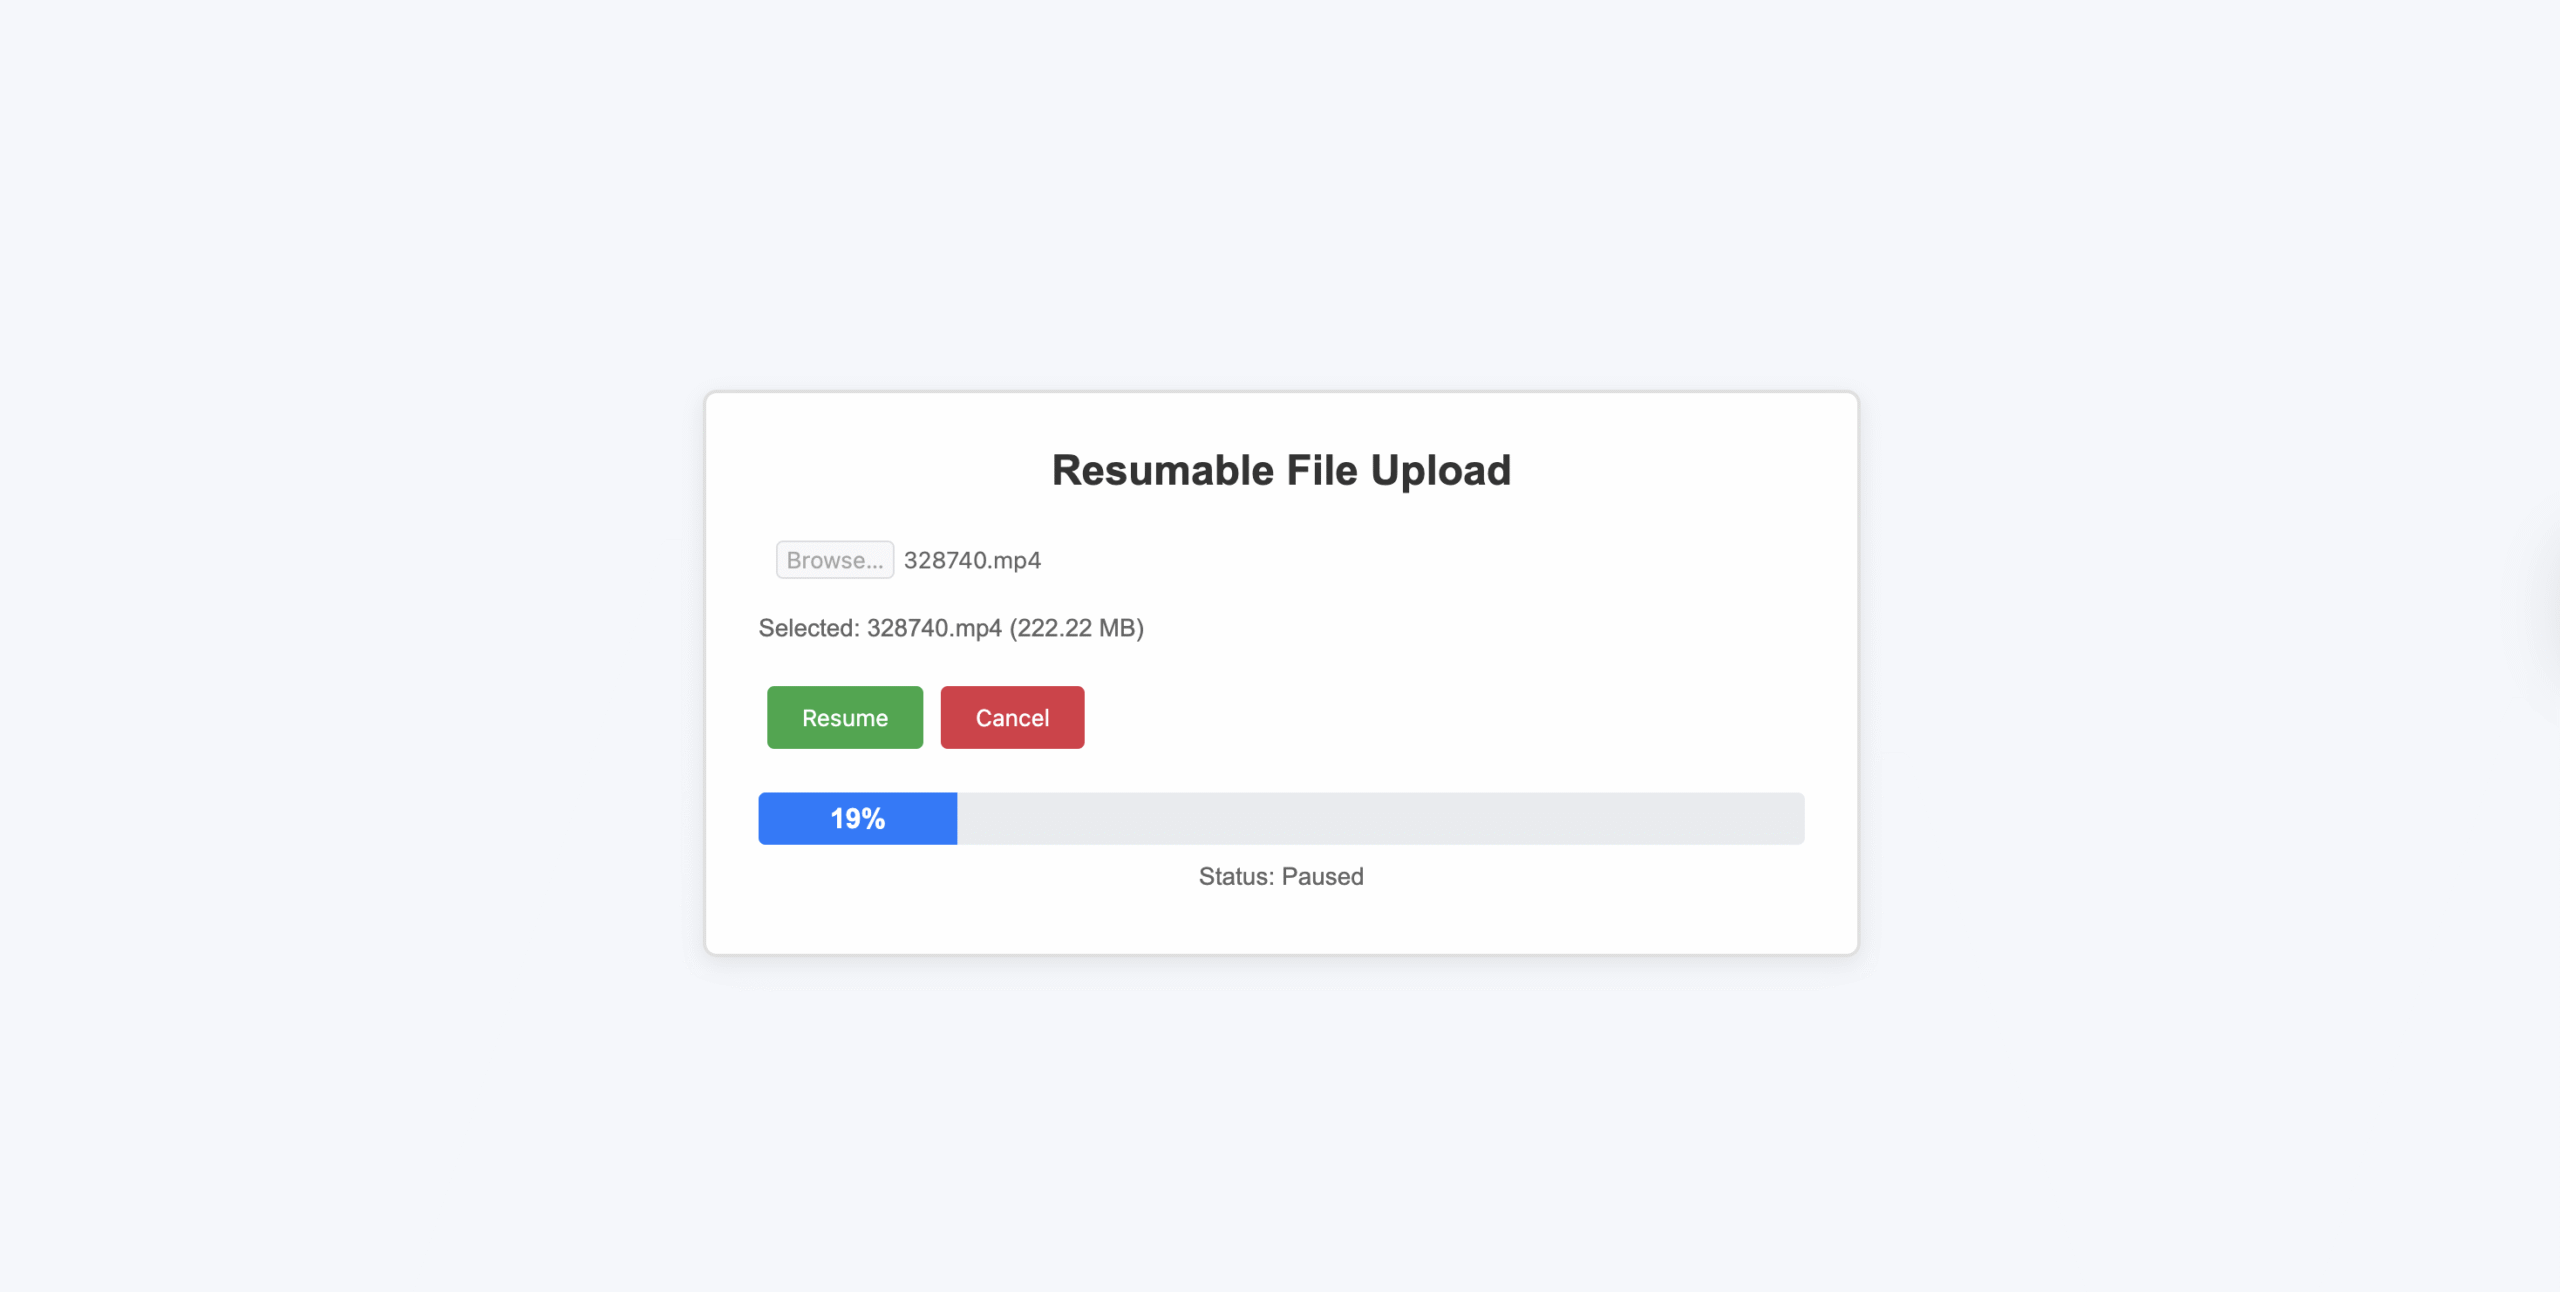
- Pause test:
- Pause around 30–40%.
- Status changes to paused.
- Progress stops updating.
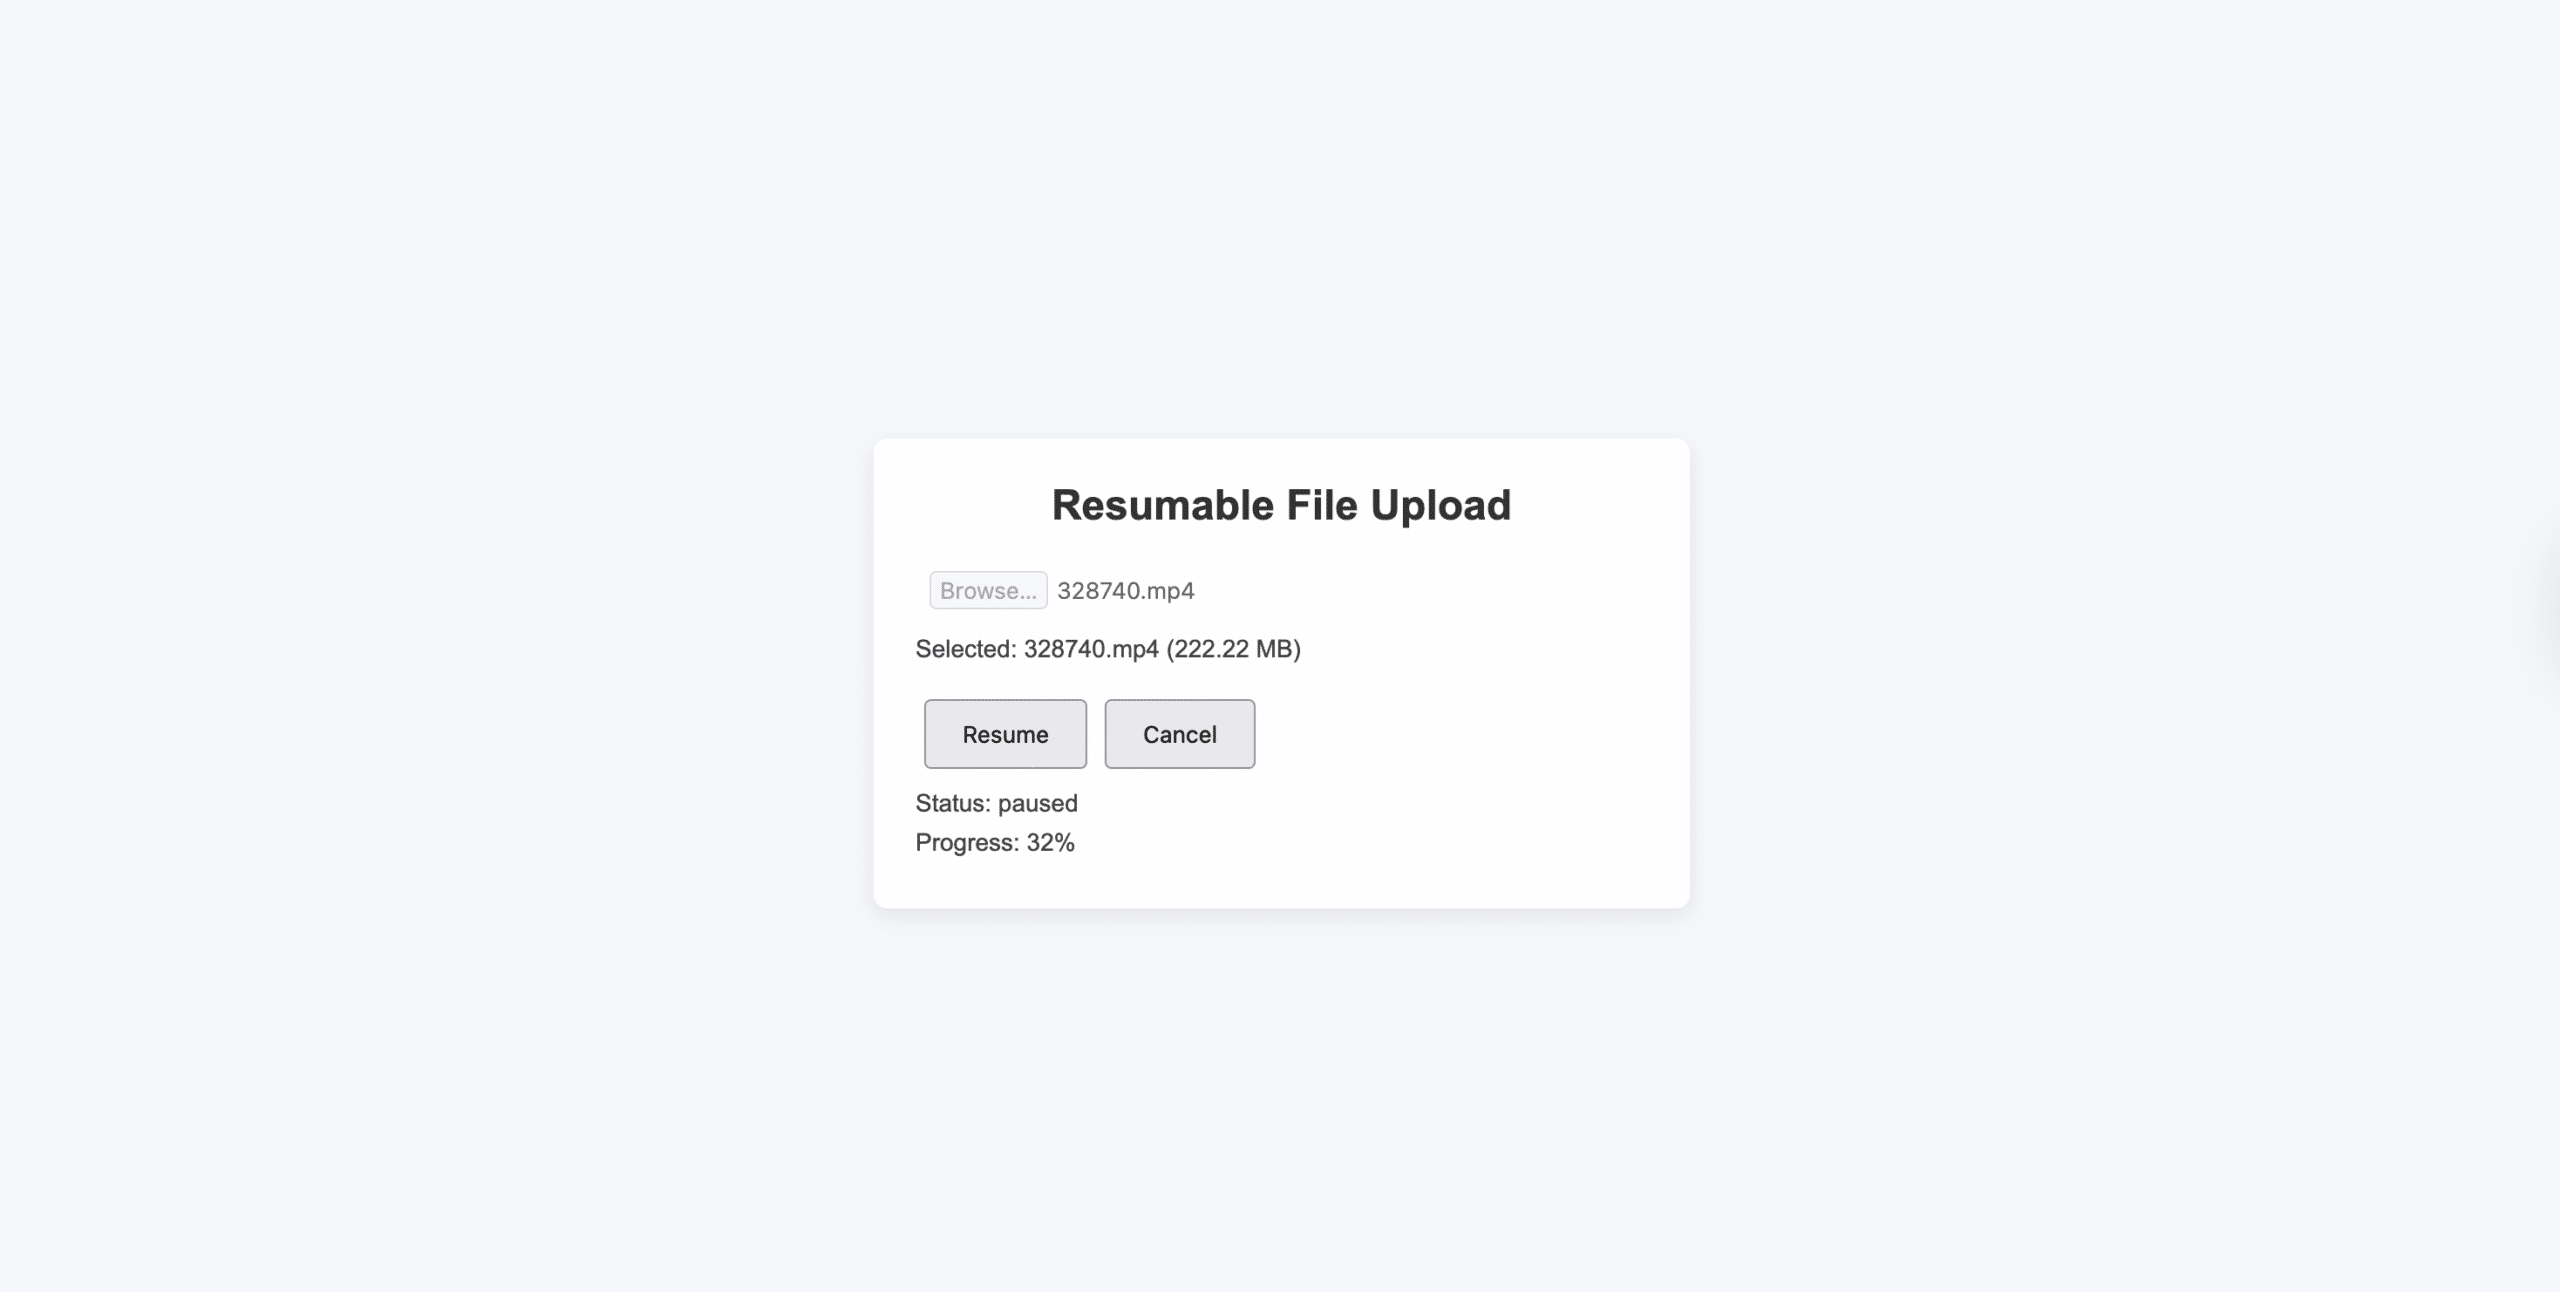
- Resume test:
- Click Resume.
- Status changes to uploading.
- Progress continues at the same percentage.
- Multiple pauses:
- Pause and resume several times.
- Progress should never reset.
- Cancel test:
- Start a new upload.
- Click Cancel.
- Status returns to idle.
- Progress resets to 0%.
Now that users can control uploads, let’s improve the user experience by showing a visual progress bar.
Step 6: Add Progress Bar Visualisation
Now let’s improve the user experience by adding a visual progress bar.
This makes it easy for users to see how much of the file has been uploaded and what’s happening during pause and resume.
The progress bar will be driven by Filestack’s onProgress callback, which updates as each upload chunk completes.
Update the UI to Show a Progress Bar
Replace the return statement in your component with the following JSX:
return (
<div
className="upload-container"
style={{
maxWidth: "600px",
margin: "40px auto",
padding: "30px",
border: "2px solid #e0e0e0",
borderRadius: "8px",
}}
>
<h2 style={{ textAlign: "center" }}>
Resumable File Upload
</h2><div className="file-input-section">
<input
type="file"
onChange={handleFileSelect}
disabled={
uploadStatus === "uploading" ||
uploadStatus === "paused"
}
accept="*/*"
style={{
display: "block",
width: "100%",
padding: "10px",
marginBottom: "10px",
}}
/>{selectedFile && (
<p style={{ color: "#666", fontSize: "14px" }}>
Selected: {selectedFile.name} (
{(selectedFile.size / 1024 / 1024).toFixed(2)} MB)
</p>
)}
</div>

{selectedFile && uploadStatus === "idle" && (
<button
onClick={startUpload}
style={{
padding: "10px 20px",
margin: "5px",
backgroundColor: "#007bff",
color: "white",
border: "none",
borderRadius: "4px",
cursor: "pointer",
}}
>
Start Upload
</button>
)}

{uploadStatus === "uploading" && (
<div style={{ marginTop: "20px" }}>
<button
onClick={pauseUpload}
style={{
padding: "10px 20px",
margin: "5px",
backgroundColor: "#ffc107",
border: "none",
borderRadius: "4px",
cursor: "pointer",
}}
>
Pause
</button>

<button
onClick={cancelUpload}
style={{
padding: "10px 20px",
margin: "5px",
backgroundColor: "#dc3545",
color: "white",
border: "none",
borderRadius: "4px",
cursor: "pointer",
}}
>
Cancel
</button>
</div>
)}

{uploadStatus === "paused" && (
<div style={{ marginTop: "20px" }}>
<button
onClick={resumeUpload}
style={{
padding: "10px 20px",
margin: "5px",
backgroundColor: "#28a745",
color: "white",
border: "none",
borderRadius: "4px",
cursor: "pointer",
}}
>
Resume
</button>

<button
onClick={cancelUpload}
style={{
padding: "10px 20px",
margin: "5px",
backgroundColor: "#dc3545",
color: "white",
border: "none",
borderRadius: "4px",
cursor: "pointer",
}}
>
Cancel
</button>
</div>
)}

{uploadStatus !== "idle" && uploadStatus !== "error" && (
<div style={{ marginTop: "20px" }}>
<div
style={{
width: "100%",
height: "30px",
backgroundColor: "#e9ecef",
borderRadius: "4px",
overflow: "hidden",
}}
>
<div
style={{
width: `${uploadProgress}%`,
height: "100%",
backgroundColor: "#007bff",
transition:
uploadStatus === "paused"
? "none"
: "width 0.3s ease",
display: "flex",
alignItems: "center",
justifyContent: "center",
color: "white",
fontWeight: "bold",
}}
>
{uploadProgress}%
</div>
</div>

<p
style={{
textAlign: "center",
marginTop: "10px",
color: "#666",
}}
>
Status:{" "}
{uploadStatus.charAt(0).toUpperCase() +
uploadStatus.slice(1)}
</p>
</div>
)}

{uploadStatus === "error" && errorMessage && (
<div
style={{
padding: "15px",
backgroundColor: "#f8d7da",
border: "1px solid #f5c6cb",
borderRadius: "4px",
color: "#721c24",
marginTop: "20px",
}}
>
<p>Error: {errorMessage}</p>
</div>
)}

{uploadStatus === "completed" && uploadedFileUrl && (
<div
style={{
padding: "15px",
backgroundColor: "#d4edda",
border: "1px solid #c3e6cb",
borderRadius: "4px",
color: "#155724",
marginTop: "20px",
}}
>
<p>Upload completed successfully!</p>
<a
href={uploadedFileUrl}
target="_blank"
rel="noopener noreferrer"
style={{
color: "#0056b3",
textDecoration: "underline",
}}
>
View uploaded file
</a>
</div>
)}
</div>
);
What this code does:
- A visual progress bar that fills as the upload progresses.
- Smooth animation while uploading.
- Progress stops visually when paused.
- Progress resumes smoothly after the resume.
- Clear success and error feedback.
- Consistent UI state after cancel or retry.
How to Test Step 6:
- Refresh the page and verify the new layout looks clean.
- Select a file and confirm that the file name and size are shown.
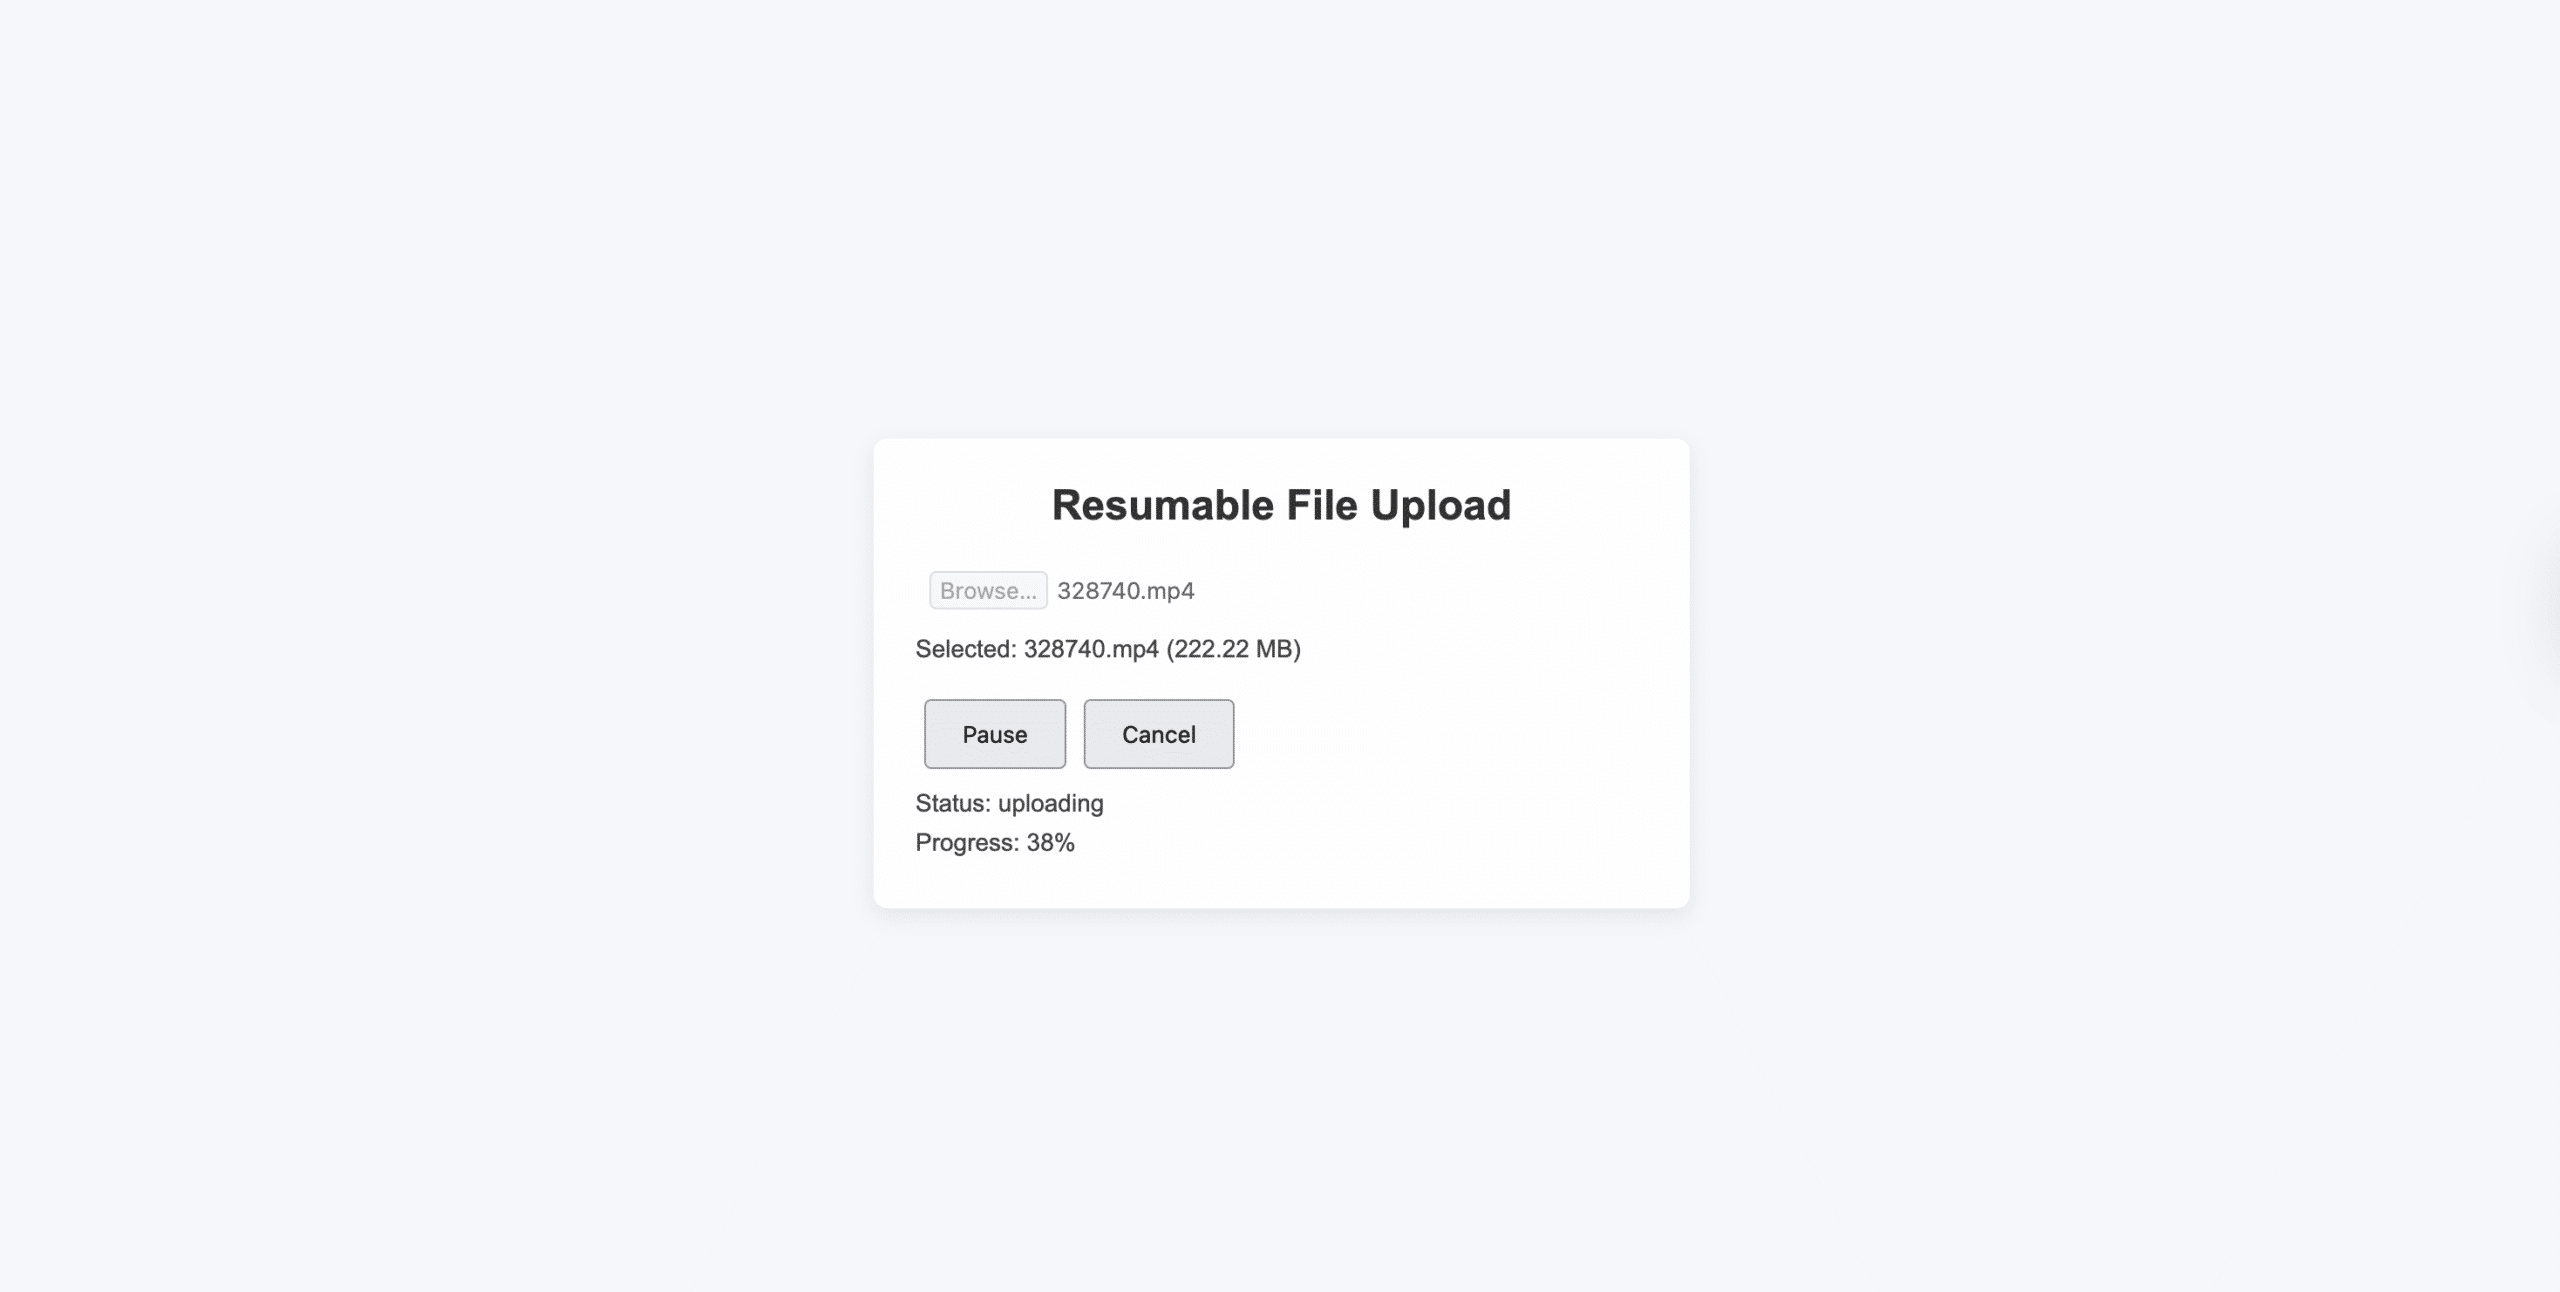
- Click Start Upload.
- Watch the progress bar:
- It should fill from left to right.
- Percentage text should stay centered.
- Click Pause:
- The progress bar should stop moving.
- Click Resume:
- Progress should continue from the same point.
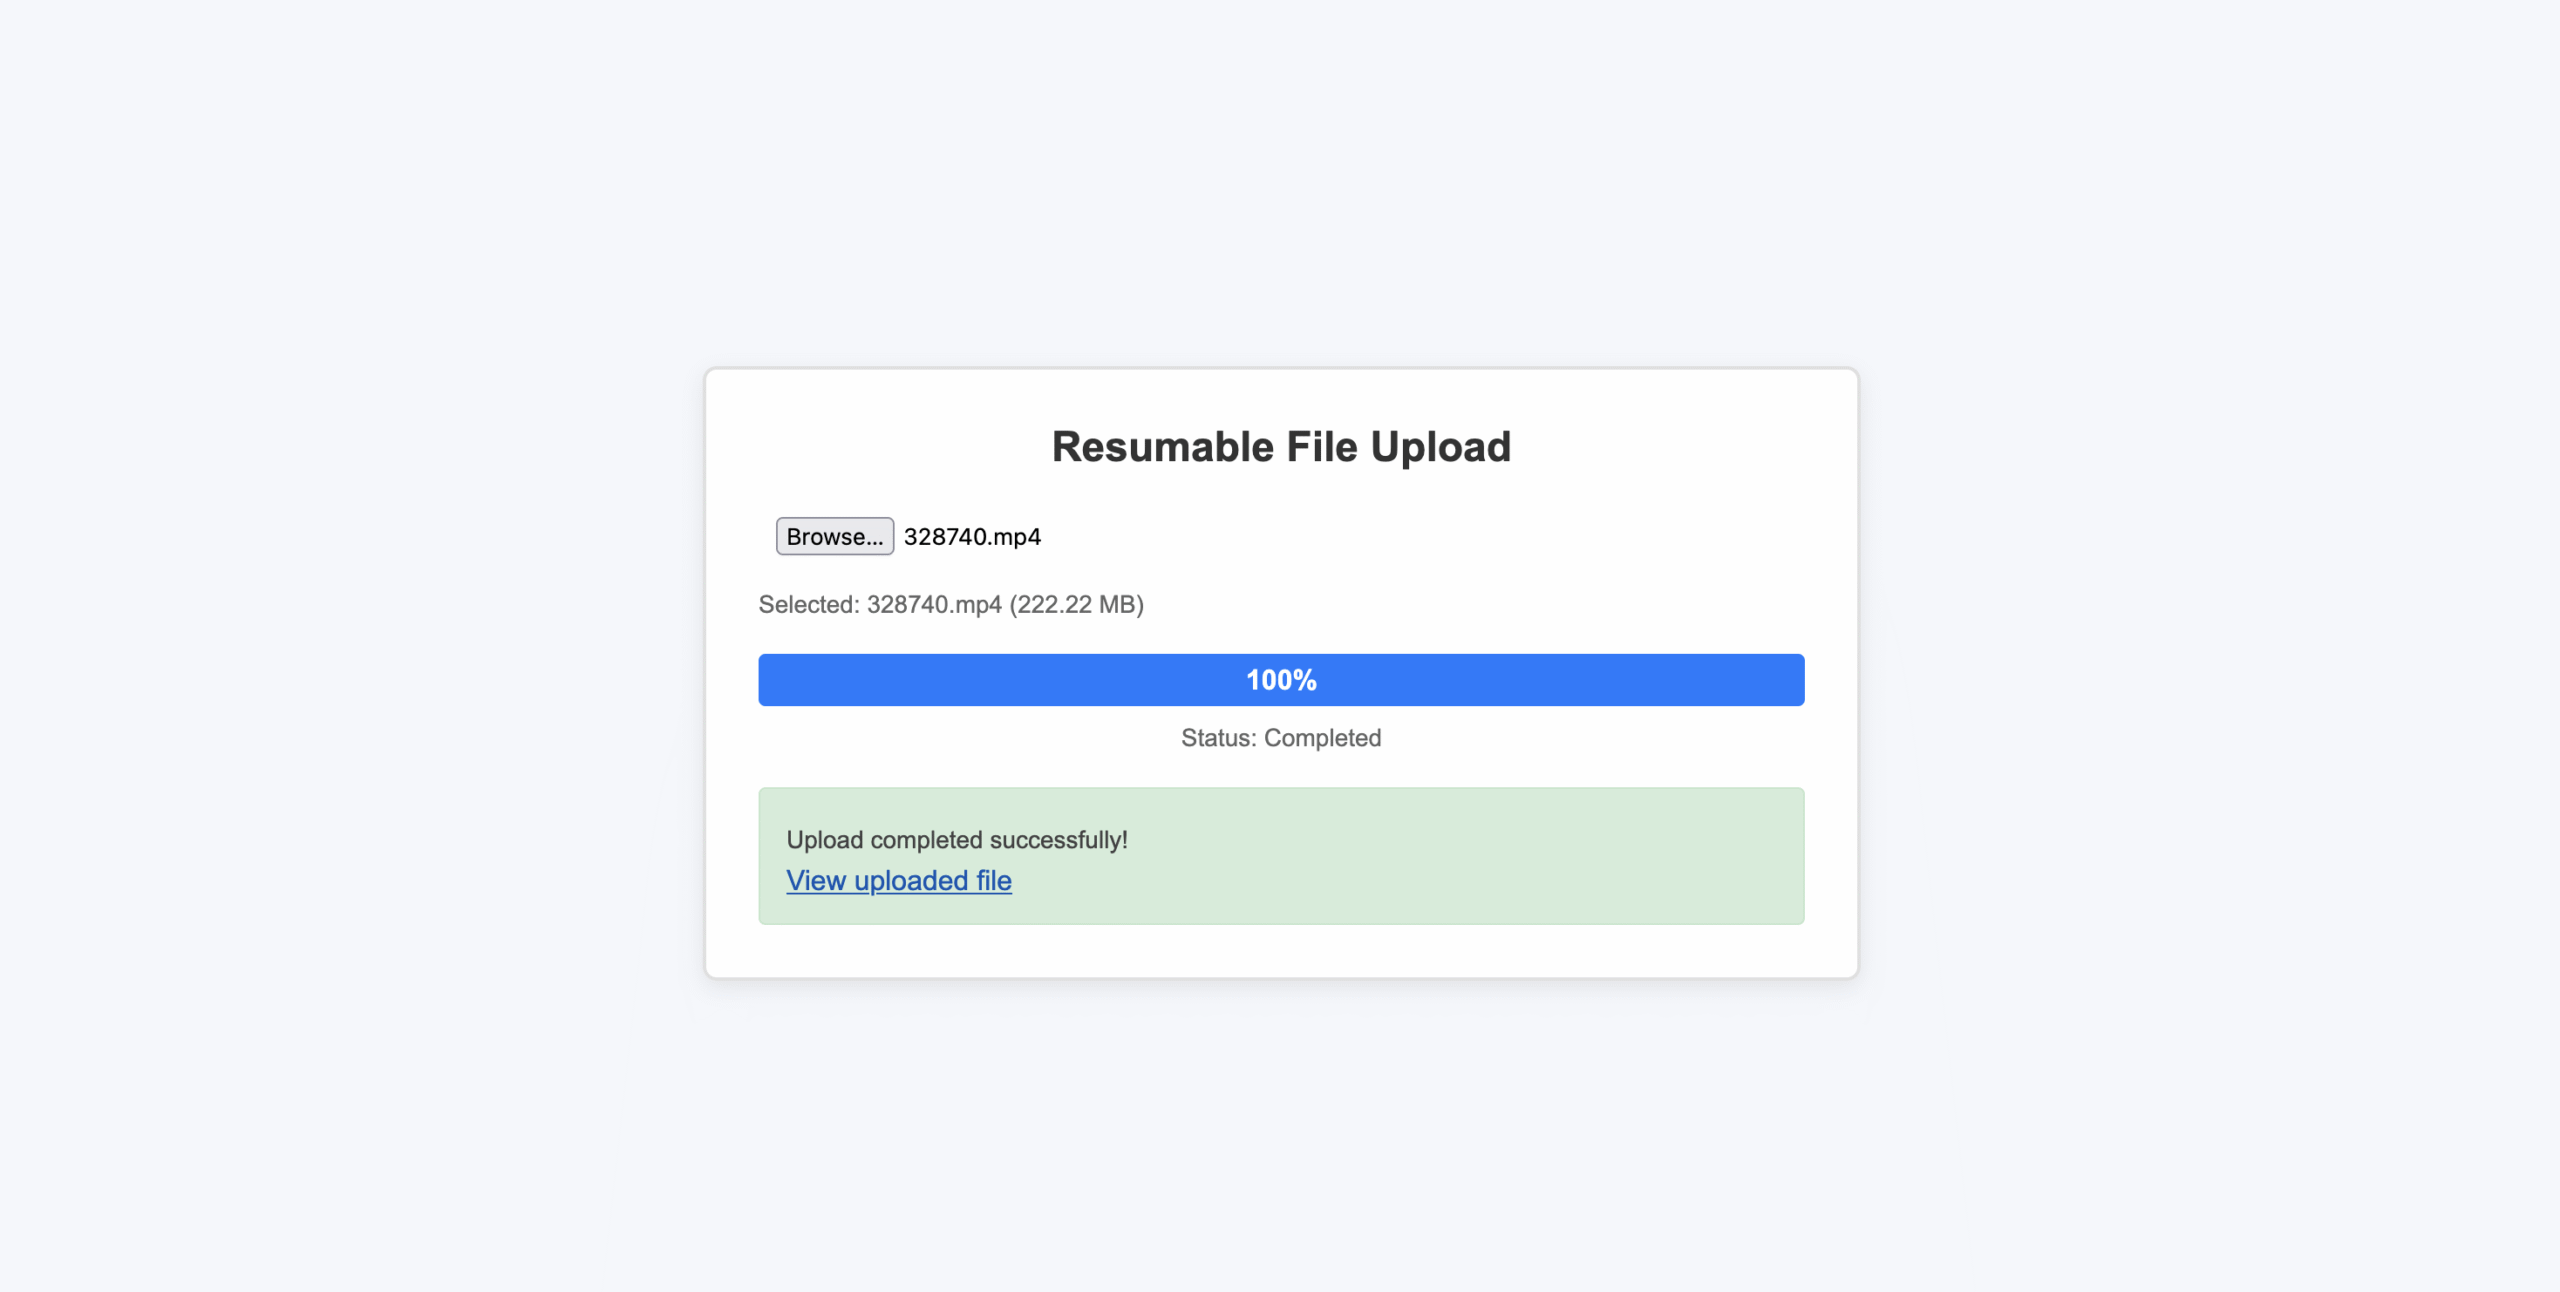
- Complete the upload:
- The success message should appear in green.
The upload UI now looks much better. Next, we’ll make uploads more reliable by handling network interruptions automatically.
Step 7: Handle Network Interruptions Automatically
Large file uploads can fail when the internet connection is slow or unstable.
To make uploads more reliable, we’ll check when the internet goes offline or comes back online and automatically pause the upload or resume it at the right time.
Add these near the top of the component:
const [isOnline, setIsOnline] = useState(navigator.onLine);
const wasPausedByNetworkRef = useRef(false);
Monitor Network Status
Add this useEffect after Filestack initialisation:
React.useEffect(() => {
const handleOnline = () => {
setIsOnline(true);
console.log("Network connection restored");// Resume only if pause was caused by network loss
if (
wasPausedByNetworkRef.current &&
uploadStatus === "paused"
) {
console.log("Auto-resuming upload after network recovery");
wasPausedByNetworkRef.current = false;
resumeUpload();
}
};

const handleOffline = () => {
setIsOnline(false);
console.log("Network connection lost");

// Pause only if currently uploading
if (uploadStatus === "uploading") {
console.log("Auto-pausing upload due to network loss");
wasPausedByNetworkRef.current = true;
pauseUpload();
}
};

window.addEventListener("online", handleOnline);
window.addEventListener("offline", handleOffline);

return () => {
window.removeEventListener("online", handleOnline);
window.removeEventListener("offline", handleOffline);
};
}, [uploadStatus]);
Reset Network Flags When Upload Ends
Update your startUpload success and cancel flows:
On successful upload:
setUploadStatus("completed");
setUploadProgress(100);
wasPausedByNetworkRef.current = false;
On cancel:
wasPausedByNetworkRef.current = false;This prevents stale network state from affecting future uploads.
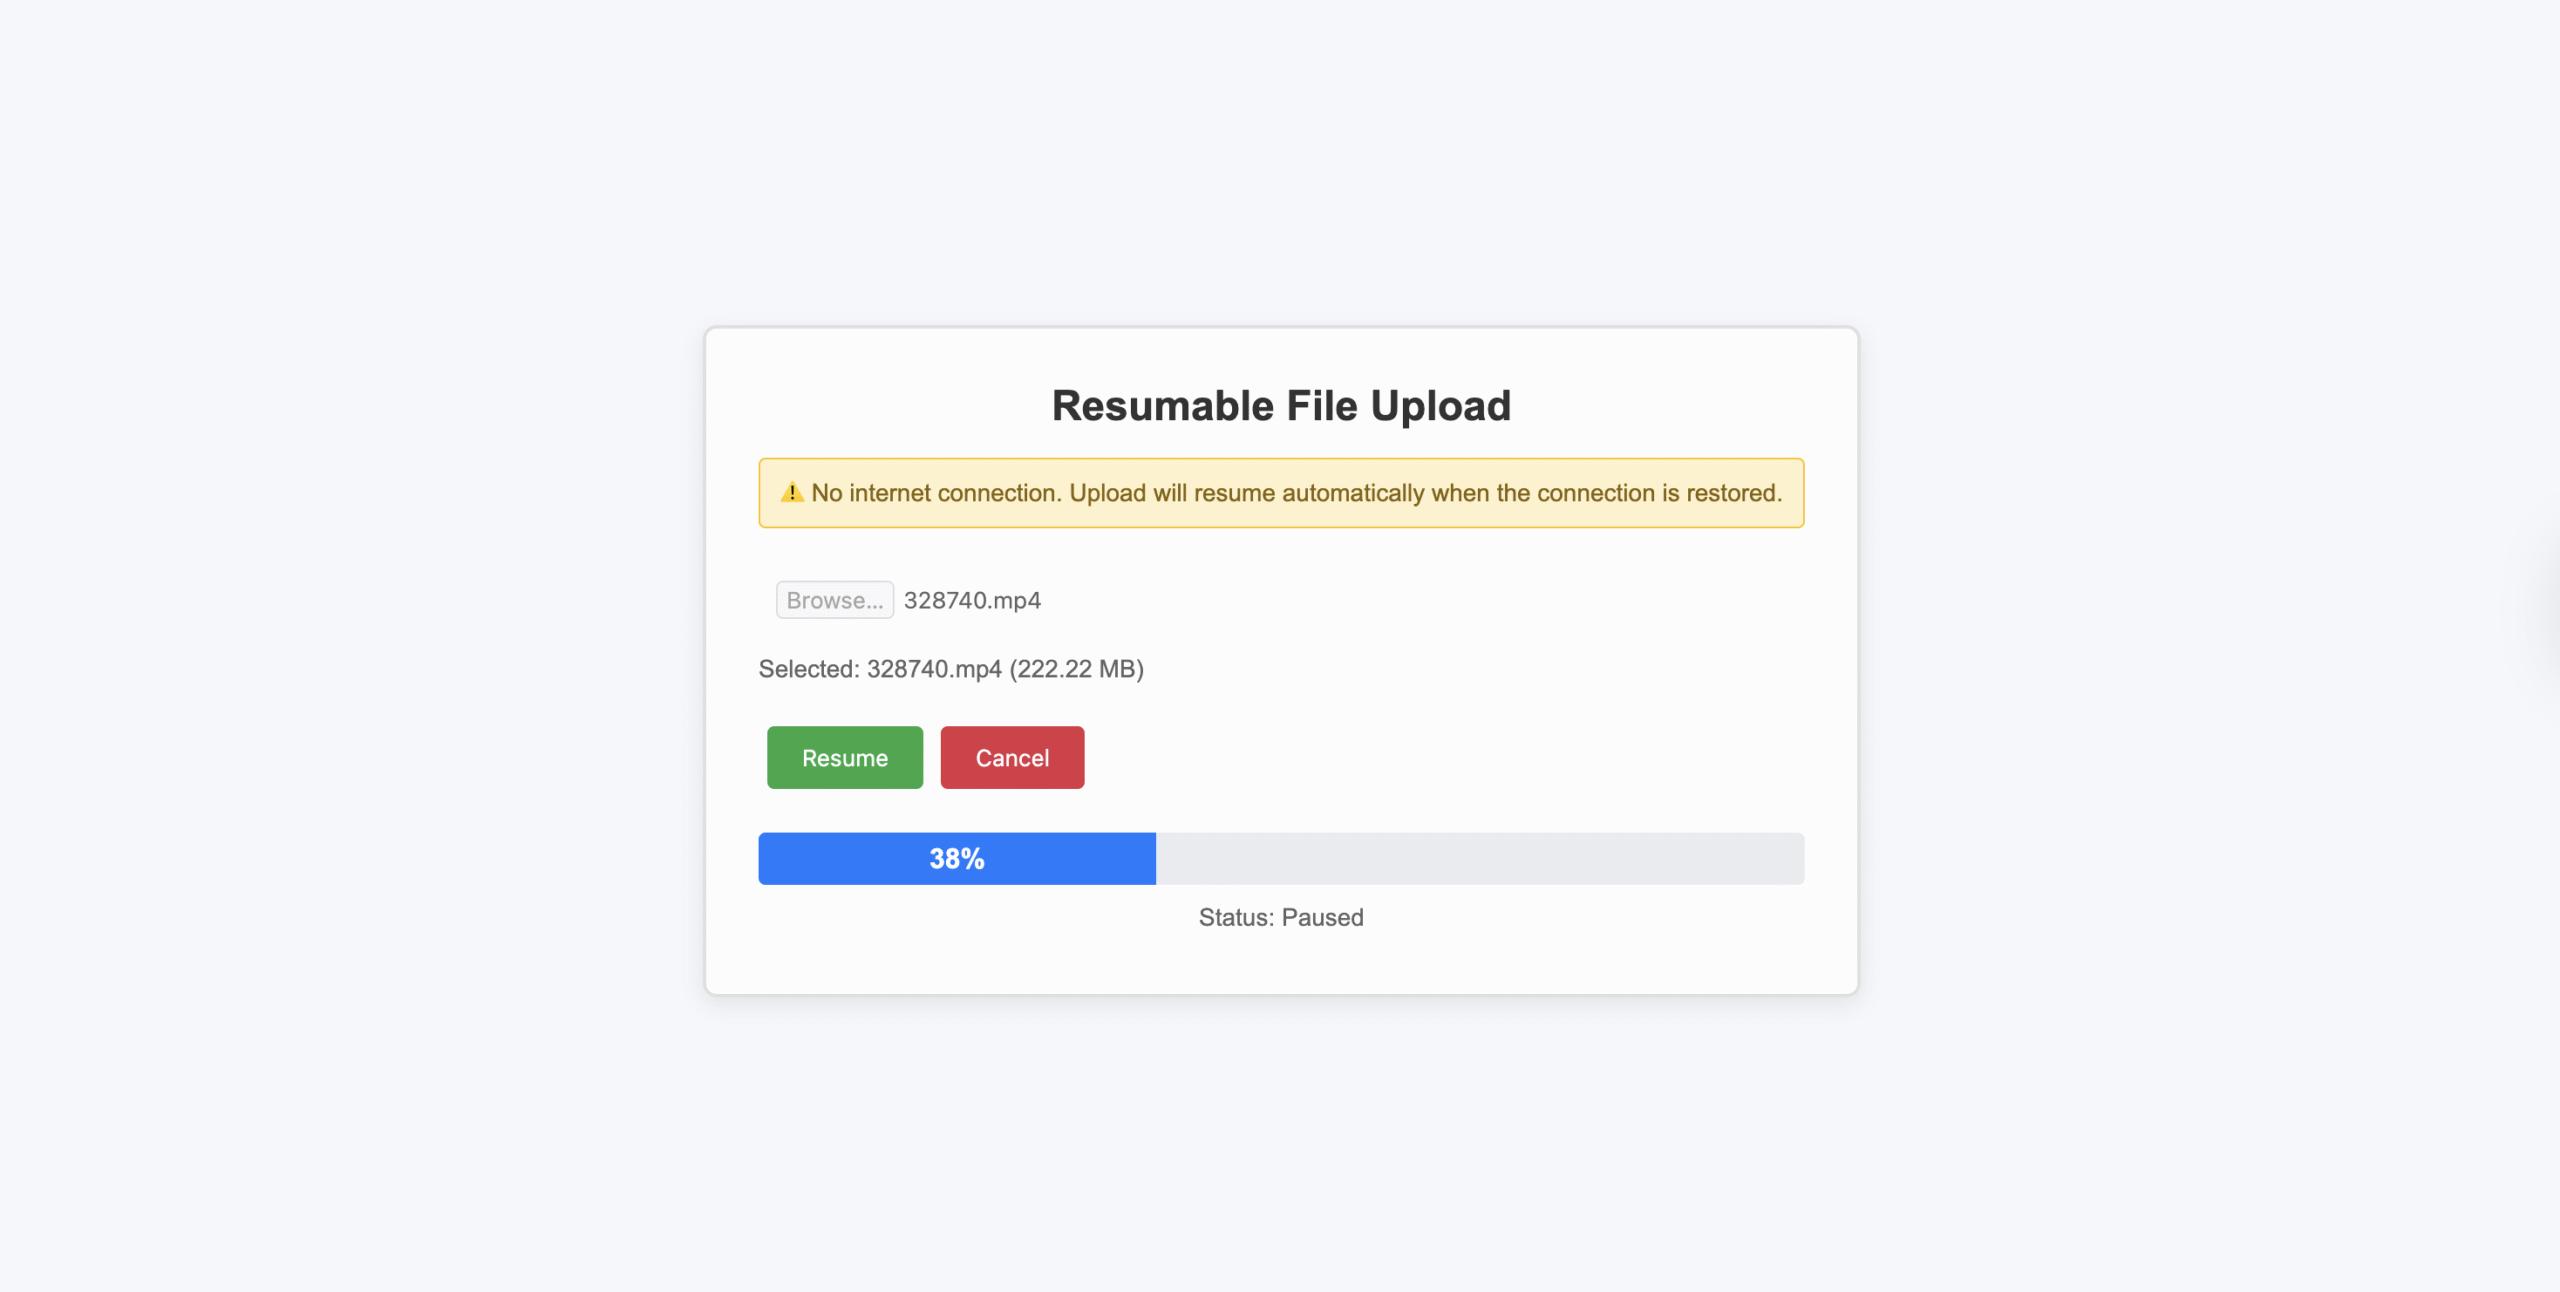
Show Network Warning in the UI
Add this near the top of your return JSX:
{!isOnline && (
<div
style={{
padding: "10px",
backgroundColor: "#fff3cd",
border: "1px solid #ffc107",
borderRadius: "4px",
color: "#856404",
marginBottom: "20px",
textAlign: "center",
fontSize: "14px",
}}
>
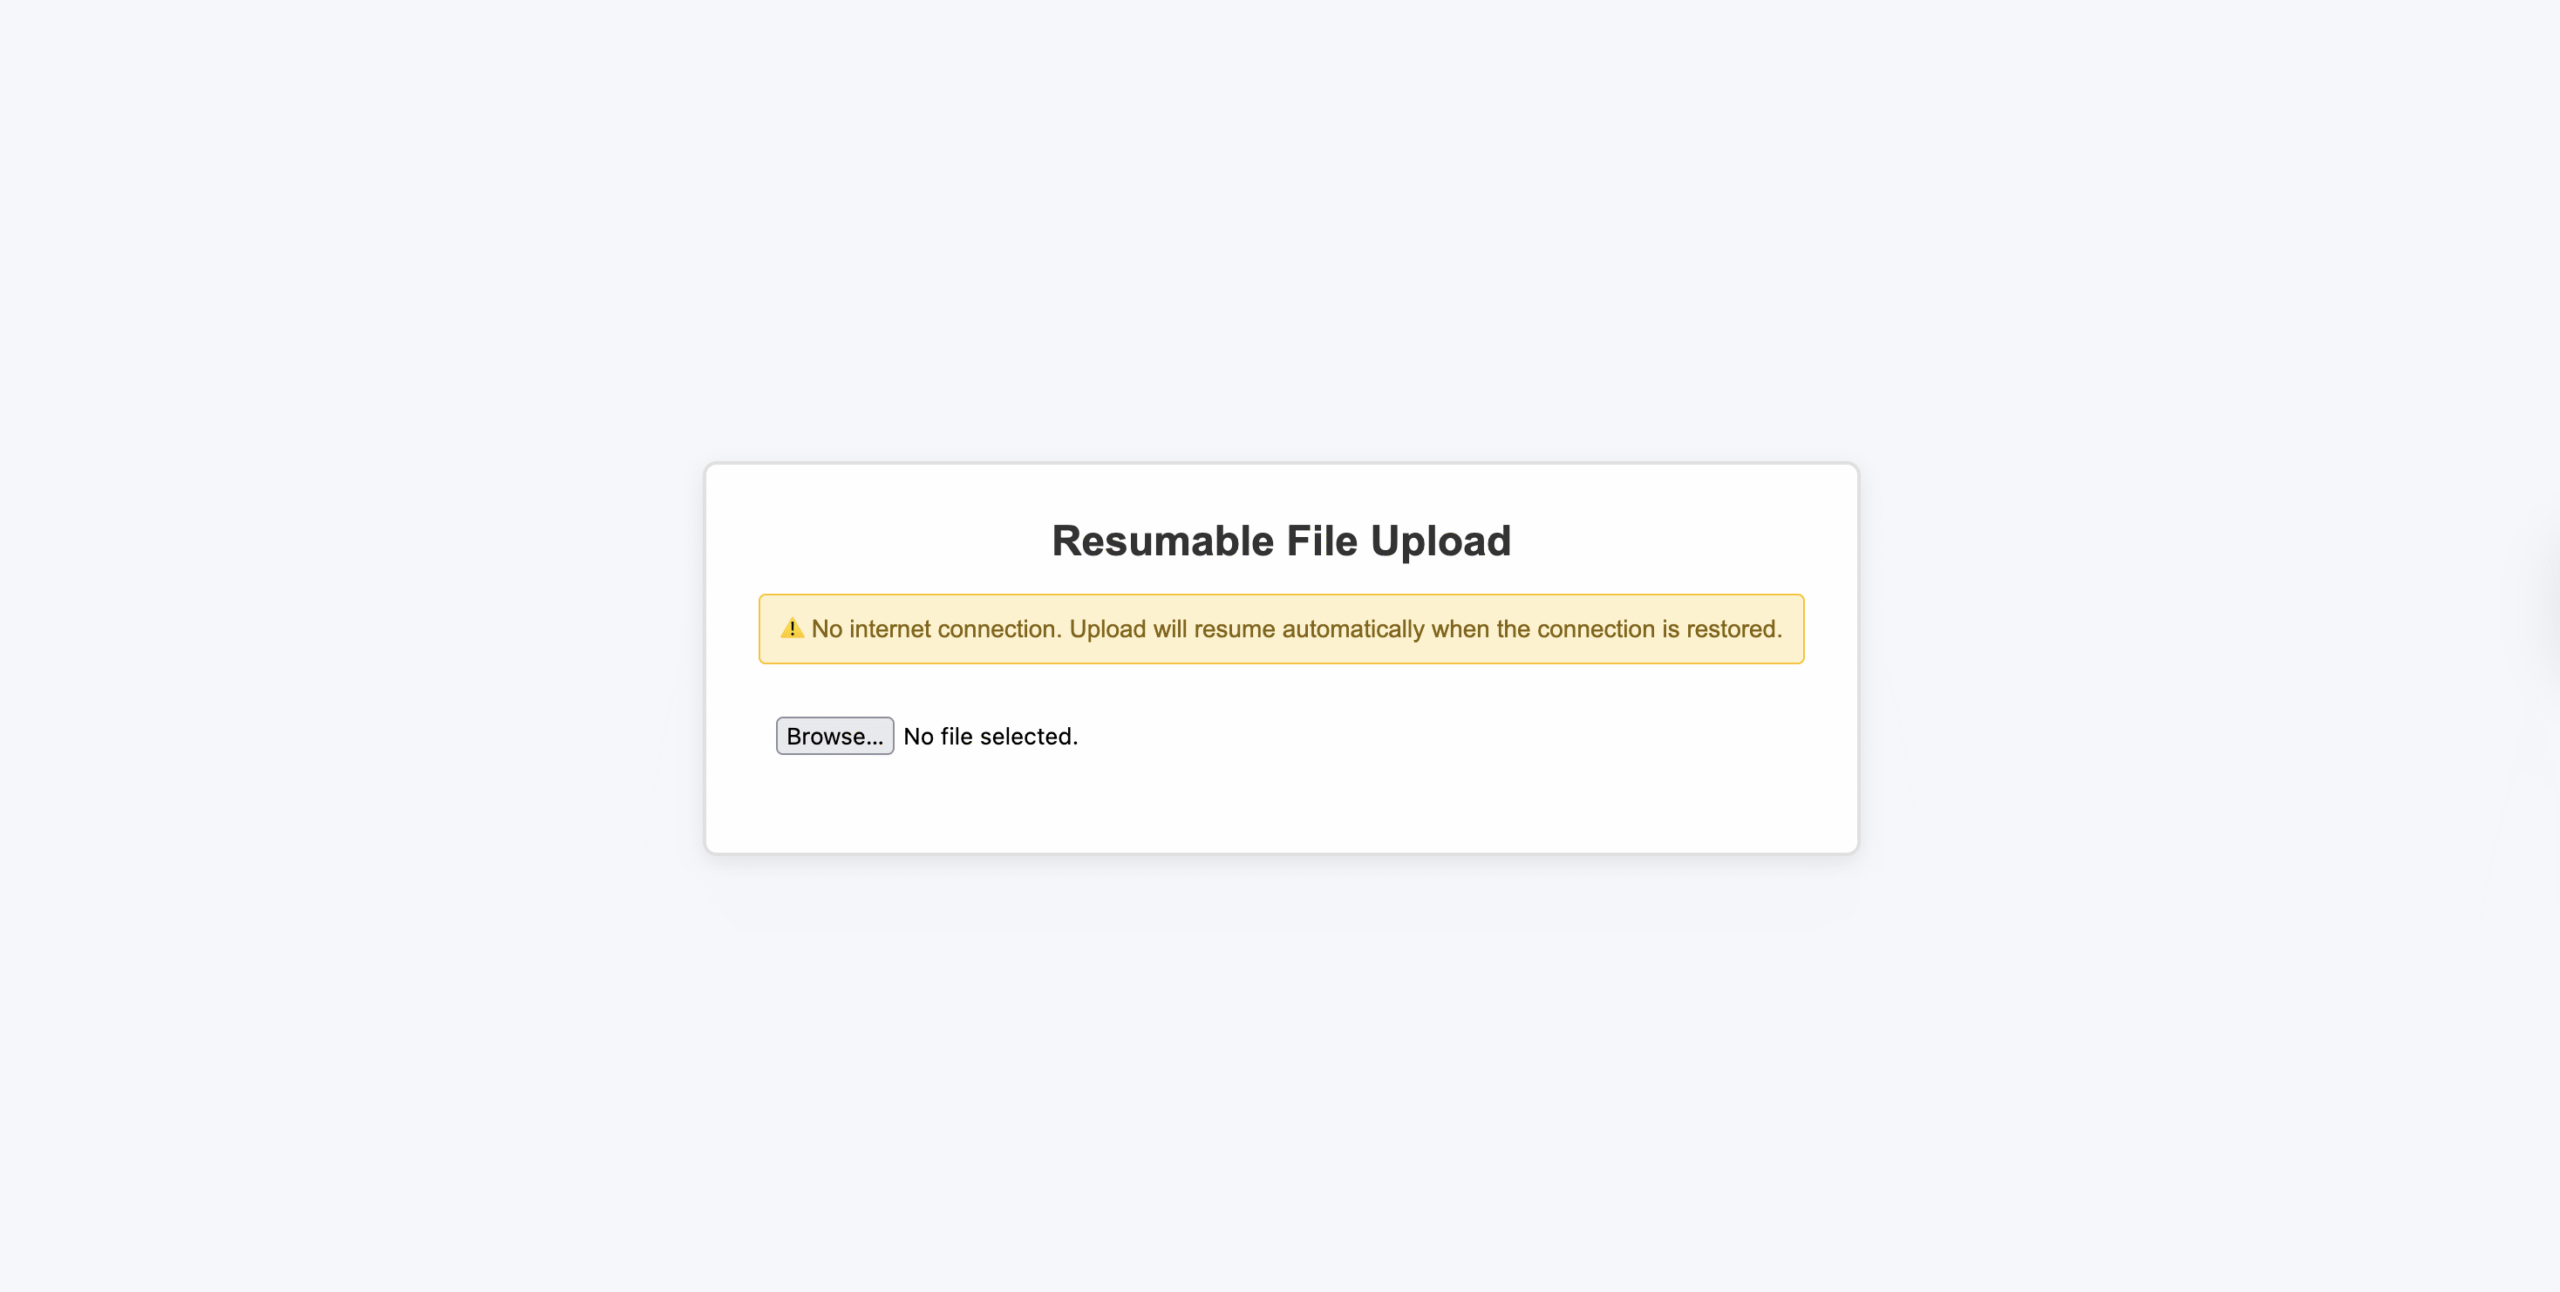
⚠️ No internet connection. Upload will resume automatically when
the connection is restored.
</div>
)}What this code does:
- The browser tells us when the internet goes offline or comes back online.
- If the internet disconnects while a file is uploading:
- We pause the upload.
- We remember that the pause happened because of the network.
- When the internet is back:
- We resume the upload only if it was paused because of the network.
- If the user paused the upload themselves, we do nothing.
This way, the app respects what the user wants and only auto-resumes when it makes sense.
How to test step 7:
- Offline detection:
- Open DevTools → Network tab.
- Switch to Offline.
- Verify the warning banner appears.
- The console shows “Network connection lost”.
- Auto-pause:
- Start uploading a large file (200MB+).
- Go offline at ~30%.
- Upload pauses automatically.
- Status changes to paused.
- Auto-resume:
- Switch back to No throttling.
- Upload resumes automatically.
- Progress continues from the same point.
- Manual pause safety:
- Start upload.
- Click Pause.
- Go offline → online.
- Upload does NOT resume automatically.
- Click Resume manually to continue.
Before finishing, let’s review some important best practices to keep your upload feature reliable and user-friendly.
Best Practices for Resumable Large File Uploads
Following a few simple best practices can make large file uploads faster, more reliable, and easier for users to manage, especially when working with pause and resume functionality.
- Use chunked uploads: Break large files into smaller parts, so uploads are more reliable and can resume if they stop.
- Store upload controls properly: Save the upload control object using useRef so pause, resume, and cancel keep working even when the component re-renders.
- Track upload status clearly: Keep track of whether the upload is idle, uploading, paused, completed, or failed so the UI behaves correctly.
- Show upload progress: Add a progress bar and status text so users can easily see how much of the file is uploaded.
- Handle internet issues smartly: Pause the upload if the internet disconnects and resume it when the connection returns, without interrupting user actions.
Conclusion
Uploading large files can be difficult, especially when the internet is slow or keeps disconnecting. By adding pause and resume using Filestack’s SDK, you can make uploads smoother and more reliable.
In this tutorial, you built a React upload component that supports chunked uploads, shows real-time progress, allows users to pause and resume uploads, and handles network interruptions. These features help reduce upload failures and give users better control over their uploads.
Using these techniques, you can build upload features that work well with large files and provide a better experience for users.


Shefali Jangid is a web developer, technical writer, and content creator with a love for building intuitive tools and resources for developers.
She writes about web development, shares practical coding tips on her blog shefali.dev, and creates projects that make developers’ lives easier.